Posted on

Tape, tape and more tape

Any crafter knows you are only as good as your adhesive.  😉 The glue, tape, foam etc..is what holds it all together! I use a lot of different tapes and adhesives, one of them is the double sided tape from X-Press It. It comes in a roll that is 55 yards long. THAT IS A LOT OF TAPING FRIEND!

IMG_3986

It is crazy easy to use, peel off the length that you want and tear off a strip. It tears easily by hand.

IMG_3987

Stick the sticky side down on your project and remove the backing.  And you are ready to stick it! Easy Peasy!

IMG_3988

I have been making cards for Copic in the Craft Room videos. I used X-Press Double sided tape and foam to create each of these cards. All three of these cards will be appearing over the next month on our YouTube and Facebook pages. 

IMG_3989

Want some more information on all the great X-Press adhesives? Check all the details out at Imagination International, Inc. 


Have a Happy Colorful Week!

Posted on

SP Multiliners and Refils

Did you know that there are 2 different kinds of Multiliners? If you are a Copic fan you probably do, and you probably already know the difference. There are the standard Multiliners these are wonderful sketch pens that are compatible with Copic markers for sketching, doodling adding on to images, weather you are adding color with your Copics or not Multiliners are a favorite among artists. 

IMG_3975

So then what is the difference with the Multiliner SP? The difference is they are refillable! Same wonderful ink in richness and Copic compatibility, but with the Multiliner SP you get the same great benefit as your beloved Copic markers, you can refill the ink and replace the nibs. 

IMG_3976

I own a few of the Multiliner SP pens and use them A LOT, I knew I would when I purchased them so I went ahead and bought the SP version so I could refill and reuse the pen. My Multiliners happen to be broader nibs (they come in a whole range of sizes). I know that I tend to be a little heavy handed when it comes to my sketch work so I decided to get pens that have slightly thicker nibs and stand up to my abuse. So along with owning these pens I usually have on hand refill ink cartridges and replacement nibs. The trick is having the correct ones.

IMG_3978

To replace your nib and/or ink cartridge you can use the Replacement tool if you like. It has two ends the wider opening is to remove the cartridge from the base of the pen. The tiny u notch at the other end of the tool will help lift the nib out of the top of the pen. Once you have pulled your pen apart (with your fingers or the Replacement tool) you are ready to replace the ink and then the nib. Double and triple check that you have the correct sizes of both!

IMG_3979

You can see on the packaging that the nib is specifically for a .5 Multiliner SP which is what is labeled on my pen. The cartridges come in two sizes A and B each one is compatible with several bodies. The B cartridge fits the .2 pens and larger where the A is for smaller Multiliner SP pens.

IMG_3980

Carefully slide the cartridge into your marker body until it fits tightly in the base. Then very carefully insert the nib. These have a long thin core that actually inserts into the ink cartridge. Always replace your ink first and then your nib. If you are only replacing the ink you might even consider pulling the nib out and putting it back in after the ink cartridge is in place. The core can be easily bent by forcing the cartridge into it. 

IMG_3981

Now that I have my pen back together I am ready to doodle! As you know I like to doodle!

Doodle Tangle #1

Next month I will be doodling up a storm to show you the Multiliners in action! Make sure to check back 😀 And if you would like more info on the FAB-U-LUS Multiliner SP pens and refill cartridges and nibs check it out at Imagination International, Inc. 

Have a Happy Colorful Week!

Posted on

X-Press It Mask It

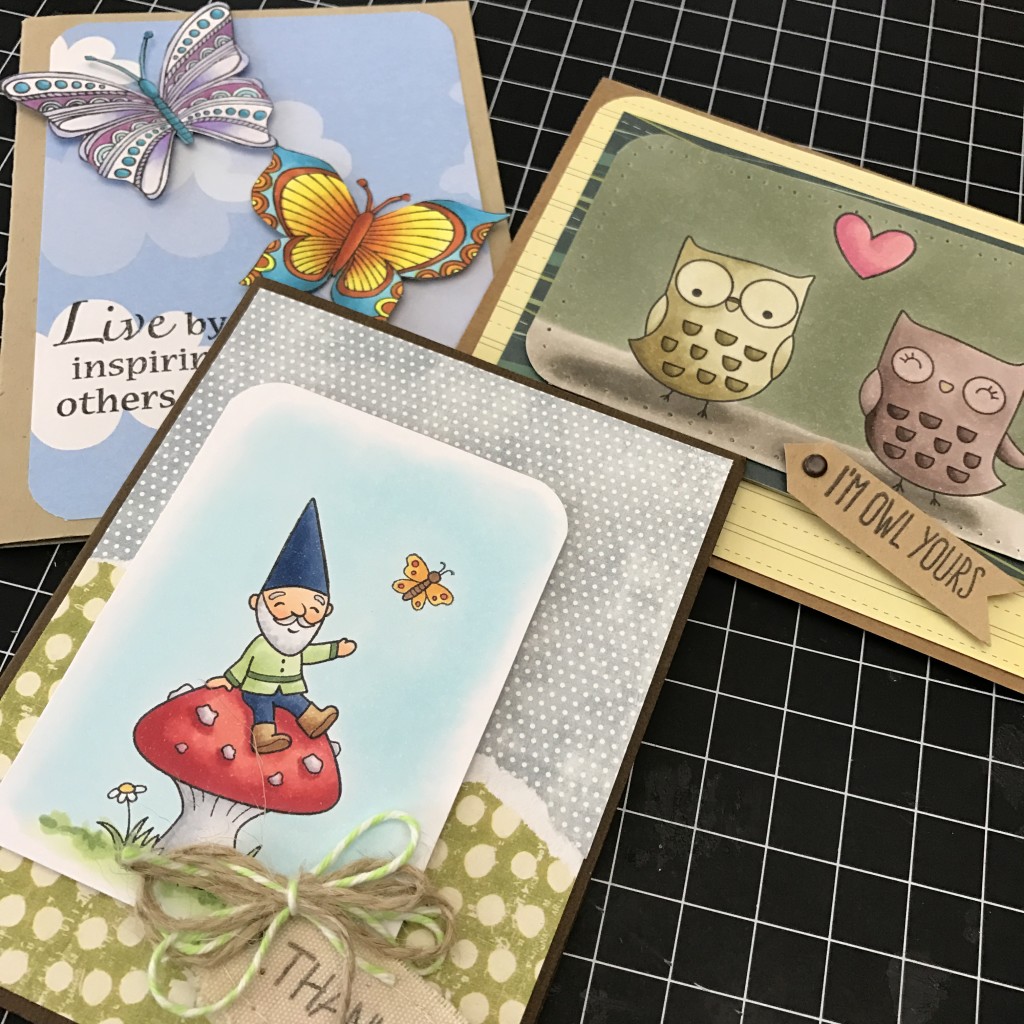
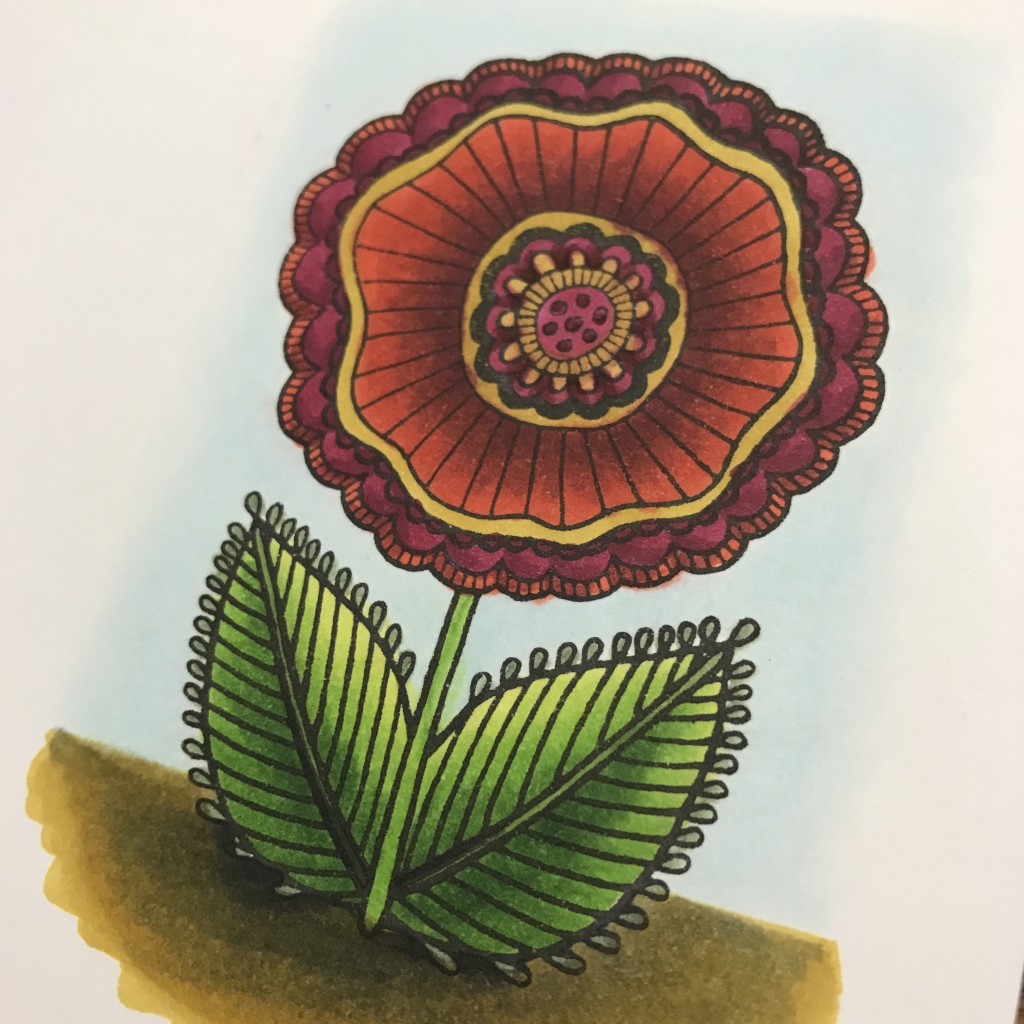
Ever had a cool new stamp that has you inspired to create an awesome background? I have a new set of Stampendous stamps by Laurel Burch and I am in LOVE. I love Laurel’s art work anyway and now I can get it in stamps, AND they lend themselves to the amazing vibrant colors of Copic so I just couldn’t wait to pull one right our of the mailing envelope and get coloring!

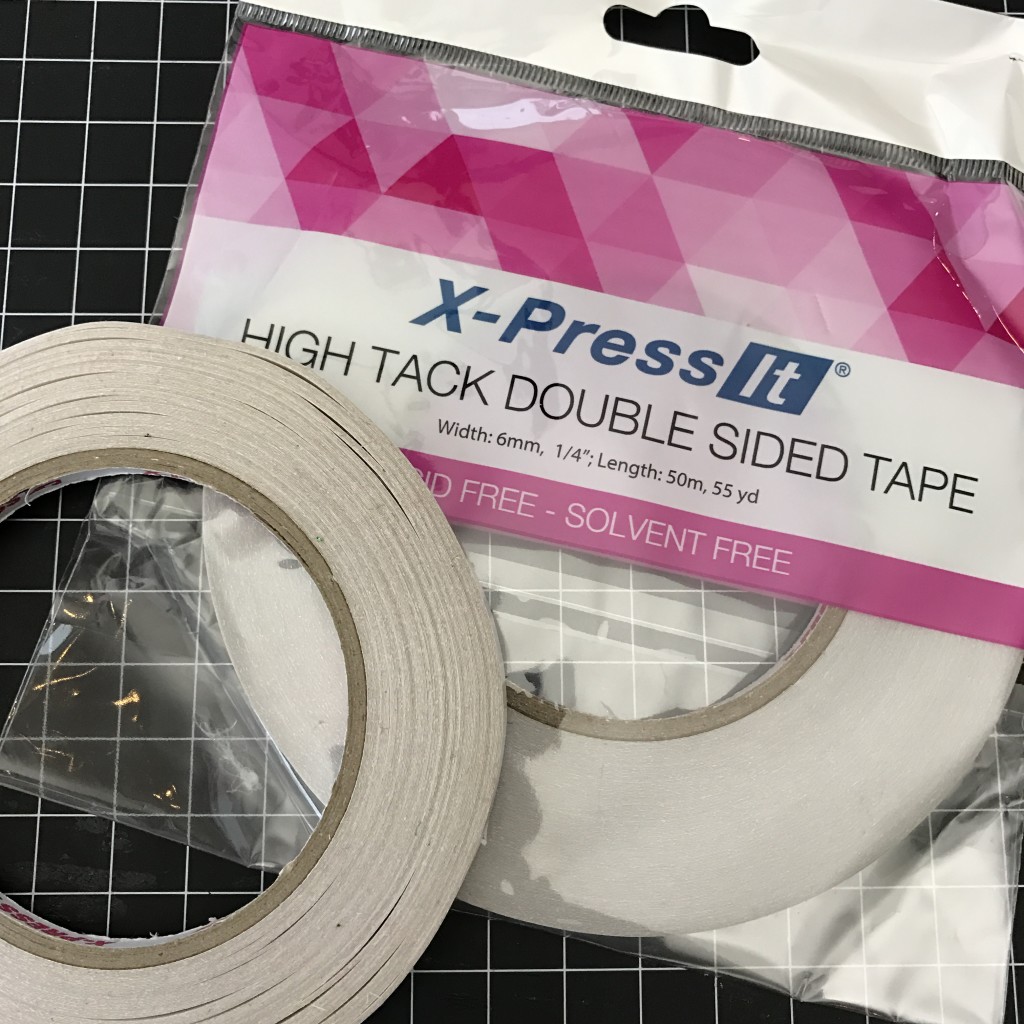
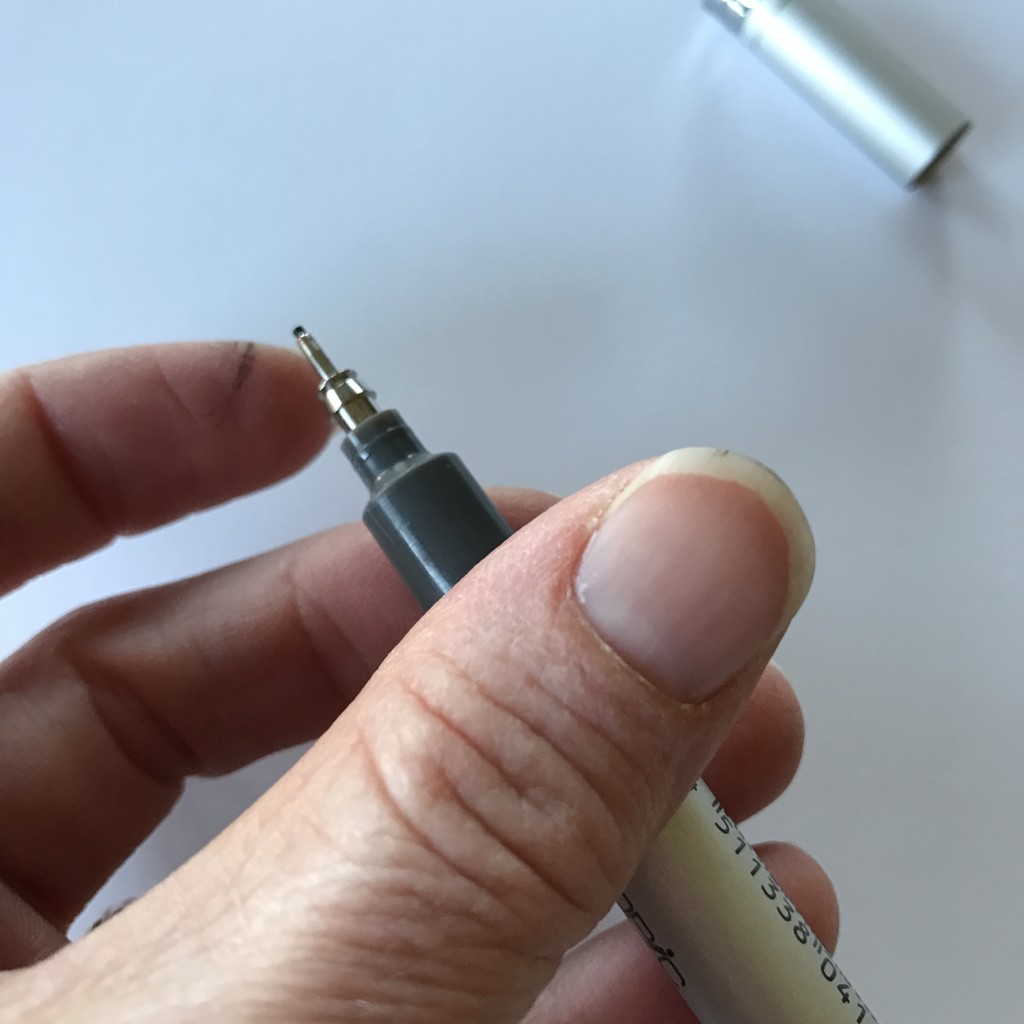
I knew before I began that I wanted to complete the image with a fabulous background as well. I could cut out the image and stick them to a separate back ground. I could try to work around the image carefully OR I could mask it. Have you ever used a post it or scratch paper to create a mask for your image? It is pretty easy, but I want to show you an even easier, more effective way to mask your image. You can use Mask It made by X-Press It. It is a clear film with light adhesive that you can lay over your image, trim away and then create your background over. Hard to describe so let me show you!

I colored my images first, I could just stamp and wait till the end to color, but like I said I was a little color happy when I got these stamps :-).

mask 1

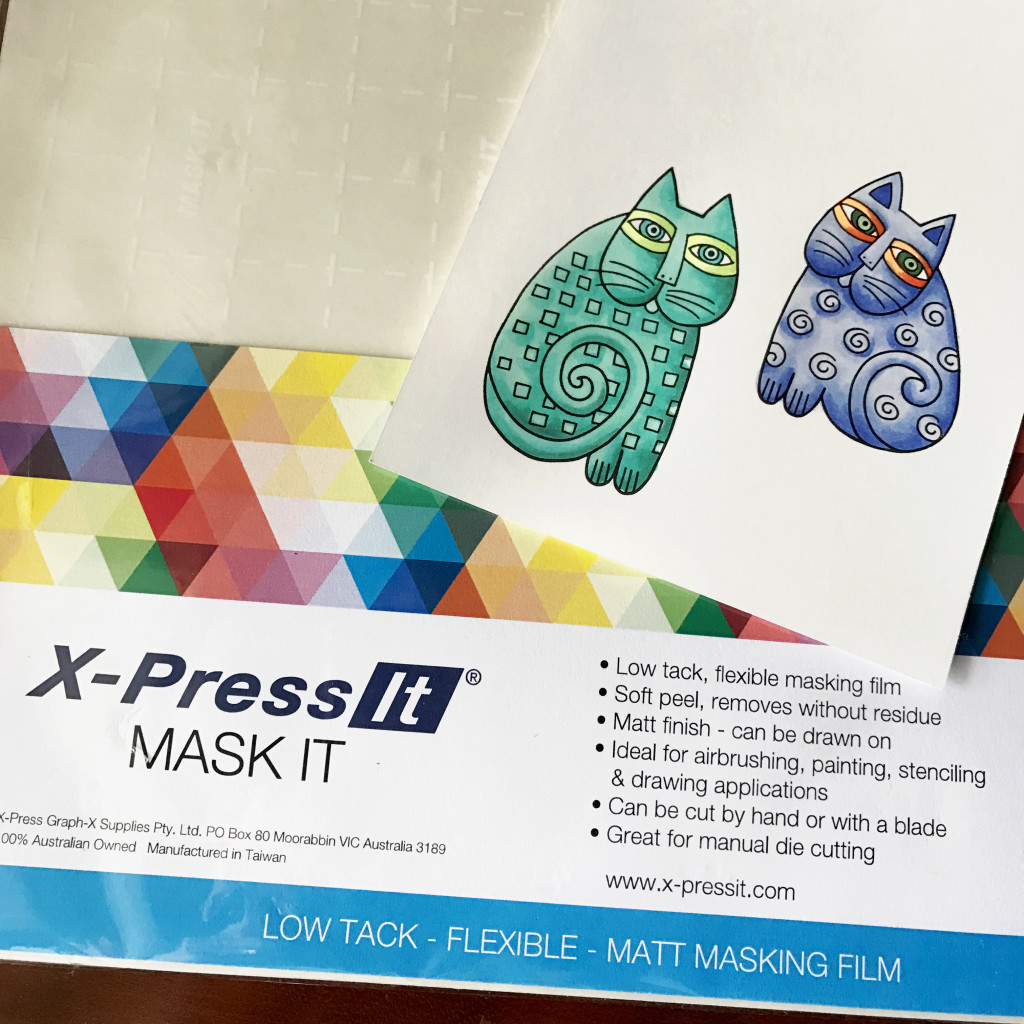
Again the stamp is by Stampendous and from the new Laurel Burch line, this one is called Indigo Cats.

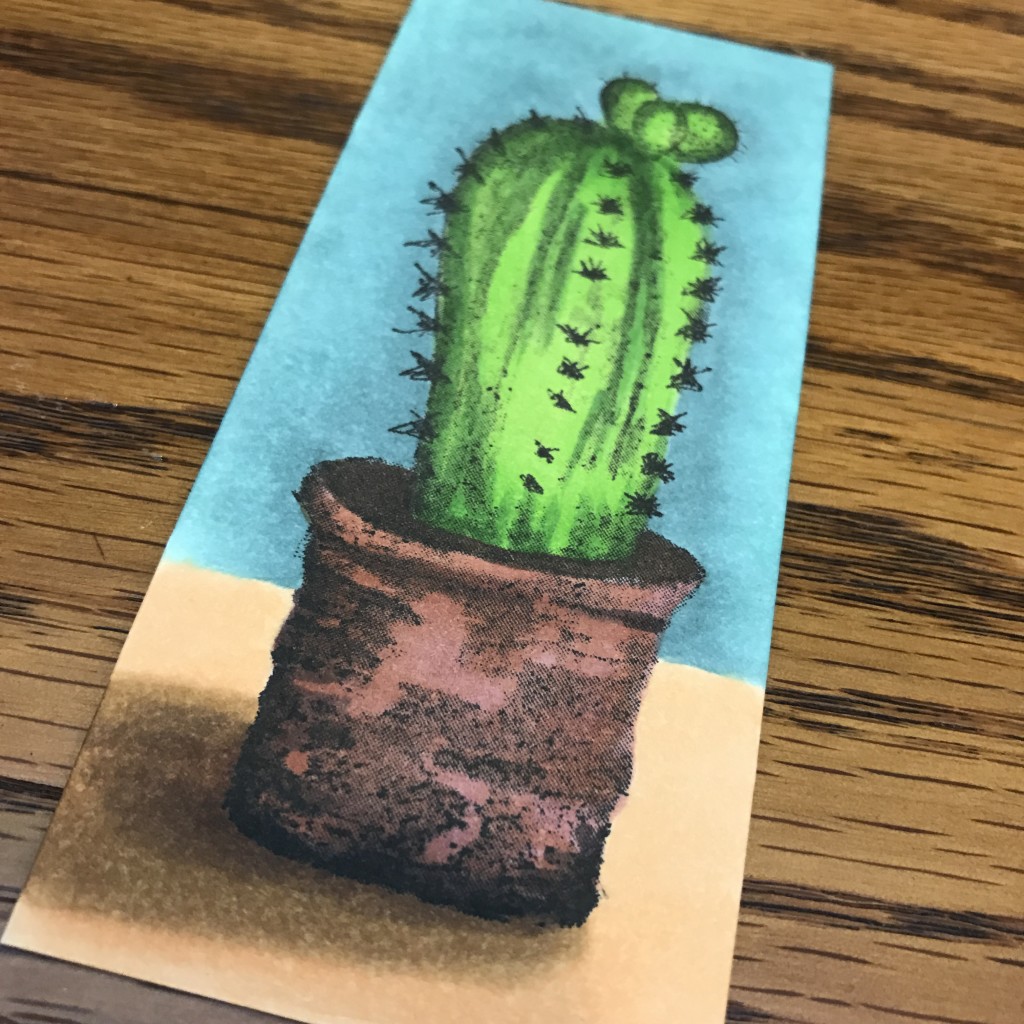
Then I cut out a piece of Mask It that was large enough to cover the area I wanted to mask. I could have cut it to only cover the cats and save on usage but I was not sure yet what I was going to do so made my sheet as big as the paper. 

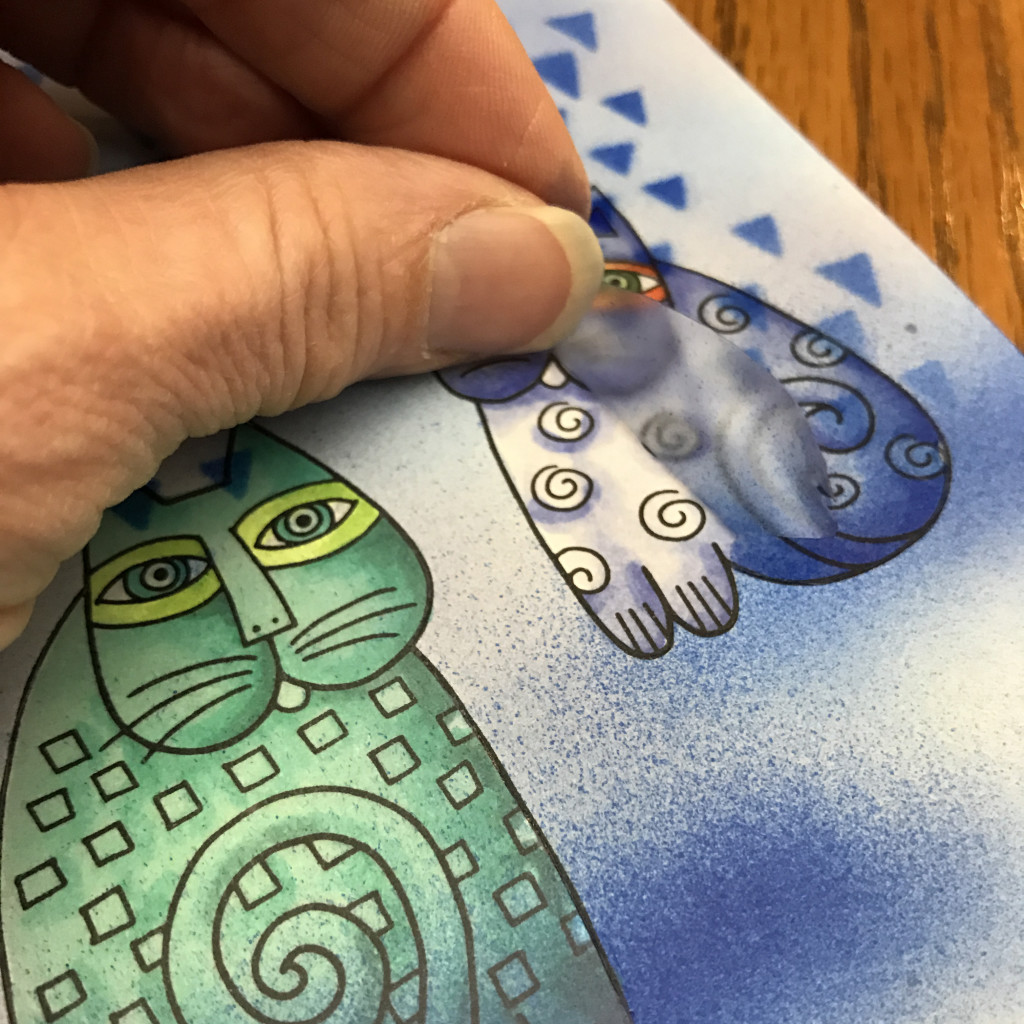
I peeled off the paper backing and carefully laid the clear adhesive sheet over my image.

mask 2

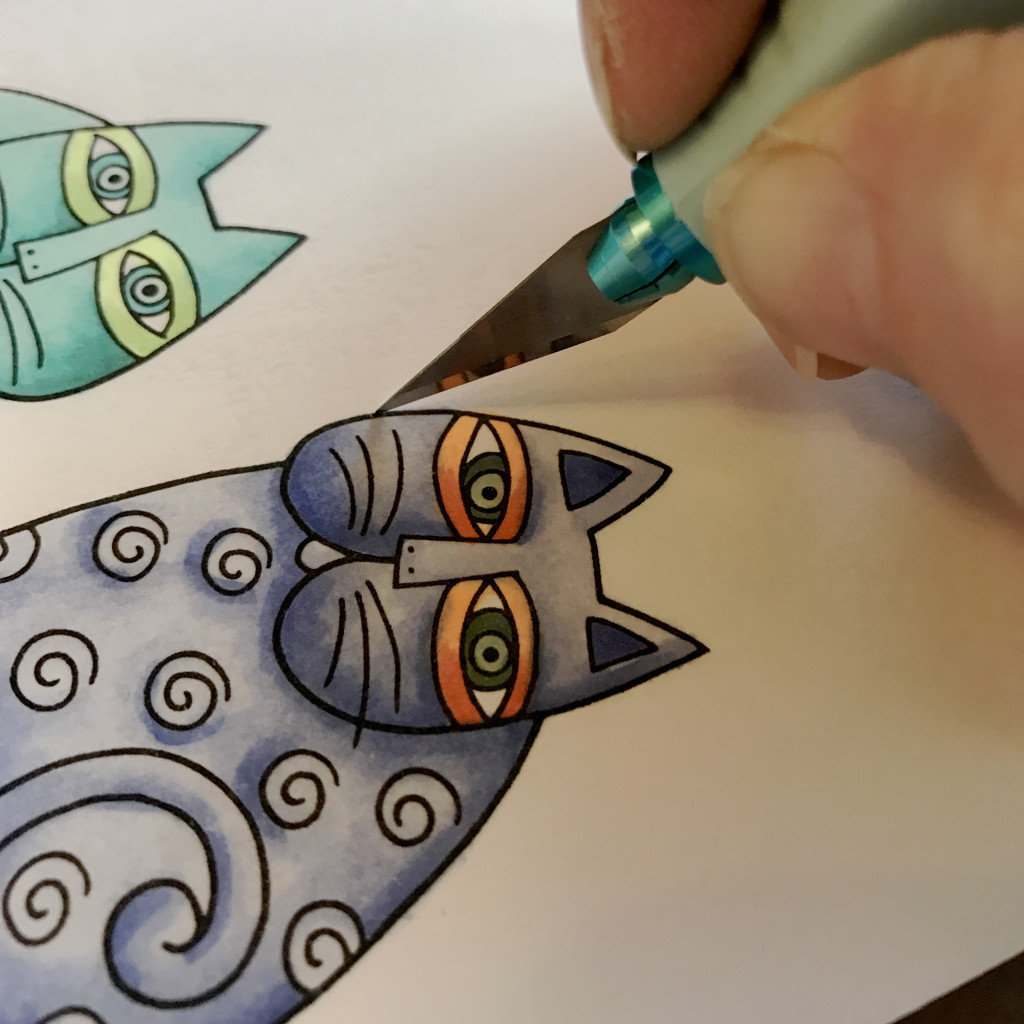
I decided I was going to air brush the entire background so really only needed the cats covered so I  used a craft knife to go right over the black outline of the cats. You might need to experiment a little with pressure. You do not want to go through the paper, just the plastic mask.

mask 3

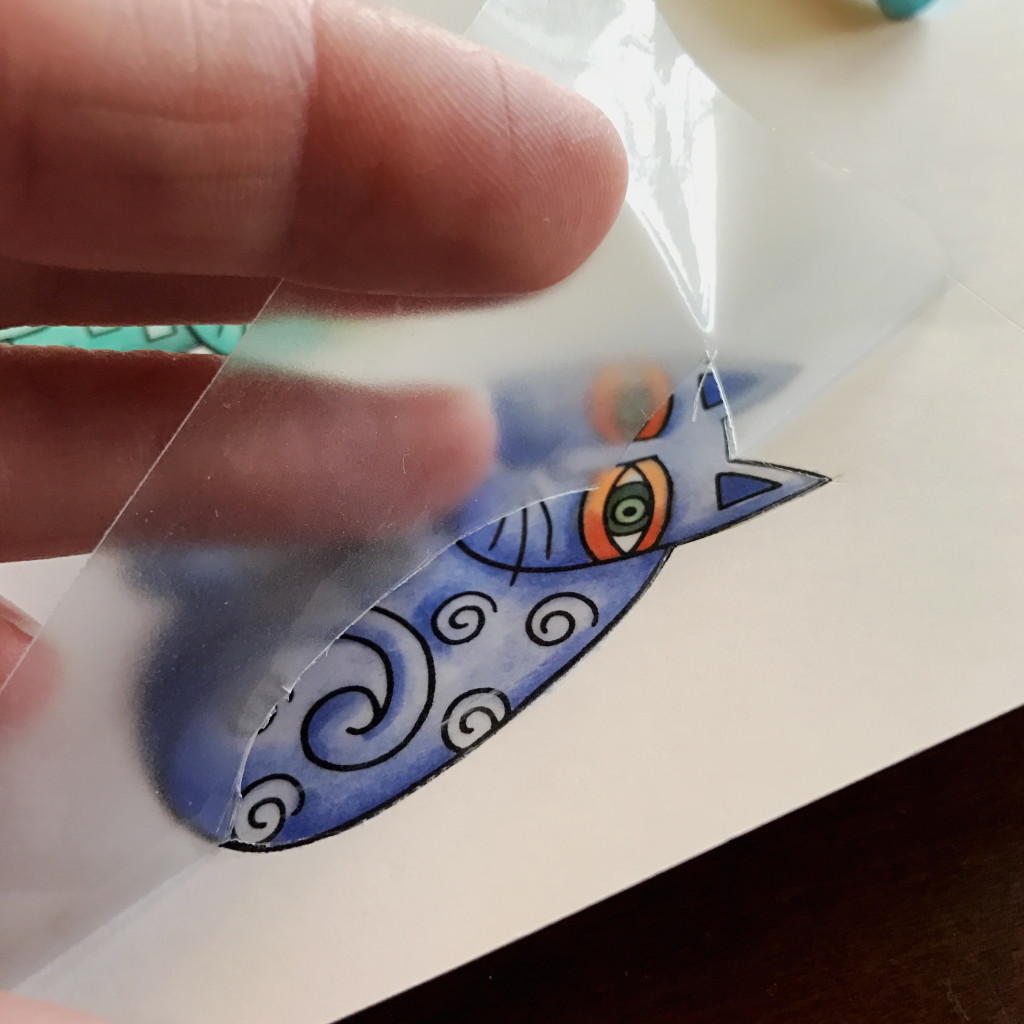
Then I peeled off the plastic where I will be airbrushing and left the cats covered so they will be protected from spray.

mask 4

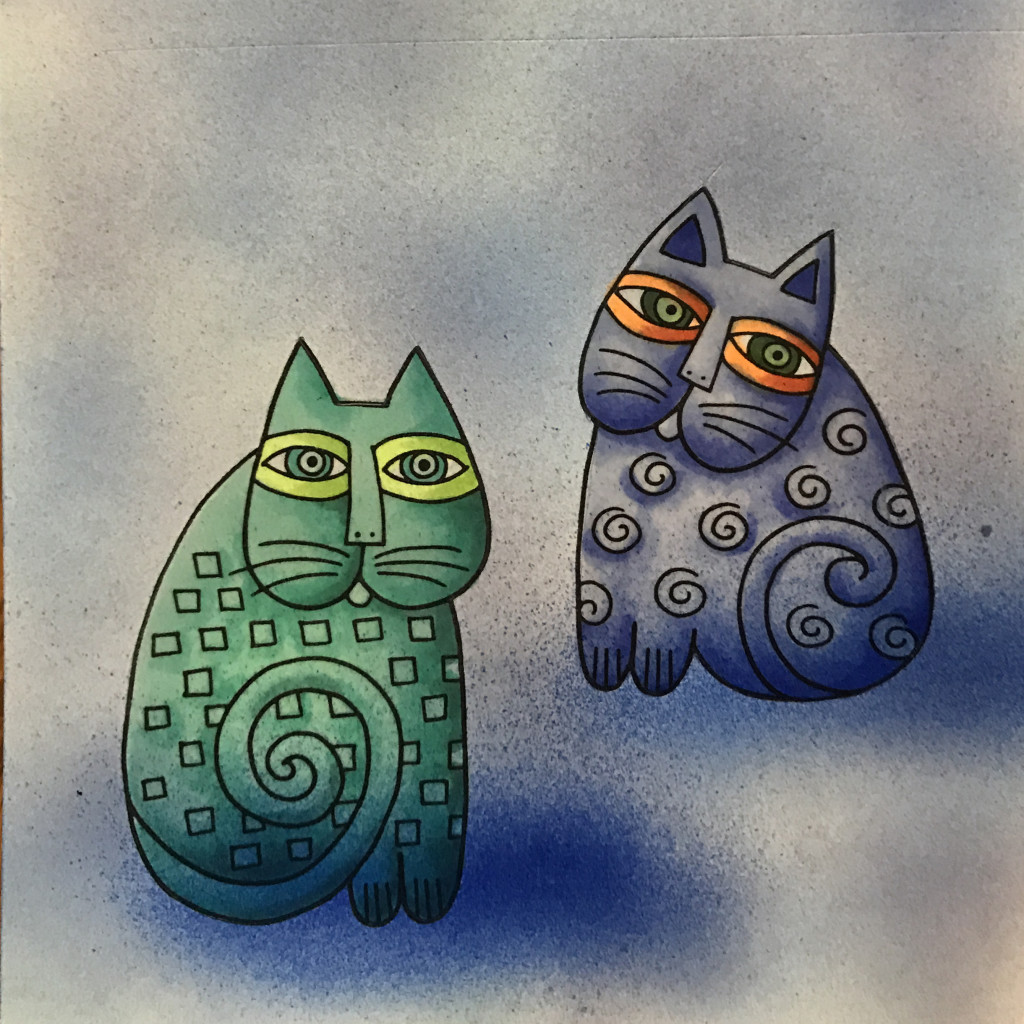
I used 3 different colors in my air brush to create a modeled background. Notice that some of the spray has gone over the cats.

mask 5

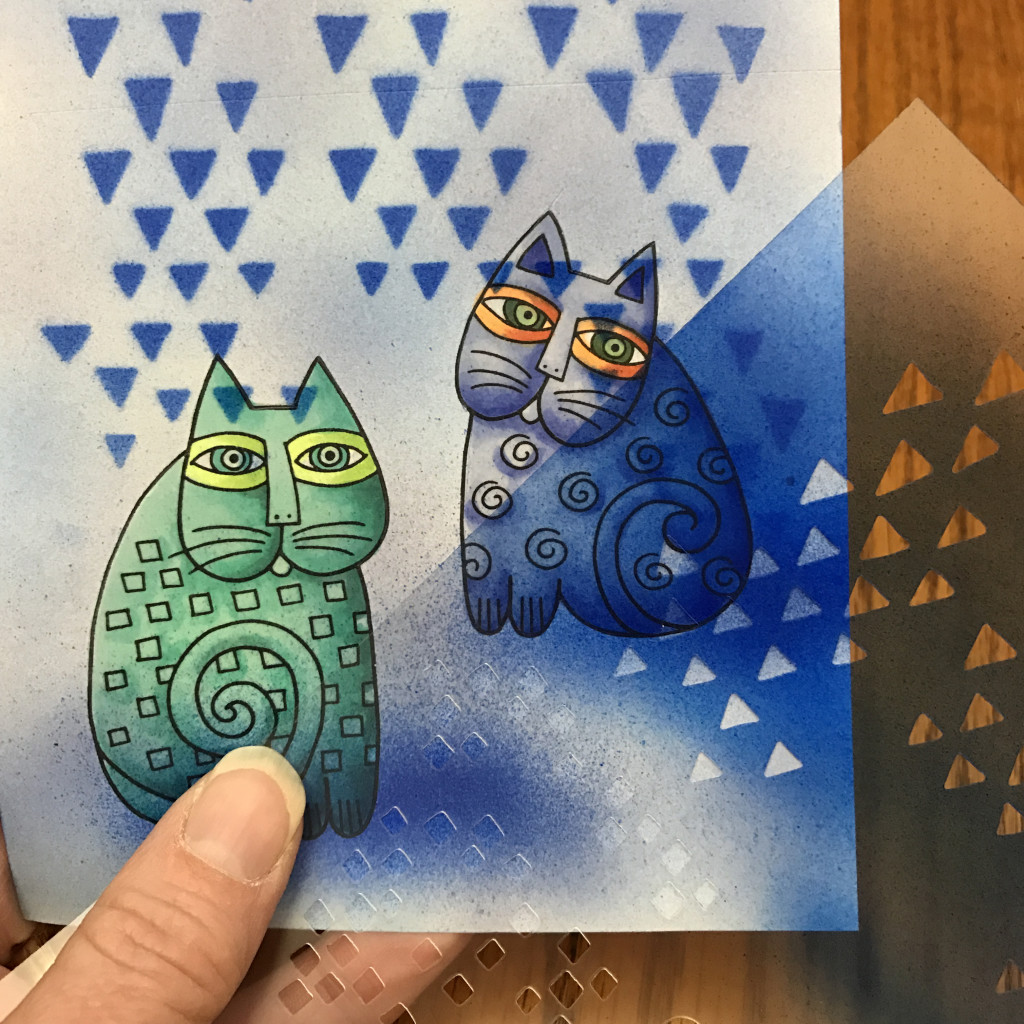
Then I discovered that the stamp set came with a stencil! BONUS I added the fun graphic shapes with the air brush as well.

mask 6

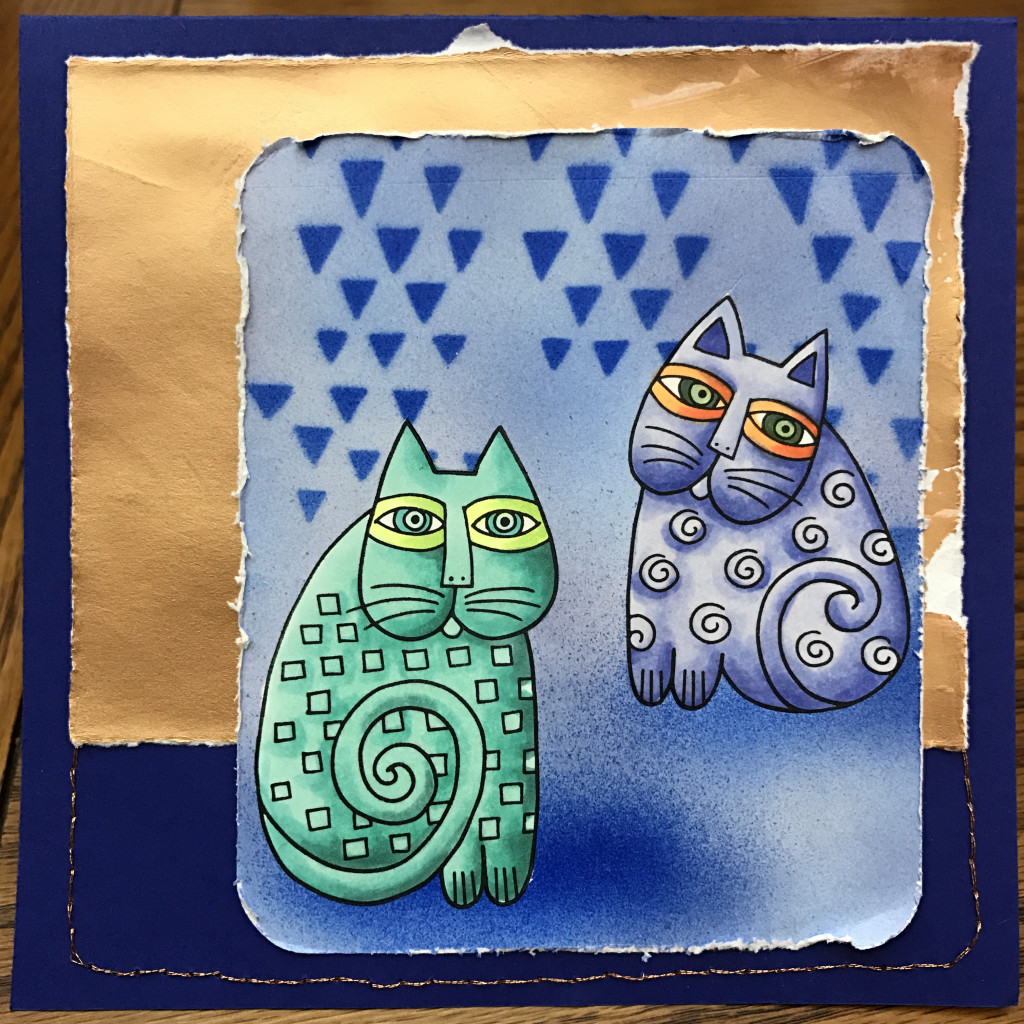
I peeled off the mask and the cats popped out all nice and clean from over spray. One of the HUGE advantages to a mask film is all the edges stay tight to the paper!

mask 7

The card only needed a base and this gorgeous copper painted paper (thanks Tommy Art!)

mask 8

If you are interested in trying this masking technique, check out all the details for the Mask It at Imagination International, Inc.

Have a Happy Colorful Week!


Posted on 2 Comments

Pantone Color of the Year YG25

Those of us in the Copic world call Y25 Celadon Green, but over at Pantone they call this hue of yellow green Greenery and it is the 2017 color of the year! If you have not heard of the Pantone color of the year here is the definition that they share:

What is the PANTONE Color of the Year?

A symbolic color selection; a color snapshot of what we see taking place in our global culture that serves as an expression of a mood and an attitude.

If you would like to read more here is a direct link to the website.

https://www.pantone.com/color-of-the-year-2017

They share why the color was selected and why they think not only fashion is moving towards more “greenery” but the culture as well. I particularly loved the lower portion of the article however, where they shared several color combinations featuring “Greenery” with other colors. 

My favorites are:

Pantone-Color-of-the-Year-2017-Color-Palette-8

Pantone-Color-of-the-Year-2017-Color-Palette-3

Pantone-Color-of-the-Year-2017-Color-Palette-6

To me these all look like color challenges! And since I got some really fun new stamps from some of the manufactures at Creativation 2017 I figured, “Bring it on!” I am ALWAYS up for a color challenge. I have two stamps picked out, one for the Moody Blooms and the other for the Grand Canyon series above, I will have to come back to the Fathomless 🙂

My Colors for the Moody Blooms series are; RV69, R08, BV29, R39, YG25, RV19, R59, G85, Y26. I added YG21 and YG67 to add more depth to the leaves, B000 for some sky, and BV23 into the ground shadows. 

IMG_3893

I got this fun stamp from Dare 2B Artzy. They were super sweet and shared some stamps AND a stamp pad that they make that is, YES, compatible with Copics Yipee! Here is their info again so you can go check out their stamps and inks, along with coordinating papers 🙂 Fun! https://www.dare2bartzy.com

The colors I chose to match the Grand Canyon combination are ; BG72, E04, YG25, V99, E55, E21, E47, E15. I added BG10 and YG67

IMG_3894

This stamp is part of the new collection from Spellbinders. Keep your eyes out for videos with both these stamp lines! The line from Spellbinders is screaming for my watercolor/Copic Misti technique! Find Spellbinder’s new line up at there site HERE

Looking at the two images side by side it always amazes me how much colors change when you put different colors around them! The YG25 looks very different with the jewel tones of the Moody Blooms then the muted tones of the Grand Canyon color scheme. What a fun personal challenge though to start of the 2017 coloring season.

Take a few minutes and do some coloring just for you! Pick a YG25 series from above or a different one from the Pantone site and have yourself a little color challenge! I would LOVE to see what you come up with.

Have a Happy Colorful Day!

 
Posted on 4 Comments

New Year: Starting with a clean slate or at least a clean desk top!

I am in my clean and purge mode, with me it is always in fits and starts. If I get started it is often hard to stop until the whole area feels a little more put together. Before I left for Phoenix and Creativation, this year’s CHA convention, I managed to at least clean out my daughters’ craft supply area and my own desk. Of course the desk top will never remain looking like this but boy I love it when it does!

IMG_3847

I even moved some art around, and before I flew away for a few days had it hung on the wall. Obviously the highlight of my workspace is the A-MA-ZING woodd shelving unit that stores my Copic Markers and Various Ink. You may or may not know this but Copics can be stored either vertically or horizontally so the possibilities of storing them become numerous.

I used to store my markers in the Copic Marker Wallets that were held in  a 31 Bag. Of course I did not have as many then and at the time it was the perfect storage solution for me. I could tip them on their side facing me while I was working and then scoop them up by the bag handles and swing them away to a crop or crafting event.

4-600x600

I get more questions about this bag then anything else I have ever posted. It measures 12″ x 7″ x 8″ (or close to it) I have been told that 31 Bags has one similar to this again, it was missing for a while. 

When I was completing my set of markers and starting to collect all the Various Ink I started looking for a new system. I surfed Pintrest and started a collection of storage Ideas:

https://www.pinterest.com/cpclasses/copic-marker-storage/

I also searched on Etsy to see what people were making for storage, I found several beautiful wood storage units and decided I was ready to try “open” storage, meaning larger openings to house color families all together versus little holes to hold individual markers. I found a unit that I loved and then asked my wonderful Father In-Law if I could sweet talk him into making one for me. It worked! And now I have this GORGEOUS piece that I get to have on my desk. 

IMG_3849

There are so many ways to store your markers. You can find what works best for you. Here are some things to think about though when you are sorting through your options;

  • How many markers do you have?
  • How much space do you have to store them in? – closet or desk top where ever they will stay
  • Do you want to be able to transport them easily and if yes are you going to take the time to move them to a separate storage unit or do you need something that can easily sit on your desk and then be on the go?
  • Do you need your markers in nice neat number order or can they be stored in open bins?
  • And of course cost, like anything else there is a huge range of prices 

By thinking through the above questions, and making some searches on-line you will be able to find the PERFECT storage unit for you!

Best of luck organizing and cleaning as you begin 2017! I hope it is a crafty, creative year for you, I am going to make sure mine is!

Have a Happy Colorful Week!