Posted on 4 Comments

Calvinball!!!!!

Do YOU know what Calvinball is?

Calvinball

The Get It Scrapped crew is holding a full out Calvinball throw-down!

This month, March 1st-31st there will be a heap load of scrapping, trash talk, rules changing, point adding and laughter in general at the GIS site.  Come one come all and join in the fun!  You do not need to be a member to play along and whatever your crafty preference you can be included.  There are points for just being there!

The festivities kick off tomorrow with a live, on-line crop, and yes, you get a point just for stopping in and saying hi!  So kick off your month right and keep playing all the way through to spring it is going to be the best!  OH and tell them I sent you…you each count as 1 point ha ha!

START HERE!

Posted on

Love is in the air

Last week was Valentines and my oldest made her last official Valentines box!  Over the years we have gotten quite grand with our boxes and Sara wanted to finish with a bang.  She and a group of friends decided to make Minions from Despicable Me.  I did a quick search on Pintrest to get some ideas and we were off to the races.  The result:

image

We used a cardboard box as the base and I built on the curved top with cardboard and hot glue.  (We have built quite a few fancy shaped boxes at the is point so I have quite the system)  Sara covered her creation in Yellow duck tape and started cutting all the foam pieces for teeth, eye, arms, legs, hands and feet.  I started work on the overalls.  Sara had an old pair of jeans that got sacrificed for the occasion.  The waist band became the straps, the 5th pocket became the small pocket on the front of the Minions overalls.  I used chances from the legs to create the rest.  I did splurge and buy the overall fasteners to give it a little more realism 🙂  The overalls were completely done with hot glue no sewing involved.  The one eyed goggle is a mason jar lid with black elastic, again attached with hot glue.  Sara attached all her parts and pieces, she added the eye and goggle then created the hair and added it on top.  Needless to say he was a big success!

On to Lori!  She scanned Pintrest for some crafty inspiration and found an owl valentine craft that she really loved so we did a little more Pintrest research and came up with the following:

image 2


What I think I love most about Lori’s box is that she did EVERYTHING!  I helped wrap a cardboard box then she painted it.  I showed her how to create the tissue ruffles and she went to town ruffling her friend.  She designed, cut and added the eyes, wings, horns and beak that of course opens and closes, all out of foam.  She even finished her all off with all the little bows.  I am so proud of her!

In the mean time I am putting the finishing touches on my current on-line class, teaching a few art lessons at the school, keeping up with the Creative Team at Get It Scrapped and new tutorials for the site as well.  In general keeping busy and out of trouble.  Swim season is wrapping up in two weeks and gymnastics competitions are in full swing so the Houghton’s are hopping!

Happy Saturday!


Posted on

Weaving Washi

I needed a short break from that whirlwind of posting through January and into February so i took the week off.  But my next media technique tutorial is up at Get It Scrapped and I wanted to share!  This month I was playing with Washi tape which is a good thing since I seem to be slightly addicted to it if you look at the pile that is growing in my drawer!  Check out the tutorial HERE

2014-01-29 15.16.12

This is a small sampling of the growing stash.  Weaving Washi is fairly simple and can use up some of that stash.  I give step by steps for two different techniques.  Amy Kingsford created a layout using one of the techniques and I created a layout using the other:

12


My American Girls by Michelle Houghton |  supplies:  Washi tape; SEI and Queen and CO., glitter stickers and dots; SEI, spray mists; Heidi Swapp, ink; Sharpie, cardstock; American Crafts

Then Christy Strickler shows off a whole new way to weave your Washi!  She posted the steps on her blog and you can see them HERE.

CSYouandMe

You and Me: Sneakin’ Snacks by Christy Strickler |Supplies Patterned Paper, Vellum Die Cuts,Flair: Studio Calico; Jewels: Hero Arts; Tape: Studio Calico, Freckled Fawn; Chipboard:Amy Tangerine; Bow Tie: Freckled Fawn; Other: Label Maker

I hope you all are having a great weekend.  We keep getting told it is going to warm up and then getting snowed on!  We had 3 more snows this past week.  All 3 were not on the weather radar until they basically hit.  I know, I live in Iowa, but I really could be done 🙂

Happy Saturday!

Posted on 2 Comments

Plaid and a painty peek!

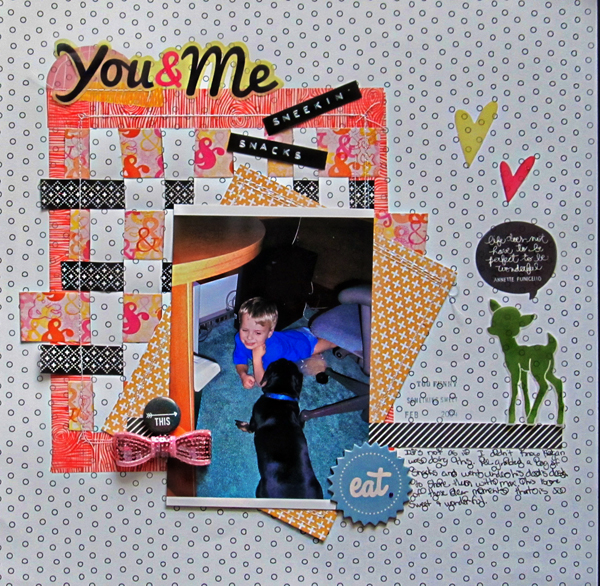
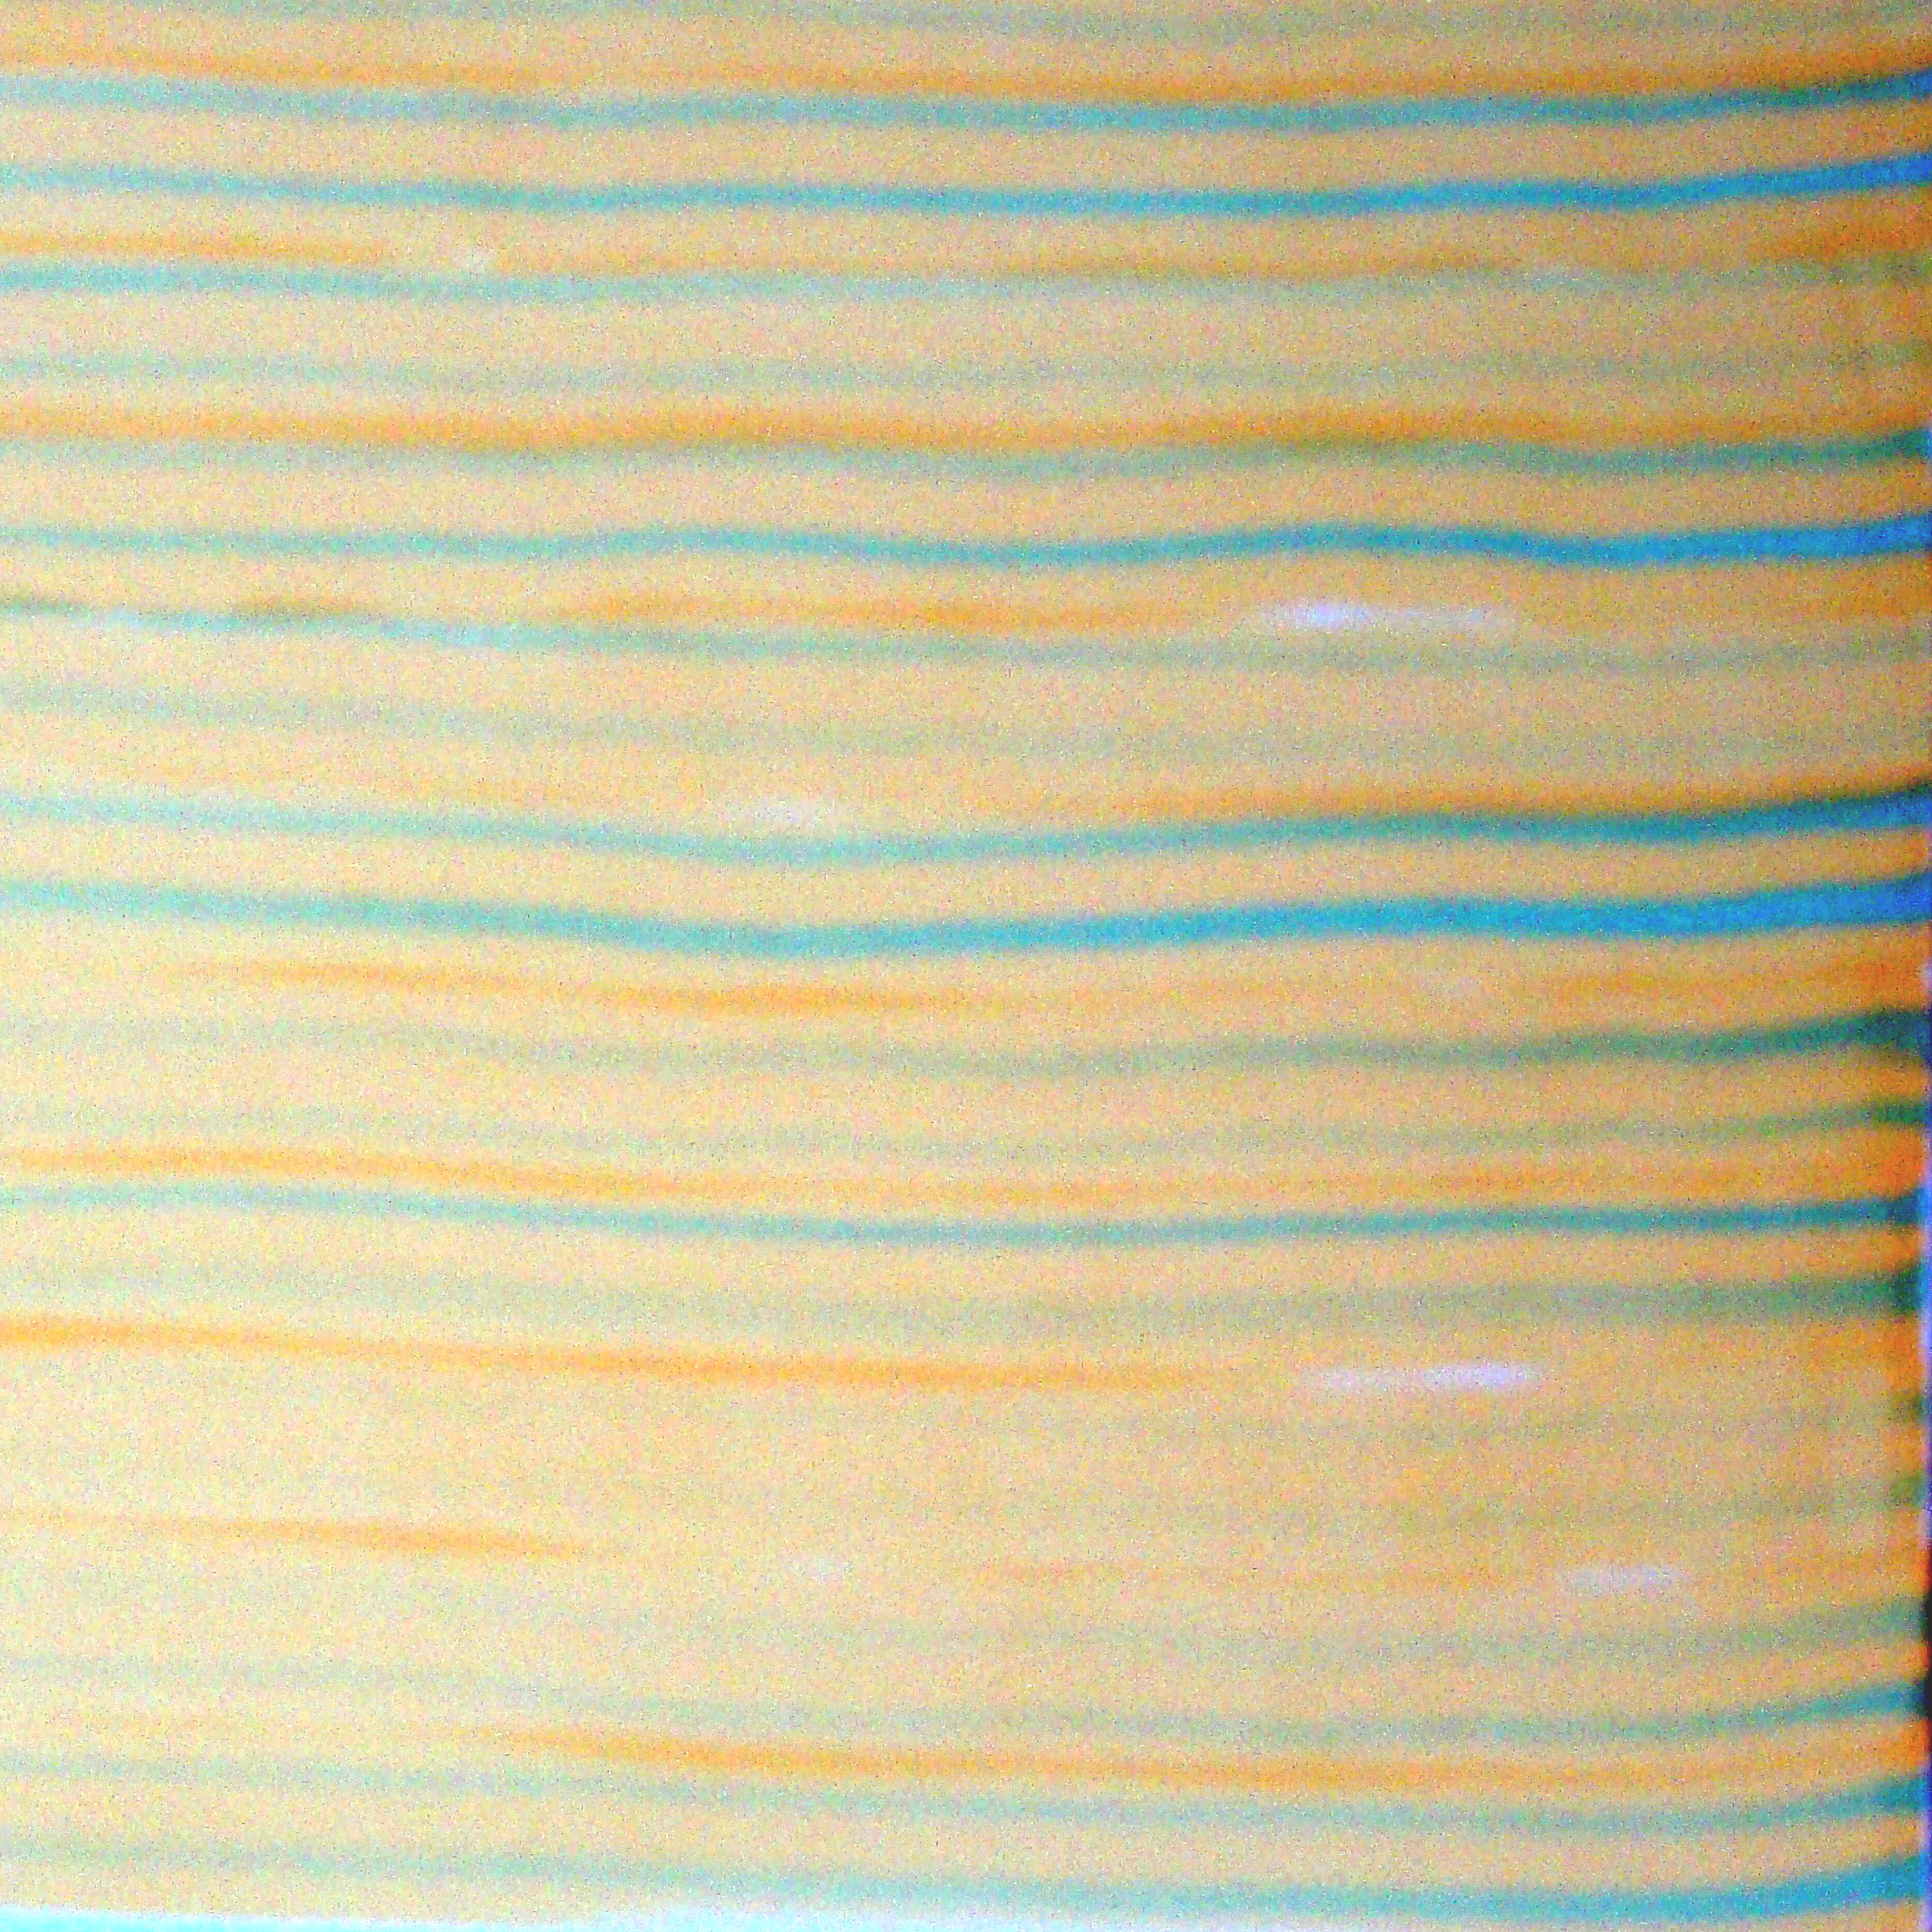
I have been getting inky and painty lately, come to think of it lots of my layouts recently have major portions to them that are in the artistic realm.  No real surprise I guess but they seem to gather in clumps 🙂  This week I am tackling plaid in my layout for Get It Scrapped and my first instinct was to create my own. I love using a wide Copic marker to create my own plaid pattern.  This particular plaid turned out very subtle and suited the layout just right.

plaid


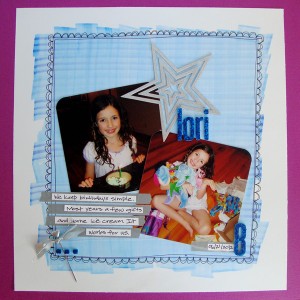
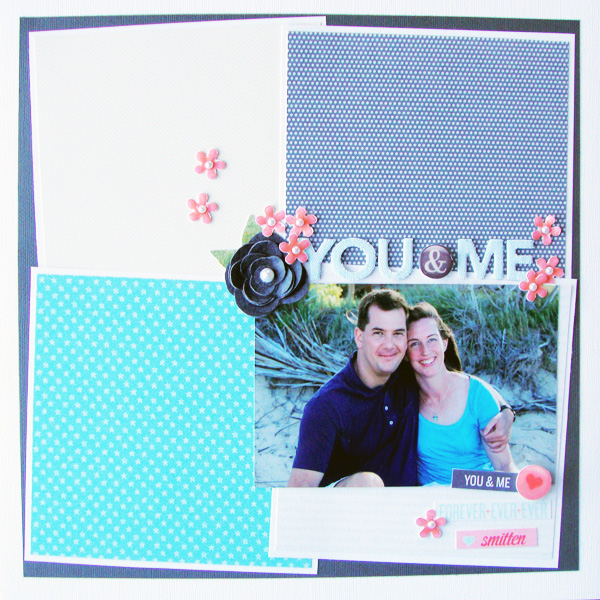
Lori 8 by Michelle Houghton | Supplies: cardstock; American Crafts and Bazzill Basics, ink; Copic, Washi tape; Lil’ Bee, letters; American Crafts, stick pen, star and ribbon; unknown

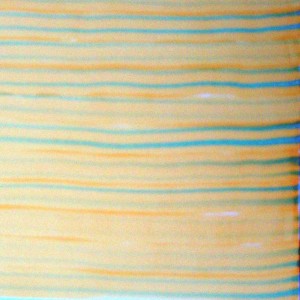
To create the plaid I used a wide Copic marker.  I then touched a darker sketch marker to the wide tip in 2 spots, holding it there to transfer color onto the wide tip.  (this does not ruin the tips!  Copics are great this way!)

05

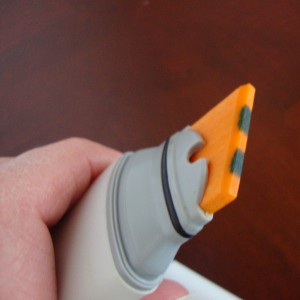
I then pulled the wide marker across the page once or twice.   I added the darker color onto the wide marker again and then pulled a few more times.  I continued the process until I had completed the area I wanted to cover going horizontally.

07

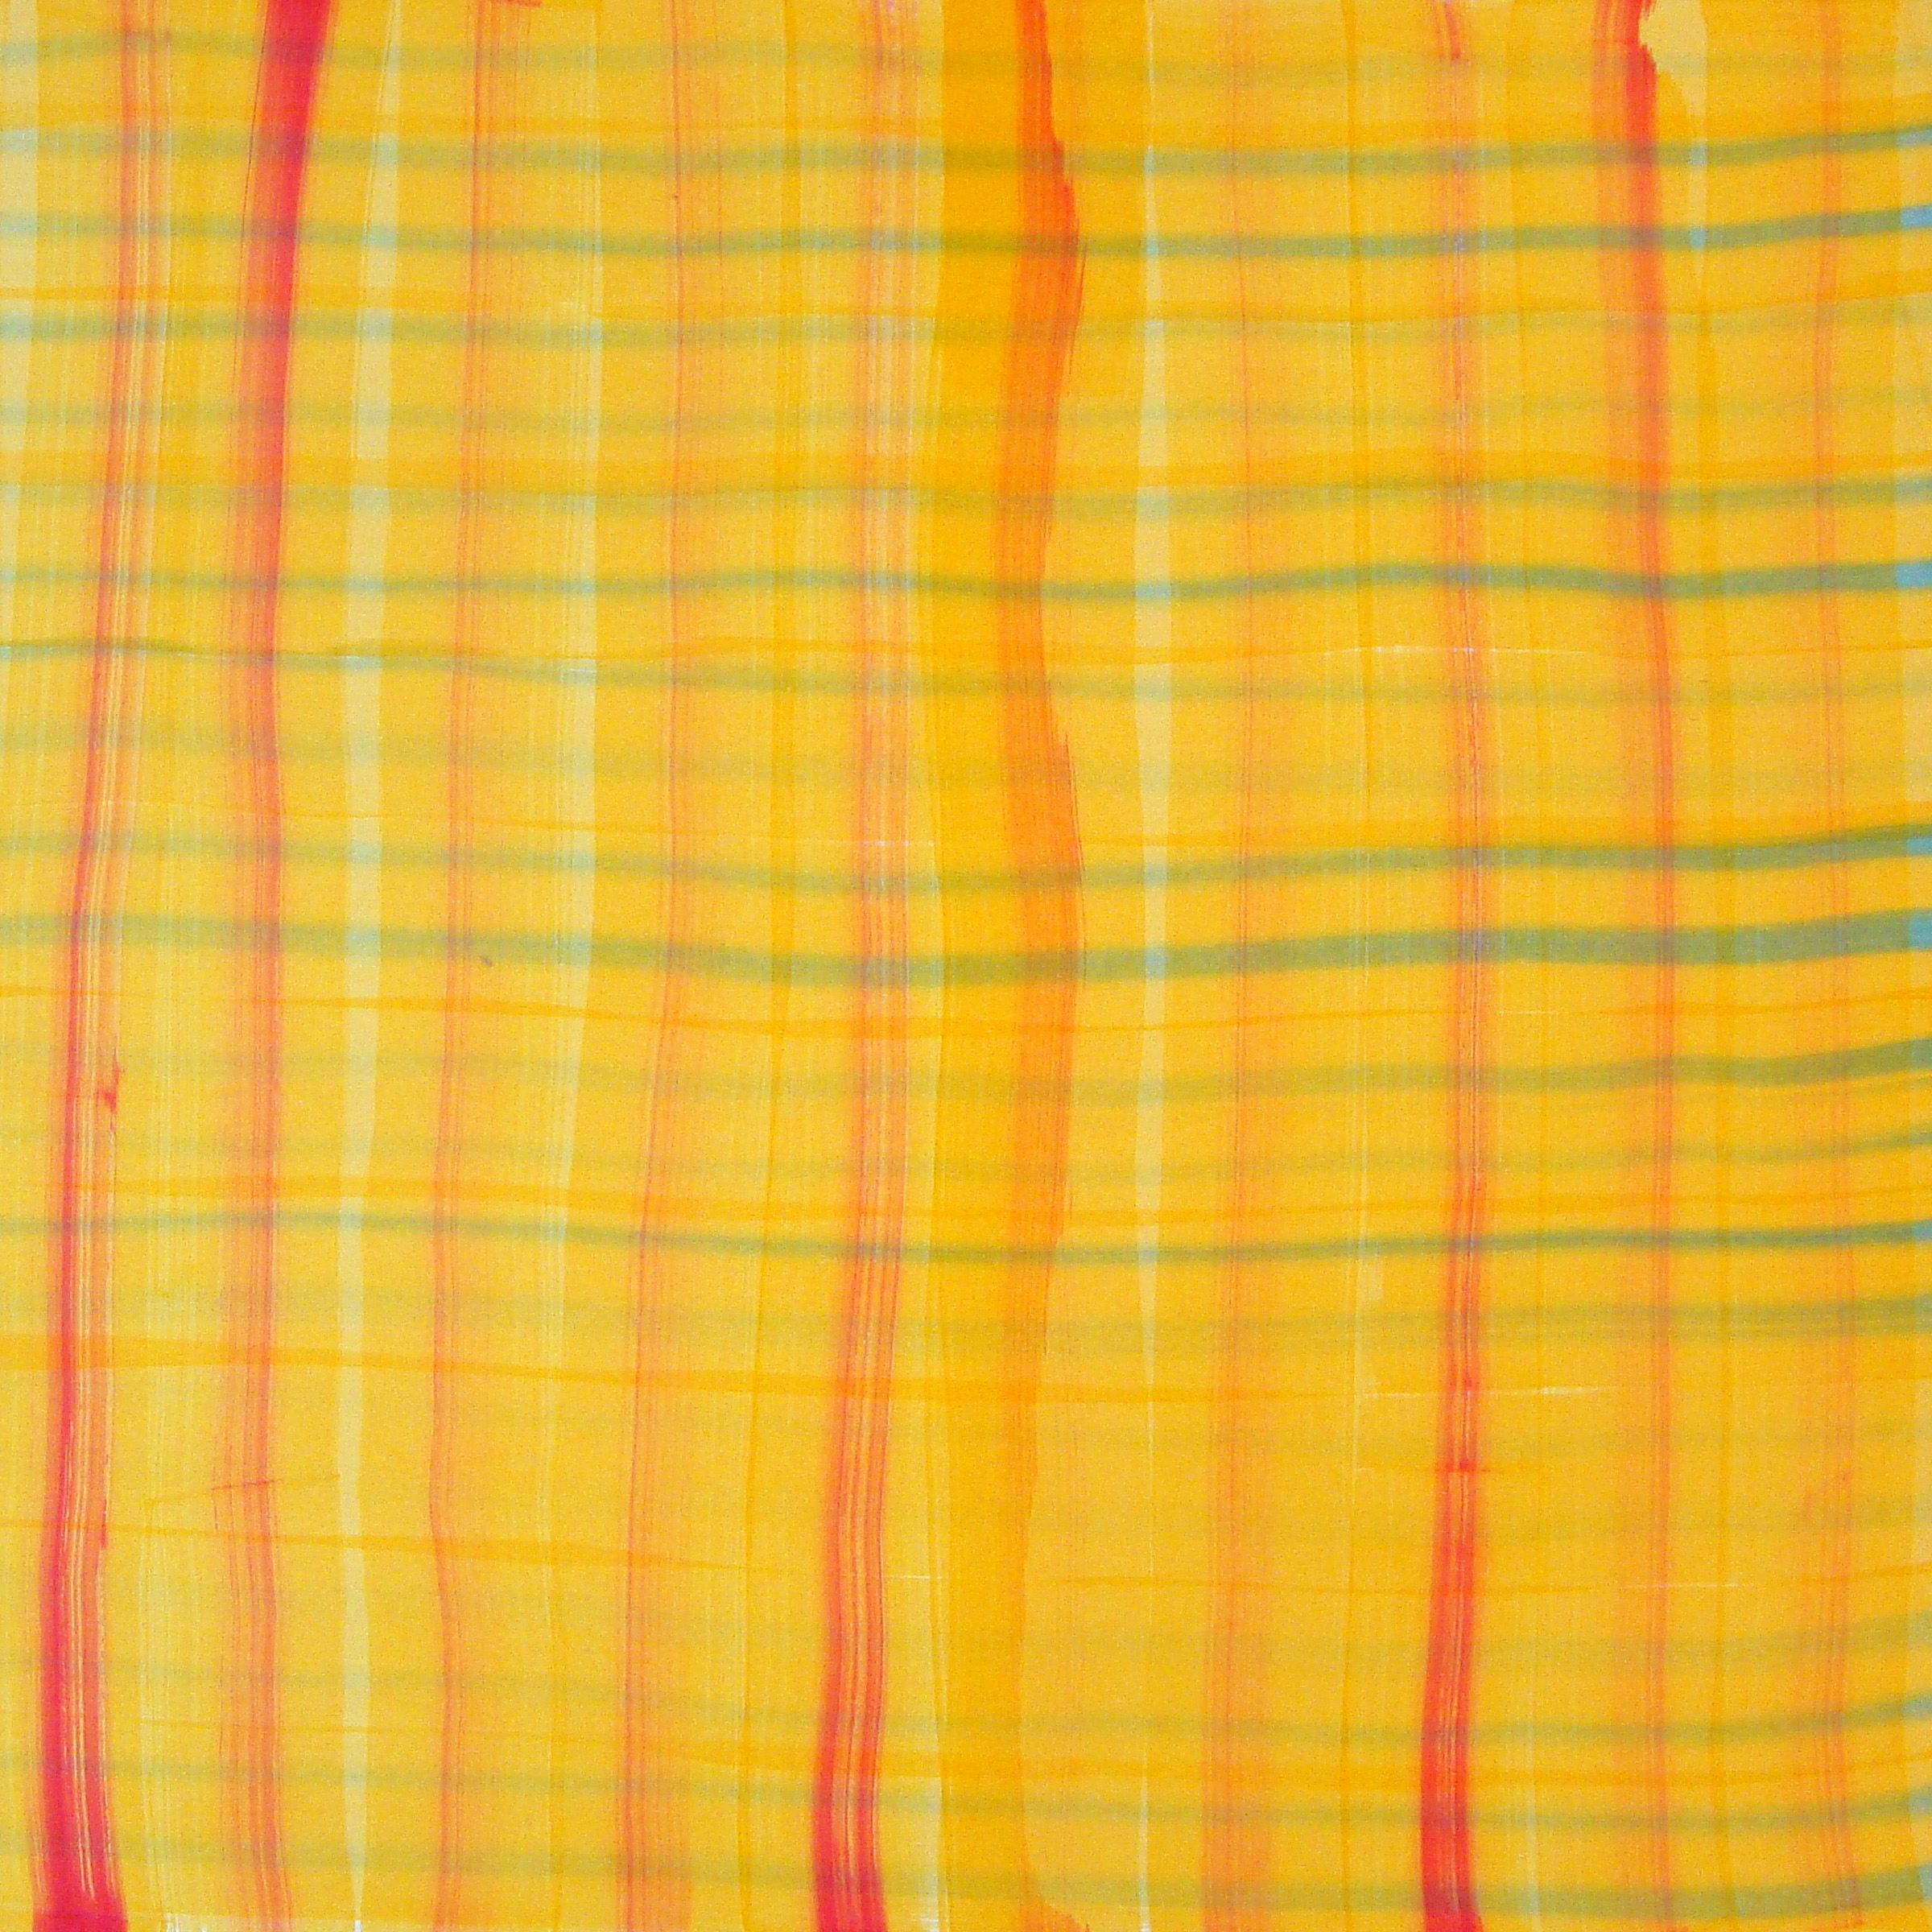
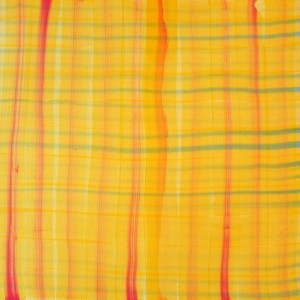
 I repeated the entire process going perpendicularly over the original set of lines.  The example I have uses a different color going into the vertical lines.

09

In my layout I used the plaid as a base for my layout.  The pictures were not spectacular but very representative of our quiet birthdays, so the plaid added a little pizzaz!  I LOVE the plaid variations in the article check them out HERE

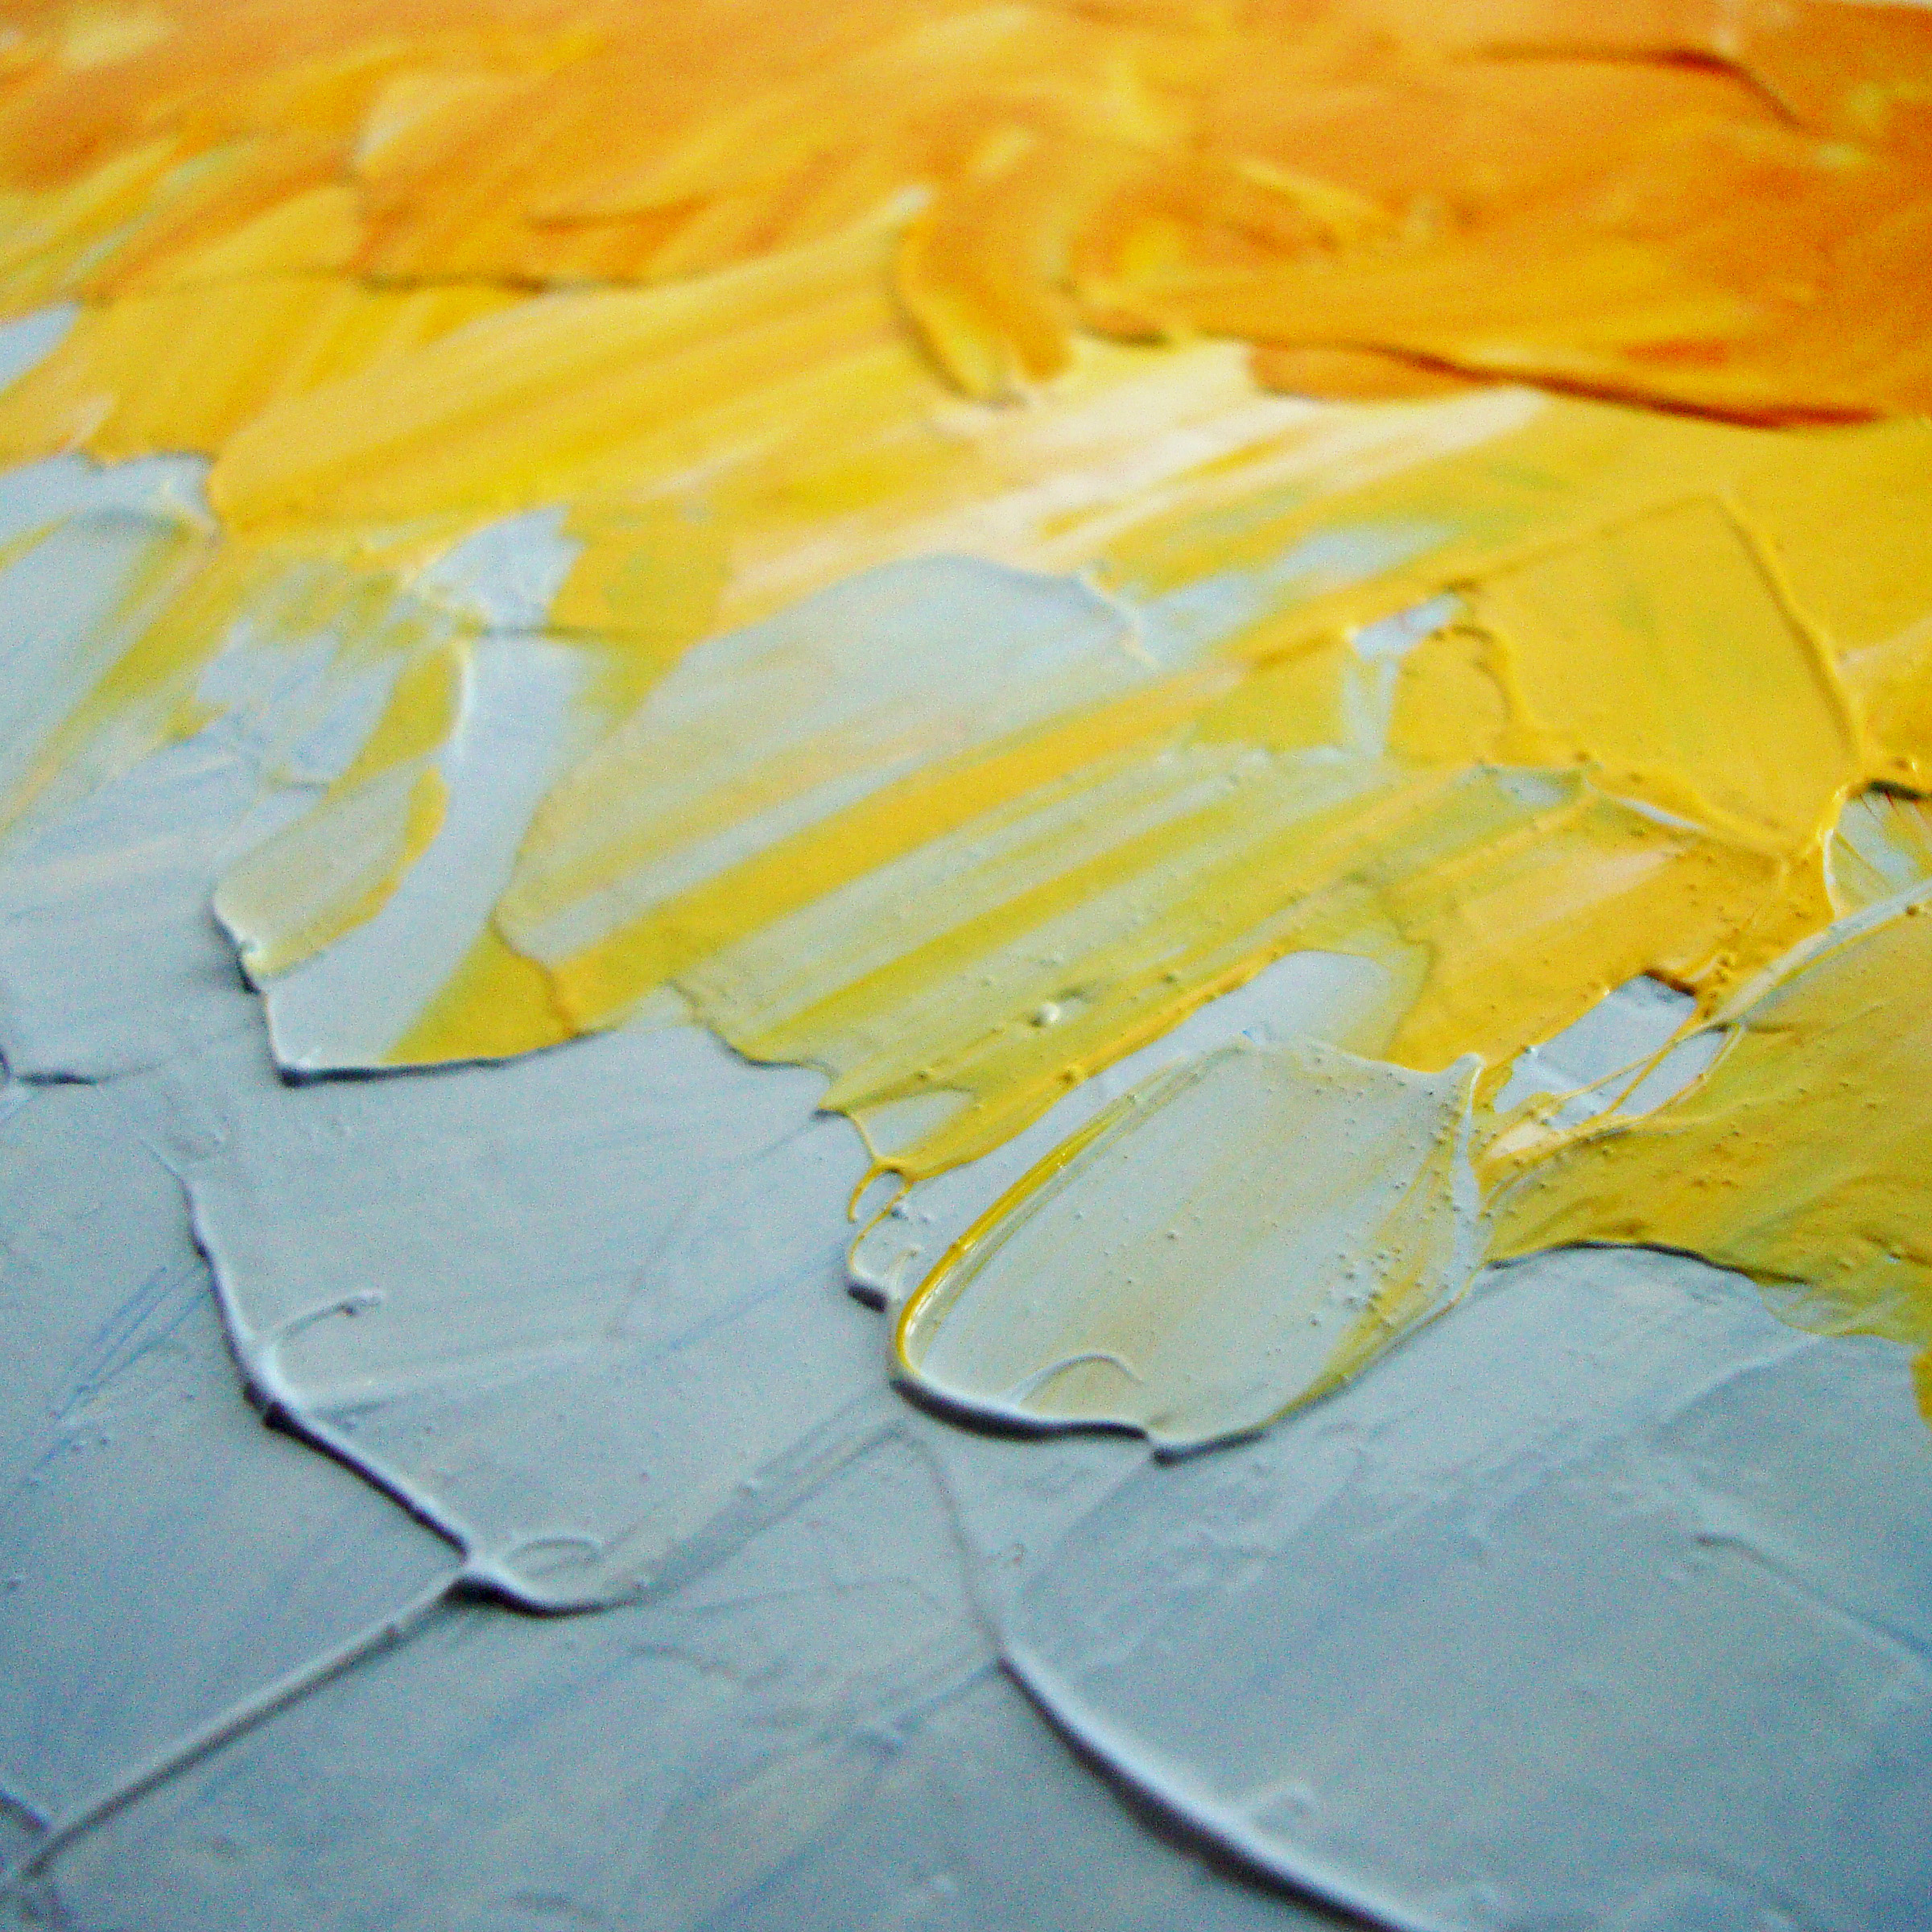
A week from today I have the second class in my Mixed Media series starting.  We are getting painty!  We will be looking at 4 famous painters and using their techniques to learn painting styles we can use on our mixed media crafting projects.  Here is a peek!

e01

f01

Happy Thursday!

Posted on

Hybrid Layout

OK, so if you know me and know me well you know that technology and I are not the best of friends.  But I have to say that I have now ventured twice into hybrid scrapbooking and it could become addictive!  I love the aspect of  the HUGE range of materials and kits that are seemingly mass produced regularly add to that the versatility of changing sizes on everything and now my new cutter that can scan anything and cut it out for me and I might be on to something.

This month I was honored to get to play with a kit and papers from One Little Bird.  You can find her at The Lily Pad which is an AMAZING digital site housing some truly gifted artists.  Several of us on the Creative Team at Get It Scrapped used a single kit to really play and see what each of us could come up with.  The only rule was that the layout must truly be hybrid, which means a combined paper and digital layout.   Combining the best of both worlds.  I always love to see a challenge where a group of artists all use the same set of supplies it is so fun to see the huge range of techniques and ideas that all come from a single source.   Here is what I came up with:

Hybrid


You and Me by Michelle Houghton | Supplies: cardstock and chipboard letters; American Crafts, pearls; Queen and Co, ink; Copic, patterned papers, flowers labels and flair digital kit by One Little Bird

I did 3 things specifically with my digital elements. 1 – All the patterned paper you see is from the digital kit.  I printed it out in large sheets and then trimmed it to the size I needed specifically the squares that base my layout.  2 – I printed 6 of the black flower and then cut it out along the lines creating increasingly smaller flowers.  I stacked these and curled the edges to make it truly lift off the page.  3 – I used the small pink flowers and the flair, these I cut and used glossy accents on to again give them dimension.  I added pearls to the pink flowers to link them in a little better with the black flower.  Finally I added the three small labels.  These I just printed and cut.   I added chipboard letters that I colored, the pearls and really that was it, the rest came from the amazing digital kit.  SO FUN!

I took a very simple route but the team went crazy with wonderful ideas so if you have time check it out HERE!

Happy Tuesday!