Posted on

Pinterest Picks

I got to share some of my favorite Pinterest boards at Get it Scrapped this week and there is an article all about how I use Pinterest inspiration in my layouts.

This is an on-going series at Get It Scrapped and i have to say I have found several amazing boards reading who other scrappers follow, very fun!Check out the article on my picks HERE

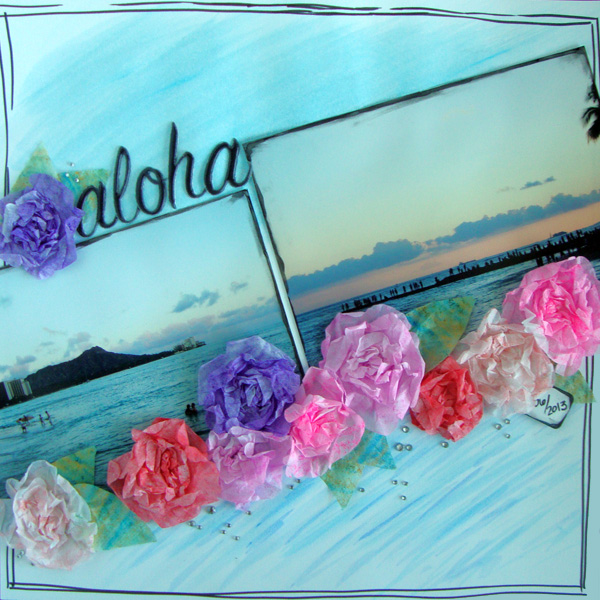
I also shared a layout inspired a find on Pinterest, here is the layout:

blog 1
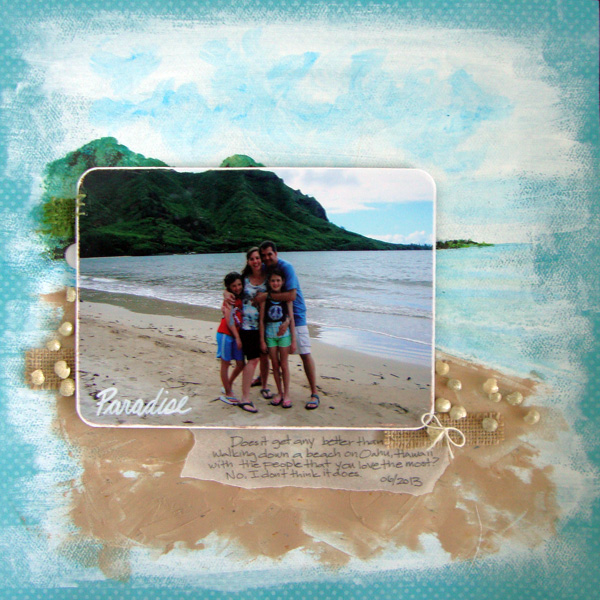
Paradise by Michelle Houghton | Supplies: pattened paper; Bo Bunny, gesso and modeling paste; Golden, colorants; Faber Castell – Gelatos and Big Brush Pens, twine; American Crafts, burlap; Canvas Corp, tracing paper; Mead, shells; Hilo Hatti of Honolulu

Here are the steps I used to create my page:

Step #1 – Coat the majority of the 12×12 patterned paper with gesso. ** Note; this particular patterned paper is a cardstock weight.  I would recommend using at least this weight or even water color paper for this project.

Step #2 – While the gesso is drying mix Gelatos and light modeling paste on a pallet or non-stick surface.  I did this by scribbling the color I wanted on my matte and mixing the paste right on top of it.  I used several different colors to get the sand color just right.

Step #3 – Using a pallet knife spread the modeling paste across the bottom portion of your layout.  I was trying to extend the lines of my photograph so I gave myself some VERY light pencil lines to guide where my paste would go.

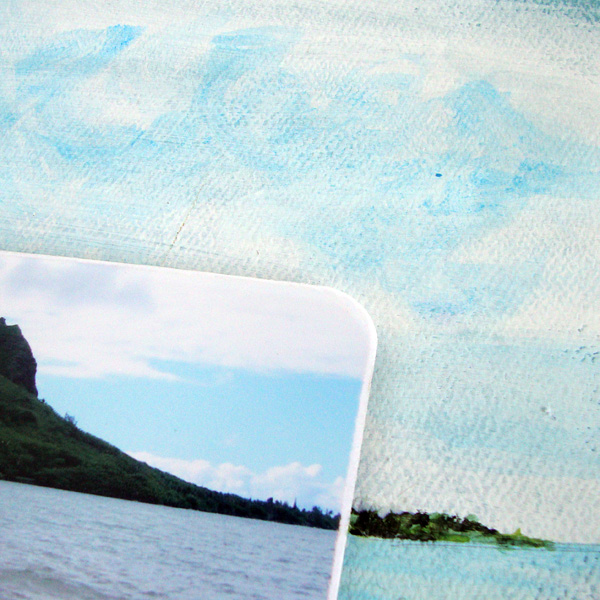
Step #4 – Using the Gelatos create a water color, again by scribbling the Gelato right on your matte and this time adding a small amount of water with a brush.  I used these water colors to add ocean, mountains and sky to my layout. I love that just like paints I could mix the Gelatos to get colors I do not own.  I don’t have any greens but it was easy to mix blue and gold to get my green mountains.

Step #5 – Darken areas by going back in with the Gelatos right on the page and blending them with a very small amount of water and a brush.  I did this on the mountains.

Step #6 – Come back in with artist pens to add small details.  I used black, may green and white, the big brush pens, to create the foaming edges of the waves and the darker tree lines.

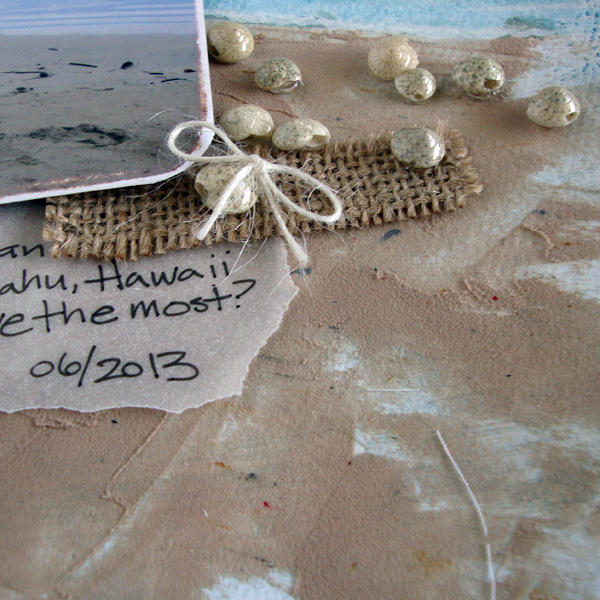
Step #7 – Use a Pitt artist drawing pen to write your journaling. If you need to add color to other embellishments to be added to your page try using the big pens to color some of your surfaces.  I turned one small piece of my burlap to a green shade, and wrote directly on my photo for my layout title.

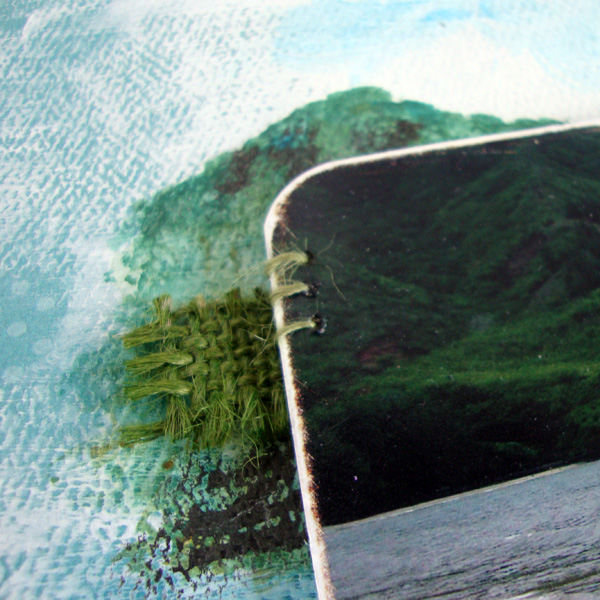
Step #8 – On your photo round the corners, sand the edges and add three small stiches of twine at one corner.

Step #8 – Adhere all the elements onto your layout.  Working from the bottom up add your tracing paper, burlap strips, shells and a twine bow.  Use pop dots to add your photo onto the page and finish your layout.

Here are some close ups of the mixed media work:

blog 2

blog 3

blog 4

I have a lot of fun things to share this week so I will be back tomorrow!  And most likely Thursday and Friday as well!  Hope you are having a great week!

Posted on 1 Comment

Frida Kahlo inspired layouts

I have a layout to share from Get It Scrapped BUT I really want to encourage you to go directly to the site HERE to see the rest of the inspiration.  Don’t get me wrong I like my layout but you have to see the others they are to die for!

FridaAloha by Michelle Houghton | Supplies: cardstock; Bazzill Basics, ink and Gelatos; Faber Castell, letters; American Crafts, pearls and gems; Queen and Co., tissue unknown

I am playing with Faber Castell’s Gelato’s and this layout has a lot of them.  I found a fun tutorial on their website on how to make the tissue flowers and wanted to give it a try.  The Frida Kahlo assignment gave me the opportunity to give them a try.

I used the Gelatos to create a water color background on my layout and then colored larger sheets of tissue with different colors of Gelatos.  I added water to them to create a water color look on them as well then after the tissue had dried die cut several layers of flowers that I glued together and crumpled.

Again you have to go check out the other layouts that Frida inspired, the colors are breathtaking and many are truly works of art!  And if you are looking for scrapbooking ideas always start at Get It Scrapped!

Happy Hump day 😉

Posted on

Guest Designer at JBS

Hi friends!  I have the honor of participating as a guest designer over at Jenni Bowlin Studio this month!  I am having an amazing time playing with the JBS kits for October and to be honest I am having trouble stopping.  I was supposed to do a minimum of 3 projects and I think I am going to end up with 6-8 layouts and a mini album.  Can you tell I am having fun?!

Here are the layouts I shared for the first day of the month

JBS Layout 1

JBS Layout 2

JBS Layout 3

All of them have a close up or two on the JBS site and some more detail about the products and process so you can peek over there if you would like a closer look.  I will make sure to at least post a few of my second round of projects after they post at JBS as well.

Tomorrow or Wednesday I will post some work from Get It Scrapped tomorrow my class at Creative Passion begins and then this weekend I am off to play with my friend Brenda at CKC Kansas City!  Busy Busy me!  Love it!

Have a GREAT week!

Posted on 4 Comments

September Photo a Day Final Instalment

Here are the last 8 photos for my Photo a Day Challenge this month at Get It Scrapped.  I am a little sad to see it go!  I think I will just have to make sure it happens again later this year 😉

If you are looking for a fun read or activity over the weekend check out the great scrapbooking ideas at Get It Scrapped!

22 – The Color Purple

image(1)Maisey’s favorite color is the color purple, at least her Wuba is purple even if she’s color blind she LOVES her Wuba!  I even caught her licking her lips she loves it so much ha ha!

23 – Little House in the Big Woods

image(13)We have an entire town sitting behind our couch on a table, not just one little house.

24 – Perks of Being a Wallflower

image(4)Sometimes when you are stuck at home with Mom and Dad because your sister got invited to a party there are perks!  Chipotle, Yummmm!

25 – Oh the Places You’ll Go

imageFound this in our yard this morning, the top was about 4 inches across and from this view looked very Dr. Sues to me 🙂

26 – Scarlett Letter

image(3)Extreme close up but I think you get it.

27 – Twilight

image(2)Caught this one going in to gymnastics Tuesday night.

28 – “May the wind under your wings bear you where the sun sails and the moon walks.” from The Hobbit

image(5)This just seemed to fit and showed the beauty of where I live.  Sometimes it is hard to see in the humidity, wind, and flat land.

29 – Outliers

image(6)Thought Doris would appreciate this.  This little guy was clinging to the window outside the YMCA where I teach.  I almost missed him but it was so cool he just looked like he was floating!

Argh! Just realized I missed one, The Book Thief, I had planned on taking a picture of a book that accidentally made the move from Ohio with me.  I had borrowed it to read, never read it and forgot to give it back ooops!  Really truly!

Hugs all!  Hope you have a great weekend!

Posted on

Copic Embellishments and Masterful Scrapbook Design

There is a new article over at Get It Scrapped highlighting just a few of the fun ways to use Copic markers on you scrapbooking layouts.  Here is the page that I added to the article;

Copic EmbellishmentsRiver Walk Lunch by Michelle Houghton | Supplies: papers: October Afternoon and Jillybean Soup; flowers: Prima; wood veneers and label: Studio Calico; sticker letters: Jenni Bowlin and Adornit; lace: American Crafts; ink: Copic; layot design: Scrapbook Coach On A Shelf class

The article highlights many of the coloring and dying techniques that I used on this page so I will let you sneak over there to get all the details.  HERE

And if you are looking for great scrapbooking ideas make sure to put Get It Scrapped at the top of your list!

Here is another bit of inspiration from Get It Scrapped as well.  Have you heard of Masterful Scrapbook Design?