Posted on 5 Comments

Copic Workshops, Do you know all about them?

Today’s post comes with a prize yay yay! Read all the way through please!
We want to make sure EVERYONE knows about the fabulous Copic Workshop classes that are offered through Imagination International, Inc. We have More Whimsical Faces and Hair:

eye

Vintage Values and Mono Tones

Blog Vintage

and Dress for Success; Clothing and Accessories:

plaid disco
Here is a link to all the information:
https://imaginationinternationalinc.com/c…/classes/schedule/

To keep on top of our upcoming schedule and make sure not to miss an opportunity sign up for our newsletter there is a place to sign up at the bottom of this page:
https://imaginationinternationalinc.com/c…/classes/schedule/

You can also find all our new offerings in the side bar of my blog 🙂

Now for the good stuff! If you are willing to leave a little love for me you will be entered to win a Copic T-Shirt! Comment on this post and you will be entered in a drawing for a Copic T-Shirt. I have not 1, not 2 but 10 shirts to give away! Want another opportunity to win? Hop over to my Facebook post and pass along all the fun you can get your name into my drawing a second time.
I will draw names on Saturday June 11th.

Have a Happy Colorful Day!

Posted on

Creating your Copic Collection

“So how many Copics do you own?” A question I hear regularly. It is a hazard of the job. Everyone wants to know how many do I own, how many do they “need” and where do they start. It is a perfect question and EXACTLY the right one to ask when you are starting out with Copics.

I can say at this moment that I own 333. I own most, I have skipped half of the grays, I own the odd numbers of all 4 gray families. So there is 24 that are not sitting on my desk. Then there is the elusive G02, it keeps giving me the slip. He he. Here is a peak at one corner of my desk storage unit.
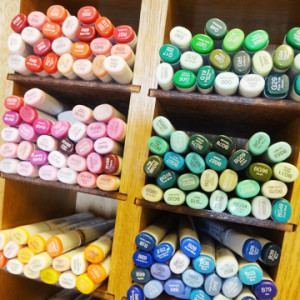
blog choosing

Do I “need” them all? If I were not doing what I am doing, teaching and designing for Imagination International, Inc. I would NOT! But Copics are my career, albeit my dream job, and a wonderful excuse to collect/hoard this amazing product, but I would not have them all if I was not in this job. I would own about 120-150 and would probably hang around that number for a good long time. That is still a lot of markers though right?!

So the final question is where do I start?

I actually wrote a post answering this very question For Get It Scrapped in 2011. I had been slowly collecting my first precious markers often one by one with coupons and sales. So I understood how important it was to make smart purchases. I also at the time could not afford a complete set all at once.

The Copic Markers You Need in Your Starter Set

The information in the post above is still very accurate. I would make some of the very same choices I made back then when forming my own set. But of course as life changes and we change some of my selections would look different. Here is a list of the first 36 markers I would buy NOW if I had none sitting on my desk 🙂 I focused in on what I thought I would be coloring, mostly stamped images of people, plants and flowers, animals on occasion. In general images for cards and scrapbook pages.

B00, B02, B04 – still a favorite set of natural blending blues
BG000 – I love this to fade to white on sky
BV20, BV23, BV25 – a must for creating depth and shadows!
V12, V04, V17 Love how the V04 in the middle pops the purples!
YG61, YG63, YG67 – I like the Greens but if I have to narrow it to 36 I might pick these over my Greens
YG01, Yg03, YG07 – I enjoy these brighter yellow greens these days
Y00, Y21, Y28, Y32, Y35, Y38 – covers blonds and a lot of other hair colors as well as gold and warm hello surfaces
YR31, YR14, YR24 – all a must for hair colors
R21, R24, R29, R59 – slight change to add depth
No RV’s –  I love them but again if I am focusing in on my most used and a small set these would disappear to make room for others.
E00, E01, E93, E21, E25, E27, E29 – not enough Earth tones but my starter picks I use these more then any others

I would add a 0, colorless blender, it is really not an option, not for blending but for all of it’s amazing effects. I would also encourage crafters to find one group of grays, the neutrals is a great place to start and get either the evens or odds you do not need every one of them for most crafting endeavors. There are always a few more that would be nice to have and every artist, YES THAT IS YOU, is going to need to evaluate what will work best for them.

I would highly recommend taking a few Copic classes, live ones if you can find them that supply the markers so you can see how the colors work together and really learn to understand the numbering system before investing huge amounts of money into you collection! If you would like to see the complete schedule of Copic classes we still have coming up in 2016 check them out HERE.

In the mean time I continue to answer the questions at the top regularly, at the classes I teach, here at my blog, and even at Get It Scrapped in connection to my original post above. So ask away! I am more then happy to help!

Have a Happy Colorful Day!

Posted on

Only 3 Certification weekends left!

There are only 3 Copic Certification Weekends left in 2016! Philadelphia, PA May 13-14, Sacramento, CA May 13-14, and right in my back yard in Ankeny, IA June 3-4.

Copic-ColoringFlowersManuelArt-9-24-1521087

Then we move on to Copic Coloring Workshops! Debbie Olson is the first out of the shoot this weekend in Milwaukee, WI! She follows up with another weekend in Grand Rapids, MI June 3-4, Cindy Lawerence is rocking Buffalo, NY with her talented coloring June 3-4 as well and then I am flying out to gorgeous San Diego,CA for a weekend of Copic fun June 10-11.

eye

If you would like more information you can check it out HERE, or in my sidebar.

Hope you can find a weekend near you that you can join us for Copic coloring fun!

Have a Happy Colorful Day!
Posted on

Intro to Copic Coloring

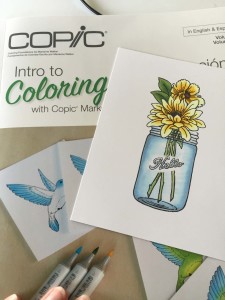
In the past I have shared about the book series being written by Marianne Walker and Imagination International. Her first in the series was Coloring Flowers with Copic and then Faces and Hair. The next is a bit of a re-wind, going back to Intro to Coloring with Copic Markers. It gives a lot of basic information about Copic markers and the how and why they work. It, like the other books, includes a whole section of images by Marianne that are for the owners use and practice.

The book also includes a whole slew of techniques that go beyond basic blending. Thank you Marianne! I tackled some clear glass leaning on the techniques found in the book. I want to try it again, like anything it takes some practice, but here are my results:

Blog Intro

I also decided instead of photo step outs it might be fun to video the process so here you go!

You can find the Intro to Coloring with Copic Markers at Imagination International Inc. and other Copic carriers!

Have a Happy Colorful Day!

 

Posted on

Gasenfude…WHAT?

No I am not learning a new language, believe it or not there is a brand new pen out from Copic! It is a nylon brush pen that is compatible with Copic inks! Yippee Skipee, let’s play!

Now let me share first and foremost that the new Gasenfude pen has it’s own learning curve and needs as much practice to master, maybe even more then your Copics depending on what yo would like to do with it.

Here are the details before I show you my play time:

  • Archival
  • 9 mm long bristles
  • 3.1 mm diameter at brush base
  • Water based, black pigment ink
  • Sturdy, genuine nylon bristles
  • Superfine point for detail work
  • Long, flexible bristles for dry-brush effects
  • Copic compatible ink (will not bleed with Copic markers)

Good stuff right?! So I decided to challenge myself and try my hand at some brush script. It is all the rage you know and really how hard can it be? (She says to herself with some confidence) I’ll be honest, harder then it looks, and took more practice then I anticipated. But like any new adventure oh so very fun! Here is the breakdown of what I ended up with.

Blog 1

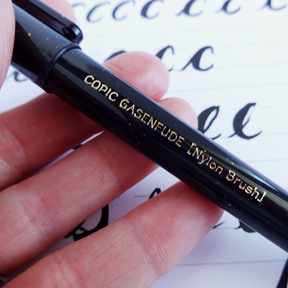
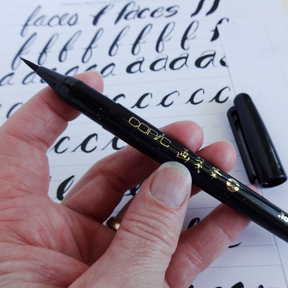
Take a closer look at the pen, I’ll check the spelling 🙂

Blog 2

This shot gives you a closer look at the long nylon brush nib.

Blog 3

It flexes even further then the Super Brush Nib on the Copic Sketch markers. Practice Practice!This style of lettering is ALL about pressure. Press down to get thicker lines, ease up to get thinner lines. Speed is a HUGE factor as well, keep it slow, I mean SUPER SLOW!

Blog 4

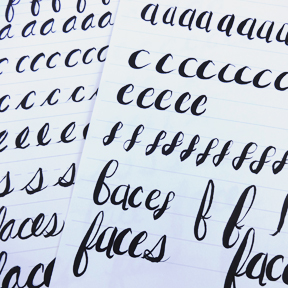
I started with a lot of individual letters. For time, I focused on letters I knew I wanted to use. I looked up a couple different styles on line to get some ideas, but ended up using a style that is mostly my own handwriting.

Blog 5

Yep more practice! and now focusing in on words. Some of my letters link like a cursive style others do not connect, like a standard print. I worked on lined paper and also did some work in pencil first to look at where I wanted thicker areas on each letter.

Blog 6

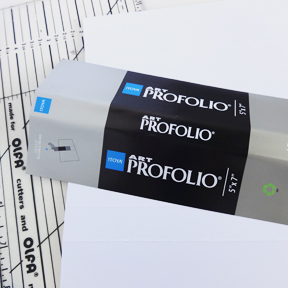
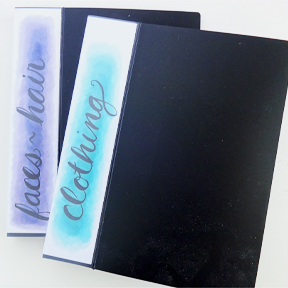
Now on to a project. I am going to add labels to my Copic portfolios. I pulled out the paper from the sleeve around the binding to get measurements. I used a pencil, clear ruler, paper trimmer and bone folder.

Blog 7

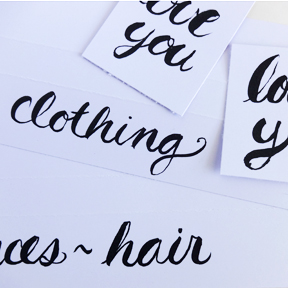
Here are my labels cut, folded, with guide lines and very light writing to give me a better shot at spacing.

Blog 8

Next ink it up with the new Gasenfude and erase all the pencil lines after the ink drys. I couldn’t resist making a couple of extra little tags with the scrap paper.

Blog 9

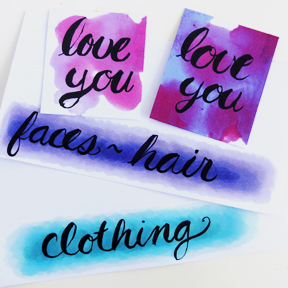
Best part of Gasenfude…compatible with Copic ink! Yay! Color, color, color!

Blog 10

Yep loving it, takes practice and patience, I am not there yet, but I am loving it!

have a happy colorful week!