Posted on 12 Comments

Kraftin’ Kimmie Day 1 of the September Release

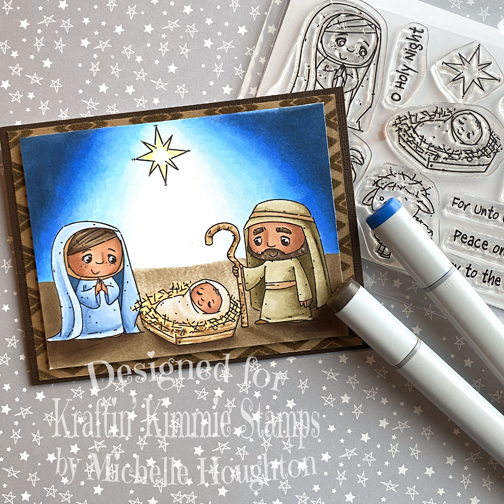
Eeeeee!! Are you ready, are you ready?It is time to begin the September Krafty Peeksat Kraftin’ Kimmie Stamps!!Our Christmas Krafty Peeks begin today and you’re not going to believe the fabulous goodies we have in store for you this month! As you may know our September release is always focused on the HOLIDAYS!!Today is Day One and you *may* have spotted this precious stamp set over the retreat weekend because it was the focus of Krafty Girl, Paula’s pencil colouring class!!This sweet new set is from artist Neda Sadreddin and it’s called…O HOLY NIGHT!!

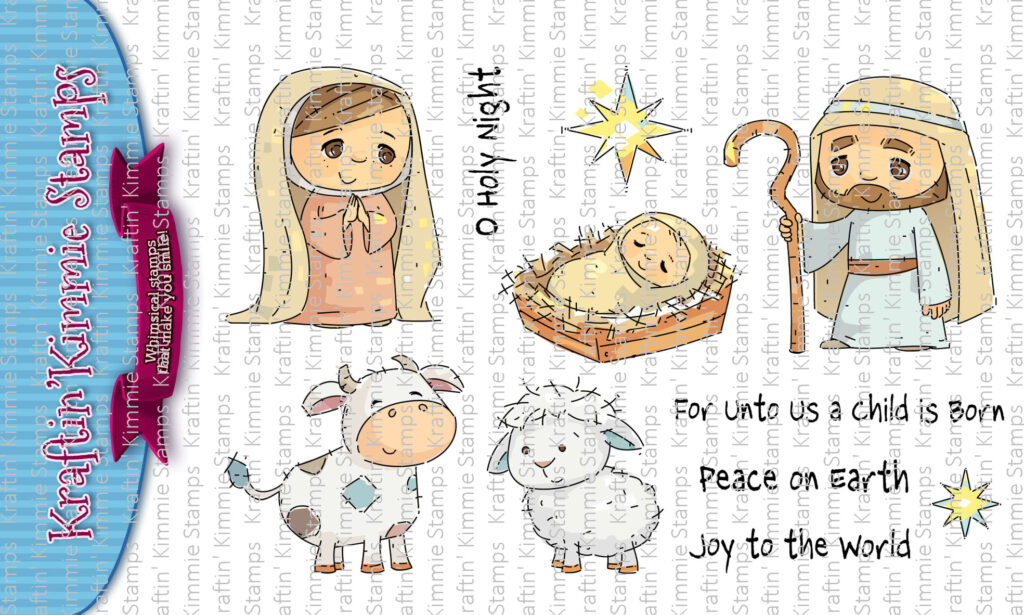
The perfect set for Christmas includes the holy family….Mary, Joseph, the baby Jesus and some adorable, fluffy animals!! This set also includes 4 perfect sentiments and the coordinating stars!As you hop around the Krafty Team’s blogs today you will see the O HOLY NIGHT stamp set in action in combination with our all of our other awesome new September Kraftin’ Kimmie products!You will spot our newest addition to the Krafty Kolours Hybrid Ink rainbow! It’s a soft new blush colour namedPRECIOUS PINK!As always it will be available in full sized ink pads, mini cubes and ink refills!We’ve got TWO brand new Krafty Stencils for this month’s release to help accessorize your creations! They are called….
TWINKLE LITTLE STARS and
HOLIDAY LIGHTS!One perfect for all your spooky cards and the other a fabulous must have pattern for any occasion!And of course, we are adding the perfect new coordinating Krafty Dots for this release! The package includes mini enamel dots in varying sizes in 6 different colours!These ones are calledCHRISTMAS DOTS!You’ll get to see all of our brand new goodies in action over the next few days of September Krafty Peeks and everything will be released at our LIVE Online Release Party in the Krafty Friends facebook group on Saturday, September 19th at 1 pm EST!For now, hop around and check out some incredible designs from our Krafty Team!! Be sure to leave some love on EACH stop on the hop because I’m going to be giving away some krafty $$ to the shop!! PLUS our designers are AMAZING and you should tell them so!  Come on back tomorrow for moreChristmas krafty goodness!See you then!

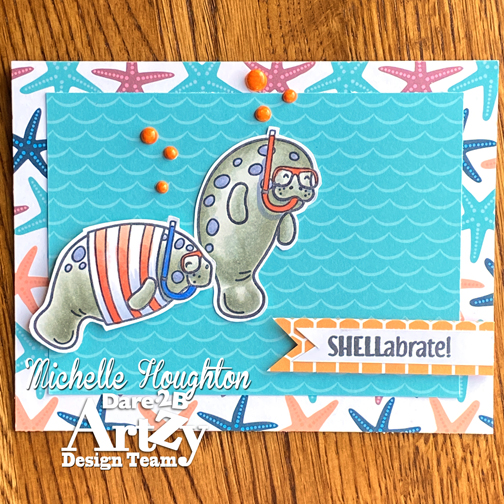
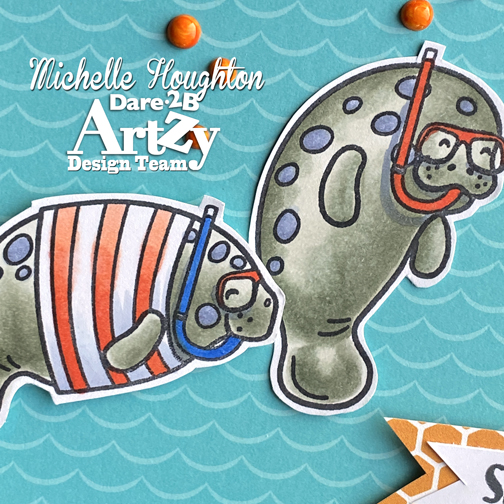
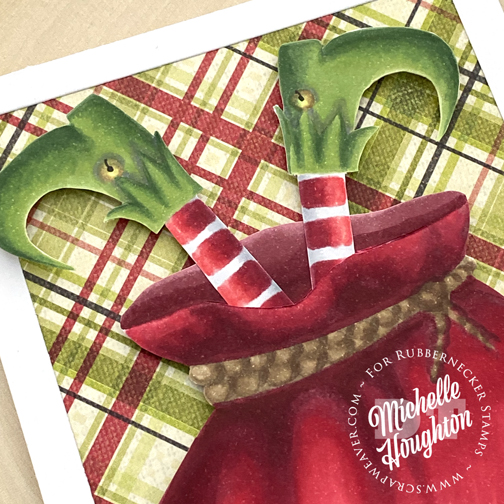
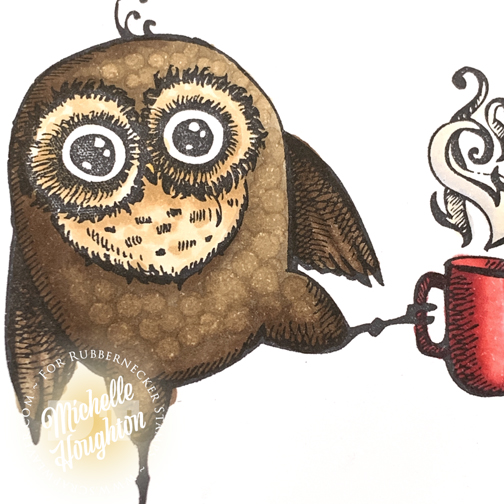
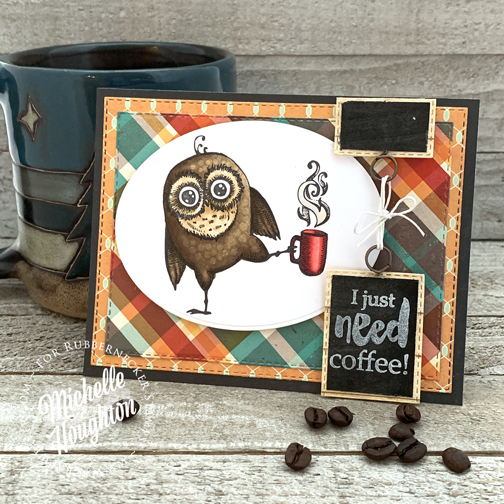
I colored up a few scenes with my Copics. I did different combinations of the images and each of the cards has a similar look. Here are the first two the third will debut with a video tutorial next Wednesday!

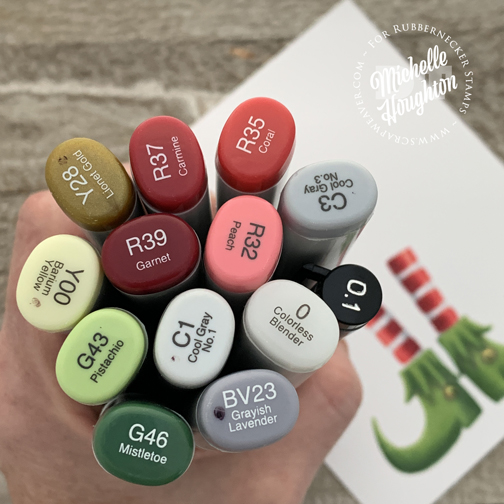
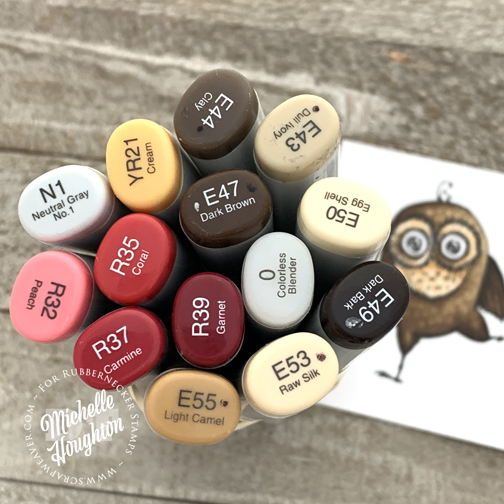
Here is the collection of markers I used for all three images. It went fairly quickly since the combination was the same on each card front. This is the card front I have created a video for. (Next Wednesday)

Make sure to keep hopping through the team! The crafty cards and creations this month will have you inspired to create!

Have a Happy Colorful Day!

Posted on

Manatees!

Hello friends! I have a little Dare 2B Artzy inspiration as you twiddle creative fingers safely at home. I have a fun new thing for you to try to!

I colored up two manatees friends and then had some fun creating my own bubbles to match.

First here is a closer look at the coloring:

I used my Copics of course and if you would like to see this portion in action I recorded it and will have it up on the D2BA YouTube channel tomorrow! I matched them up with some perfect Dare 2B Artzy papers then decided they needed bubbles. Problem! I have packed all my acrylic dots for my move to Alaska and now I am wanting them. Instead of digging through a few dozen moving boxes marked “craft supplies” you know the ones I thought I could do without for a few months I decided to make my own!

It actually is pretty easy and I did have this out of my boxes 😉

I used Nuvo drops in white and created drops on parchment paper. They pop right off when they are dry and I can attach them anywhere with a small glue dot or a favorite adhesive. The best part…drumroll please.

I can turn them into any color I like, matching them to any project by coloring them with my Copics. Now on the larger drops you can see some inconsistency or streaking in the color. If I really was bothered by this I can air brush the drops and the color will be nice and even. But small things like this just don’t get to me and so I just happily colored away!

My new “acrylic dots” tucked onto my card for bubbles and I added a sentiment banner and my two manatees friends are ready to shellabrate.

Tomorrow I will have the video of the coloring portion of the crad if you would like to see the process. I am showing coloring both dark to light and light to dark on the manatees so if you are curious about the difference and the process it might give you a little insight!

Thank you for stopping by today. Check in at the D2BA blog for more inspiration and new monthly challenges! Remember someone wins some D2BA goodness every month!

Stay Safe and Healthy!

Have a Happy Colorful Day!

Thanks for stopping by today! And make sure to check out some of the products I’ve used here in the D2BA store!

Posted on

Elf Boots!

Hidey Ho! Happy Friday to you all! Have you seen all the new stamps from Rubbernecker for the Holiday season? I have been lucky enough to get a couple of them and I have two to share today! One of them was featured in a video Wednesday over at the Copic In The Craft Room YouTube channel.

For this release there are several sentiment stamps and I have been blown away watching what the Design Team is creating with them. They are so creative with ink and stencils and… I kept mine very simple and created a shaker.

I used the new stamp as well as a nesting oval die set from Rubbernecker.

Here is my second card featuring the Elf Boots. They are so stinkin’ cute! I tried a new ink with some no-line coloring it’s Called Ink one 3. Worked great and you can get a peek at it on the new video!

Here are the colors I used on the elf legs and boots. The Multiliner I used to add the small detail back into bell.
Here is a close up of the boots and legs. The new ink disappeared right away and even next to the white stripes of the socks my lines disappeared with the lightest touch of C1!
I created a large Santa sack for my little elf to fall into. I debated about a chimney or even the just the bottom of a tunic and decided on this. It makes me giggle 😁

And here is a link to the video of coloring the boots and socks!

To find the stamps and the dies I used to create the cards click the Rubbernecker below and head over to the store!

Have a Happy Colorful Day!

Posted on

Coffee Anyone?

Hello crafty friends and family it is Friday! Woo Hoo! super excited to be sharing a card this week featuring another Rubbernecker Stamps image. I have been an owl fan for a long time and Rubbernecker is another company that has an adorable set of these cuties!

I colored my guy up with Copics of course!

body – E43, E44, E47, E49, E50 (for texture) chest and eyes – E50, E53, E55 beak – YR21 mug – R32, R35, R37, R39, Colorless Blender steam – N1, E50

I used several Rubbernecker dies and a second coffee themed set for the sentiment.

I also have a video showing this little guy getting all colored up! If you have time stop by the Copic In The Craft Room YouTube channel and check it out! Here is a link 😉

https://www.youtube.com/watch?v=IYW0fpC4GHE

Have a Happy Colorful Day!

Thank you so much for stopping by today, hit the Rubbernecker banner below to head to the RN shop!