Posted on

NEW Copic Multiliner in Lavender

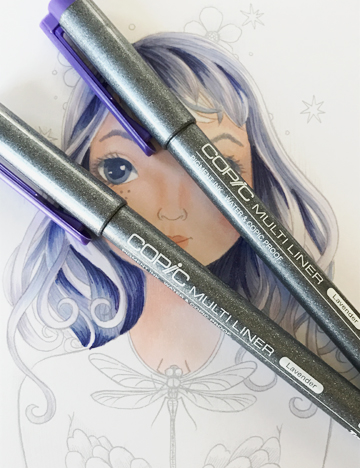
There is a new color in the Copic Multiliner line-up, Lavender. I LOVE Copic Multiliners! I love the different nib sizes, love that they write so smoothly and particularly that I can color over them with Copics!

I use them in my day planner, to draw doodles, to sketch and then color with Copics. I usually have one in my purse and backpack as well as attached to  my planner and sketchbook.

To feature the newest color in the collection I picked out a beautiful image by Jeremiah Ketner and colored it using my Copic sketch markers and Lavender Multiliner.

blog-ml-lavender-1 
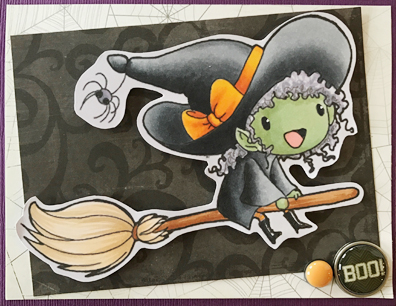
Here is a close up so you can see the detail of the Multiliner work:

blog-ml-lavender-2

For those of you that are still scratching your head a bit I even filmed my coloring of this image so here is a link to the video as well:

I know this is a pen that will pop up in my work regularly AND now that we are focusing in on one of our new Coloring Workshops for 2017, Hand Lettering I am excited to add some color to my hand lettering practice as well!

Make a note to check out the Multiliners if you never have before. If you are regular Copic user they really are a nice companion tool to your Copics. You can find all the details over at Imagination International, Inc.

blog-ml-lavender-3

Have a happy colorful day!

Posted on

New Copic video AND FREE Digital image!

As we continue into the October month, and I have managed to check a few MAJOR projects down to size I have had a great time going through my stamps to collect a group for fall and winter videos over at Comic In The Craft Room. This week I am featuring a digital stamp from an artist that I discovered way back when I was first starting with Copic markers. Jayleen Weaver, or GuruKitty as she is known on-line is a FAB-U-LOUS marker artist and Comic genius and has a fun playful style in creating characters. For a short while she even created a few digital stamps.

Unbeknownst to me she is no longer creating digital stamps. I always TRY to use stamps that my followers can still get and play along with me on so I did a hunt to find her on-line again and discovered this fact. BUT, I did make contact and ask if it was OK to use the older stamp that I still have and if I could direct people back in her direction. She said not only would that be fun, but that what the heck she’d even let you all have the stamp! So you have permission directly from the artist Jayleen Weaver to copy the image below and use it in your art. Like any rubber, acrylic or digital image she would GREATLY appreciate that if you post or share your art that you give her credit for her art! And if you have a friend that would like the image have them come this way and pick it up for themselves, don’t share the blank image on your blogs or on Pinterest or other social media outlets PRETTY PLEASE!

cutewitch1

You can find Jayleen Weaver at www.gurukitty.com and can credit her there as well.

Here is the video link over at YouTube with the coloring I did:

And here is the finished card :

cute-witch

Both Jayleen and I would LOVE to see what you create with her so if you would like to share give us a link to your work here or over at Copic In The Craft Room!

Have a Happy Colorful Week!

Posted on

X-Press It Glue Markers

So I color A LOT! Like really A LOTI create a video and photo tutorial each week, I travel and teach a weekend full of classes most months as well as teach classes locally about once a month. To tip it off I am creating new manuals and then of course I just like to color so I try to squeeze in some fun coloring just for me every once and a while!

Then I end up with a mountain of images just sitting. So I finally break down and mass produce cards. I have a process and thought you might get a giggle to see how I do it. My cards are not always the stunning works of arts that I would like them to be, but I get’er done and besides they have pretty art work on them right? That counts right?

1 – I start by pairing a large group of images with a card base color and then at least one or two coordinating papers to go with it.

blog-cards-1

2 – I run my images through my Brother Scan and Cut if I want them fussy cut. Some will just get trimmed down, but lots will get fussy cut and the Brother scan and cut can do a whole group all in one pass!

blog-cards-2

3 – Then I am ready to start assembling cards, I try to find a couple trims and patterned paper sometimes to go with images.

blog-cards-3

4 – I fold all the card bases and attach all the patterned paper or card front layers. I often will use the X-Press It broad tip glue marker because it is easy, fast and a great adhesive.

blog-cards-4

5 – Then comes the fun part I add the images and just one or two little details to add a little life to the card. I often find myself reaching for both the broad and fine tip X-Press It Glue markers since they are quick and easy and can get into all those small little details. Again I keep my cards SIMPLE. But then I have a stack of cards for any occasion and can pull them out for happy mail at any time! If you are interested in the X-Press glue pens they come in 3 sizes and can be found right HERE on the Imagination International, Inc. web page.

blog-cards-6

Hope you have had time recently to be crafty no matter what you created!

Have a Happy Colorful week!

Posted on

Shadows and Shading by Marianne Walker

One of the questions we get asked most often in Copic classes is how do I shade things? Where do I put the light source, then where do I go from there?

If you are person who likes a simple straight forward guide to have on hand this book is for you!

blog-book-1

Marianne Walker created this book with those questions in mind. She focuses in on the essentials and give you a compact guide to creating shading and shadowing. It is a great how, and why book that can become your go to reference when facing tricky lighting situations.

One of the pages I love the most is a reminder of how to break a complex shape, like a person, into the basic shapes for shading.

blog-book-2

I can even use the tips and tricks on shading faces. It is all in there. The images used below are from DanaClarkColors.com

blog-book-3

blog-book-4

I love how straight forward and no nonsense the book is and how easy it is to find a plethora of useful tips and information on lighting, shading and shadowing.

This week at Copic in the Craft Room I colored the boys face above and talked about how I used the book as a reference as well. Here is that video if yo are interested:

You can get the book right from the Imagination International, Inc site.

Hope you have a happy colorful week!

Posted on

Just a few opportunities left! Copic Coloring Workshops 2016

Did you know that there are only 6 Copic Coloring Workshop weekends left in the 2016 season? Make sure not to miss these fun, informative classes when they hit your vicinity!

I will be in Sacramento, California in just 3 short weeks and I still have spots left…SO COME PLAY WITH ME!

All three classes are a blast and have amazing techniques to learn and tips to take with you to use on your Copic coloring projects.

Advertising image 2016

The dates I will be in Sacramento are Friday, September 23rd and Saturday, September 24th. We have a great group shaping up and I would love for you to join us! Sign up right HERE! Scroll down to Sacramento and get yourself on the list 🙂

Hope to see you soon!

Have a Happy Colorful Day!