Posted on

Slimline Color Burst Trees

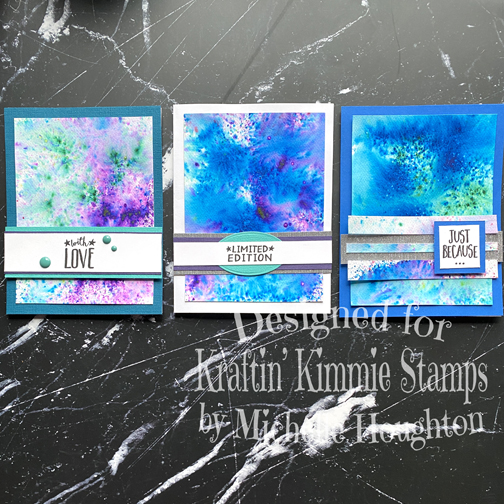
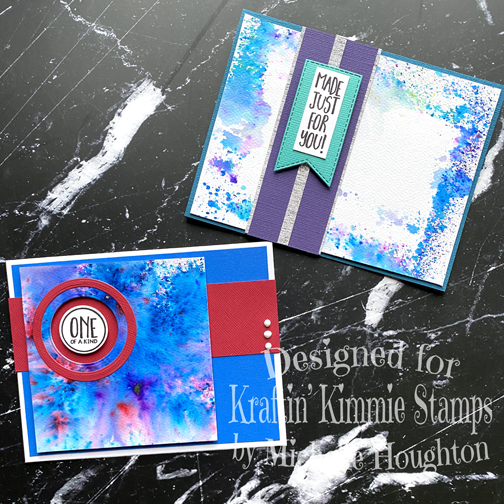
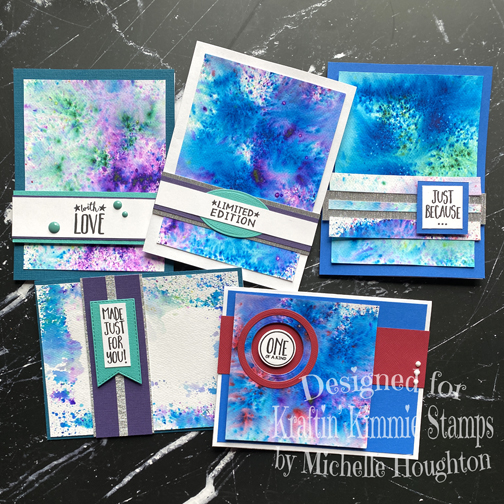
Hey all I am making colorful messes today and playing with some gorgeous slimline dies today!Take a peek at my colorful, messy process. Happy New Years Eve by the way!😁

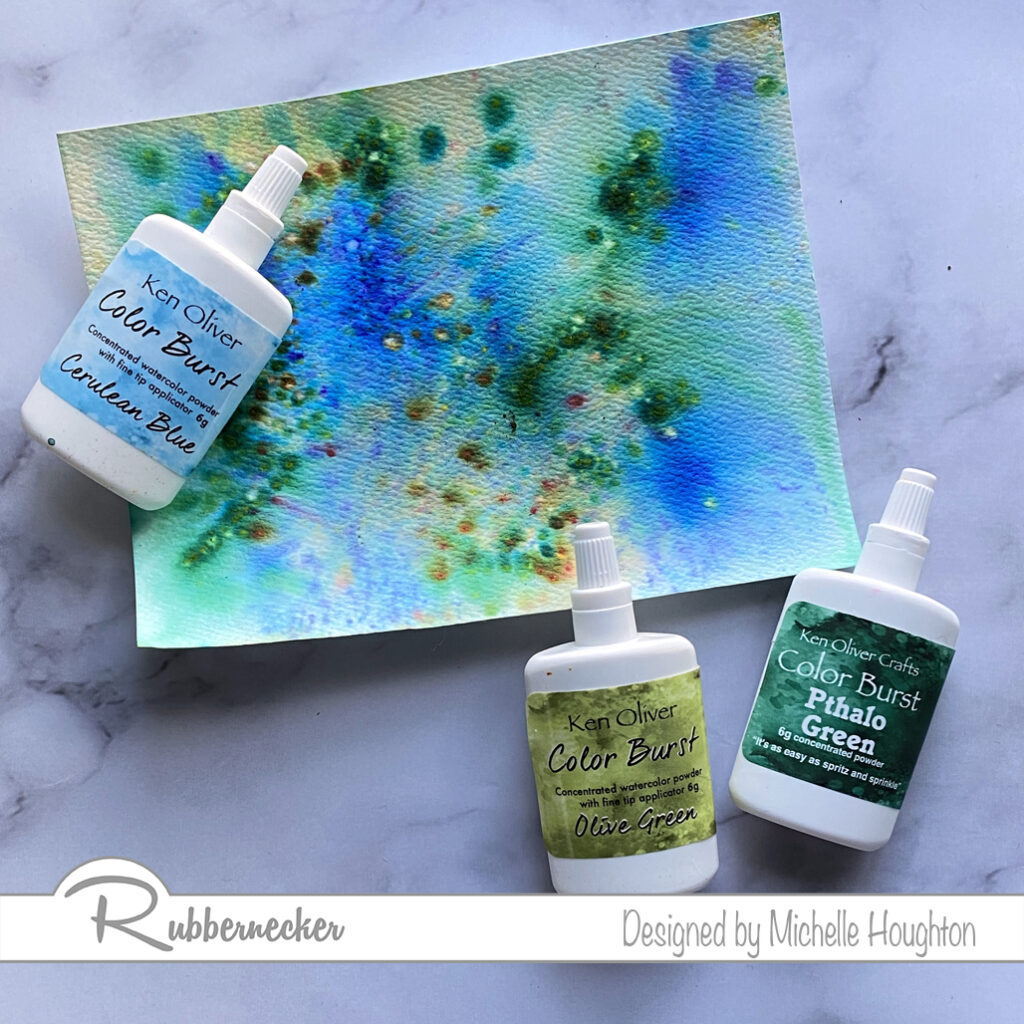
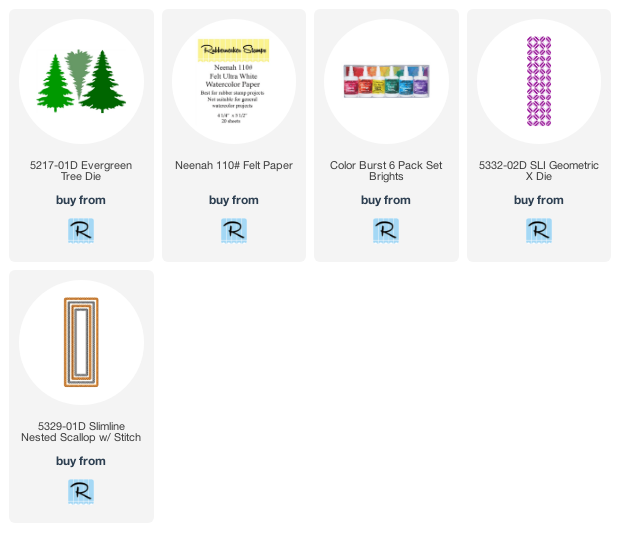
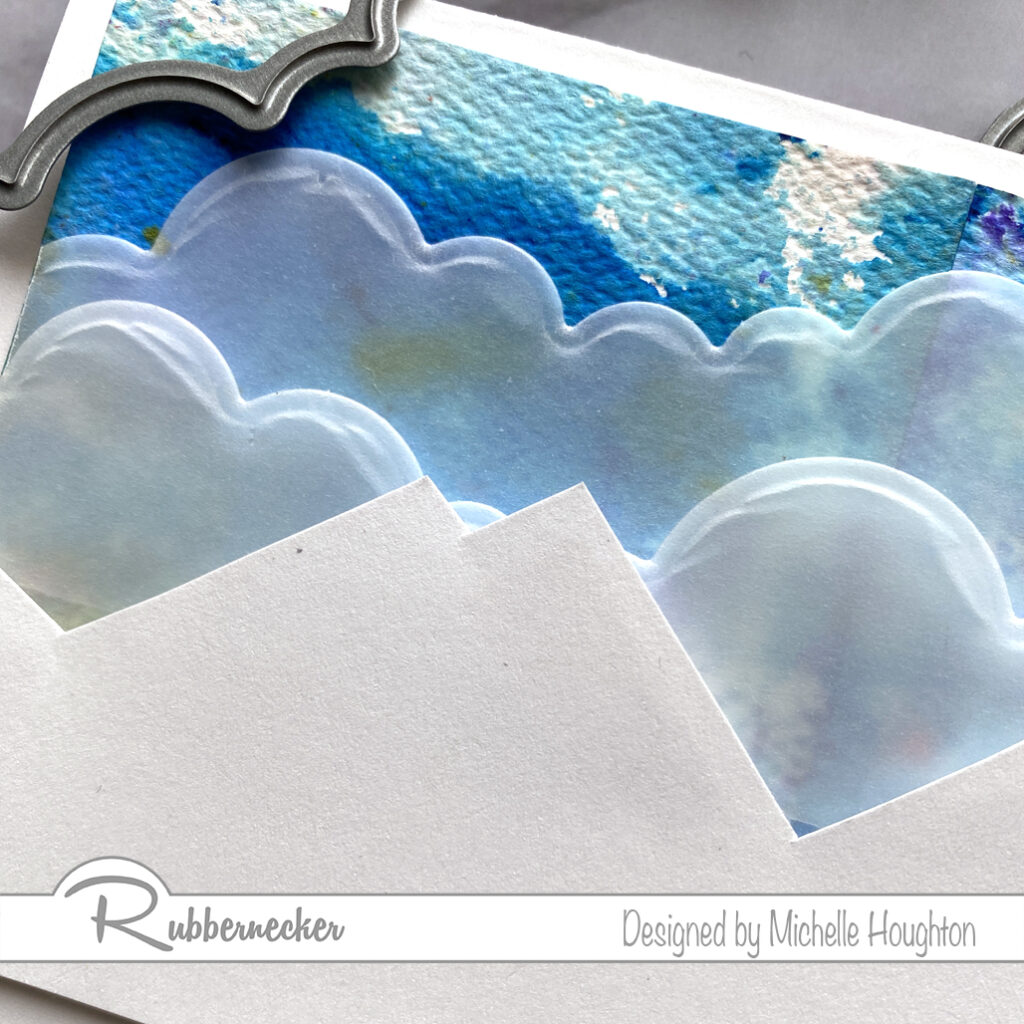
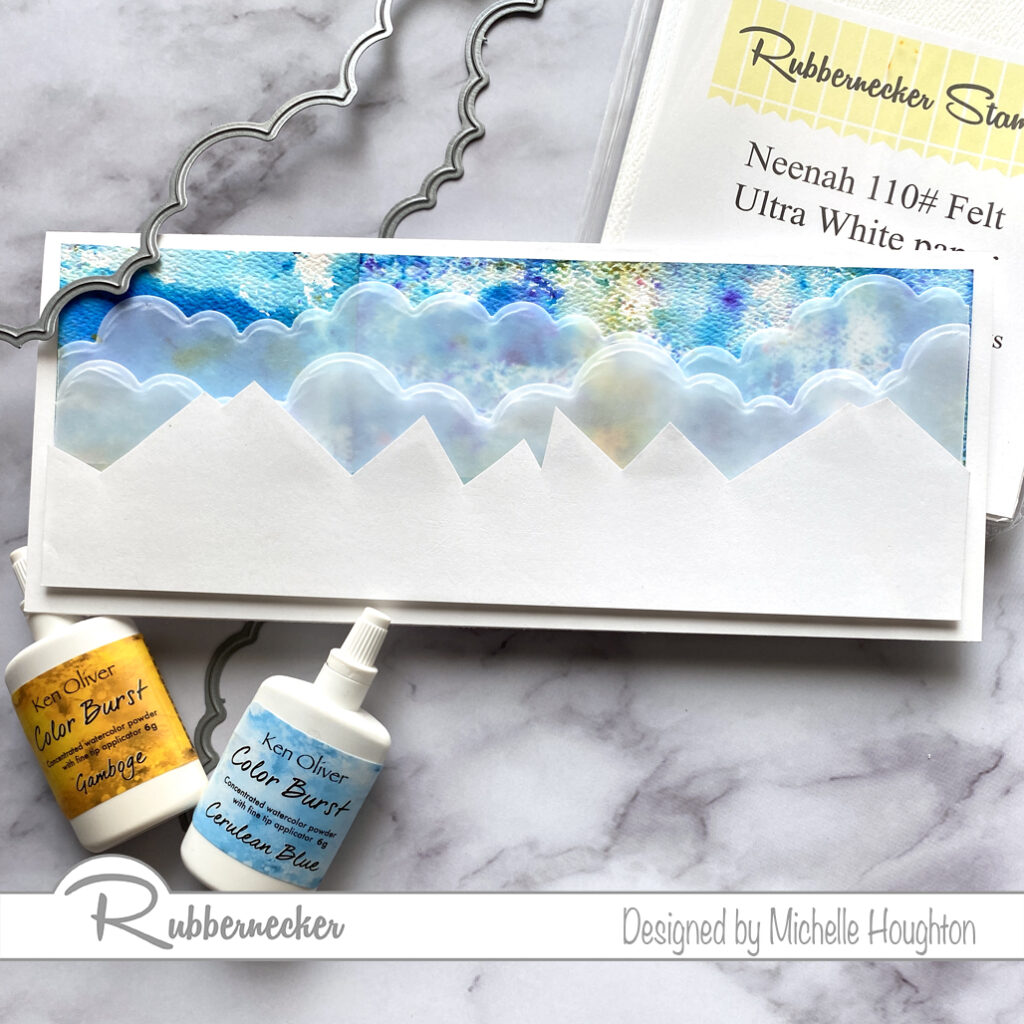
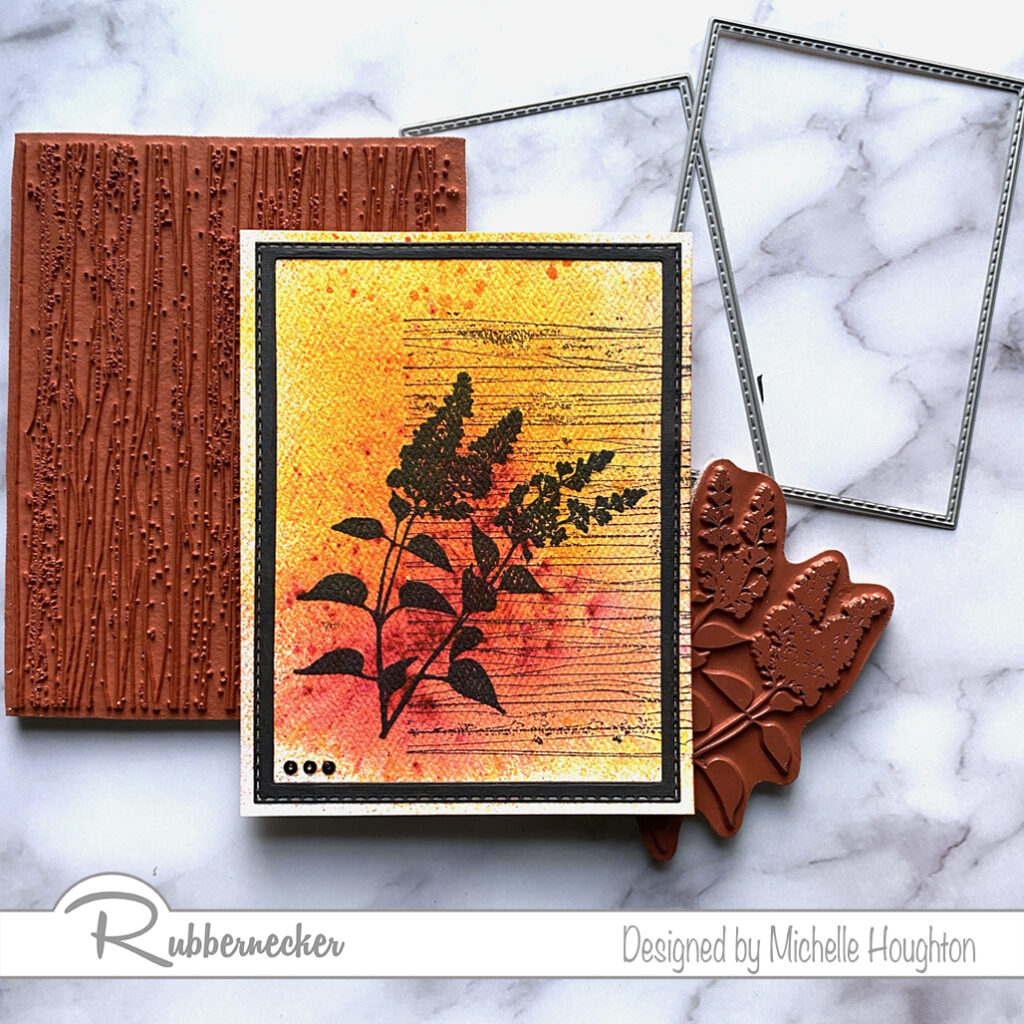
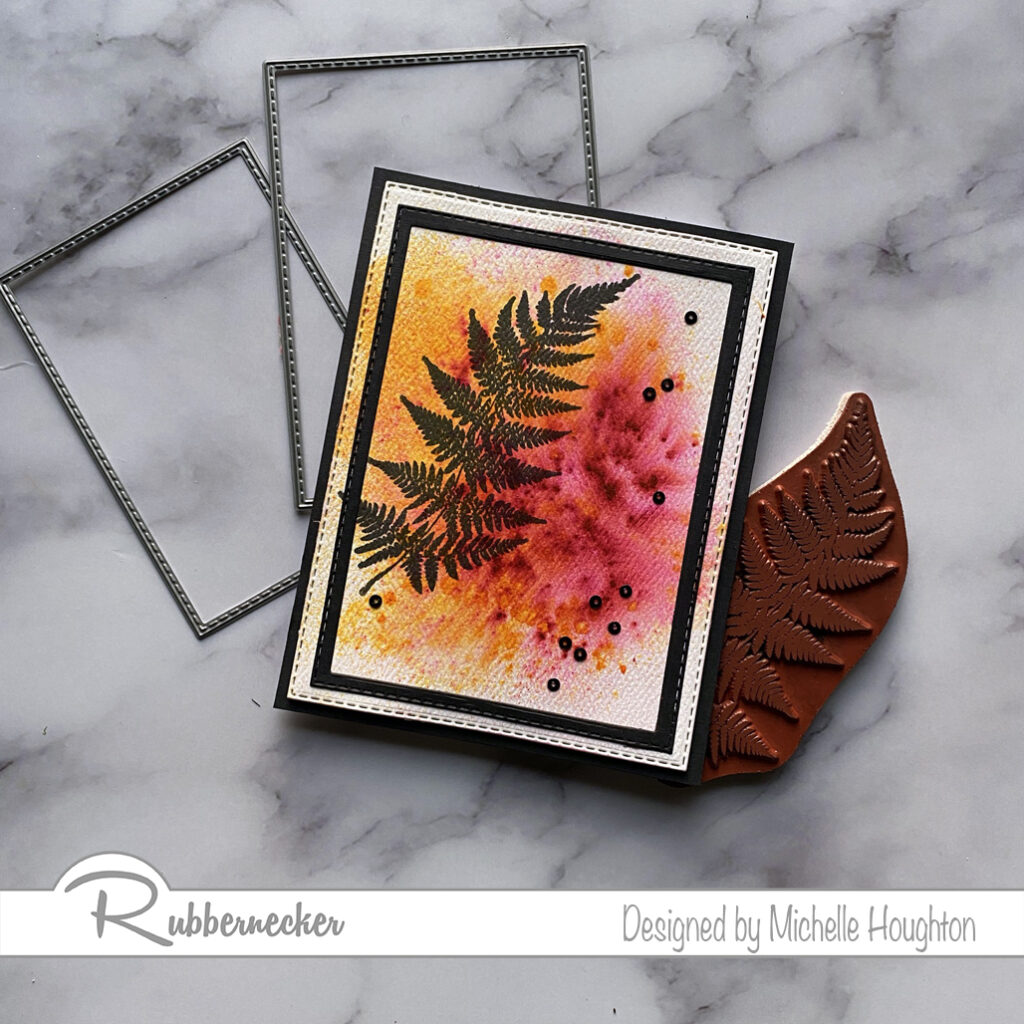
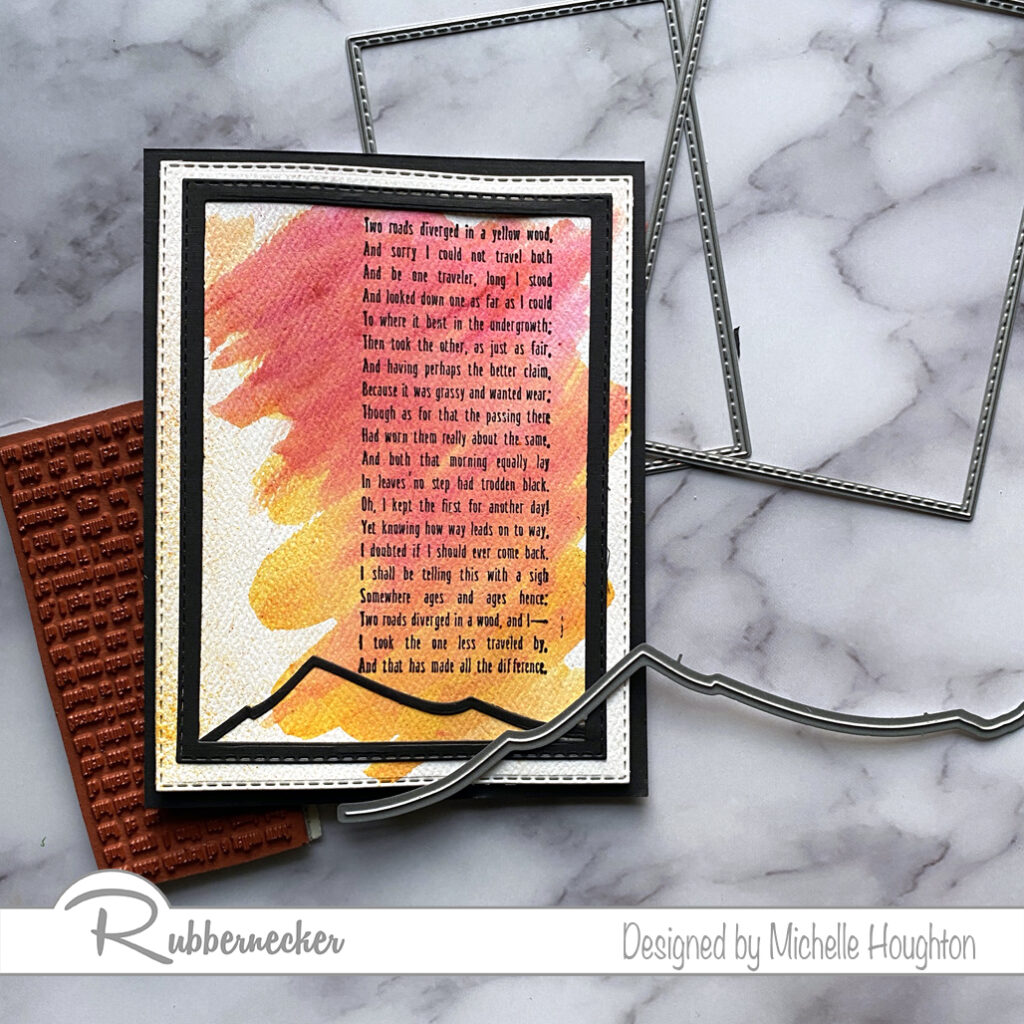
  • Dust 2 or three colors of Color Burst onto Neenah Bright White Felt Watercolor Paper.
  • Spray the paper with eater and allow the Color Burst to spread.
  • Let the paper dry completely.
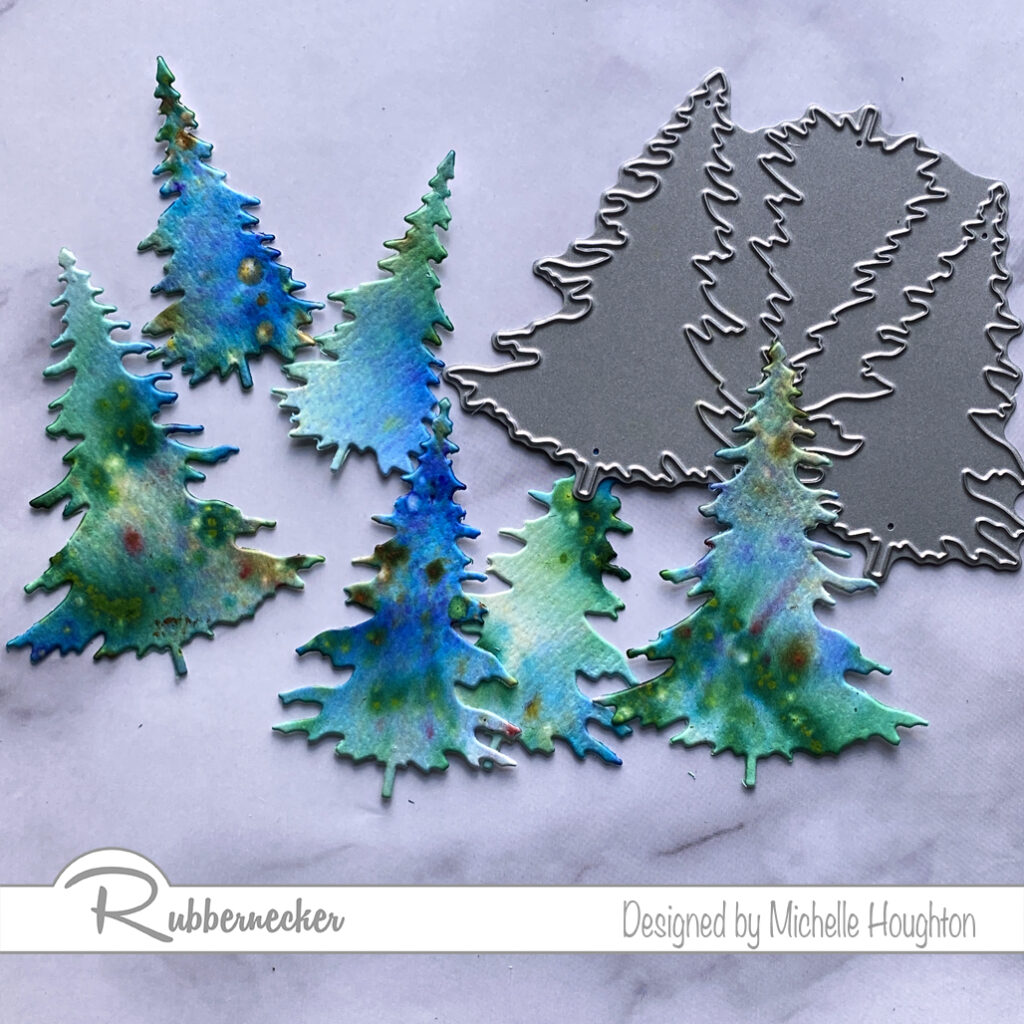
  • Use the Evergreen Trees Die to cut a small forest of trees out of the colorful paper.
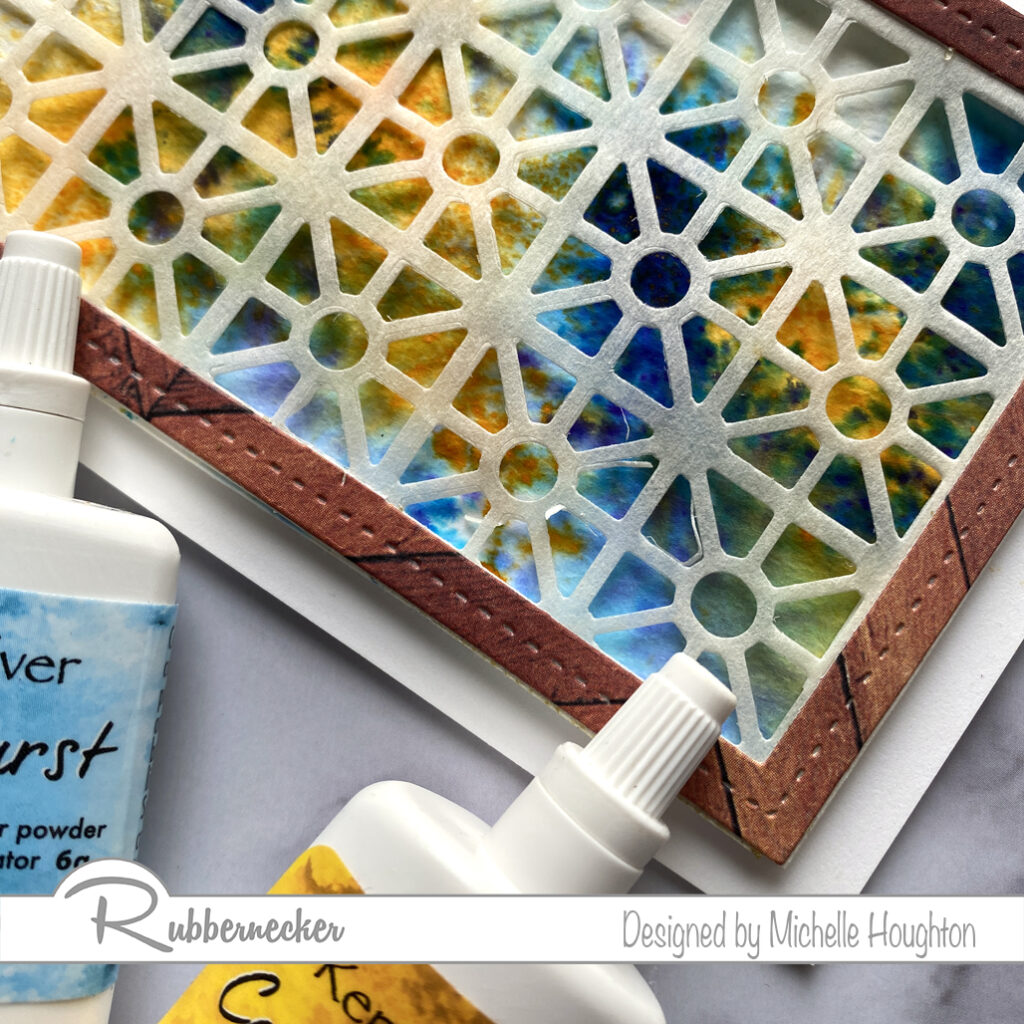
  • Use the slimline Geometric Die on a silver metallic cardstock.
  • Use one of the nesting slimline scallop dies on the silver paper you just cut with the geometric die.
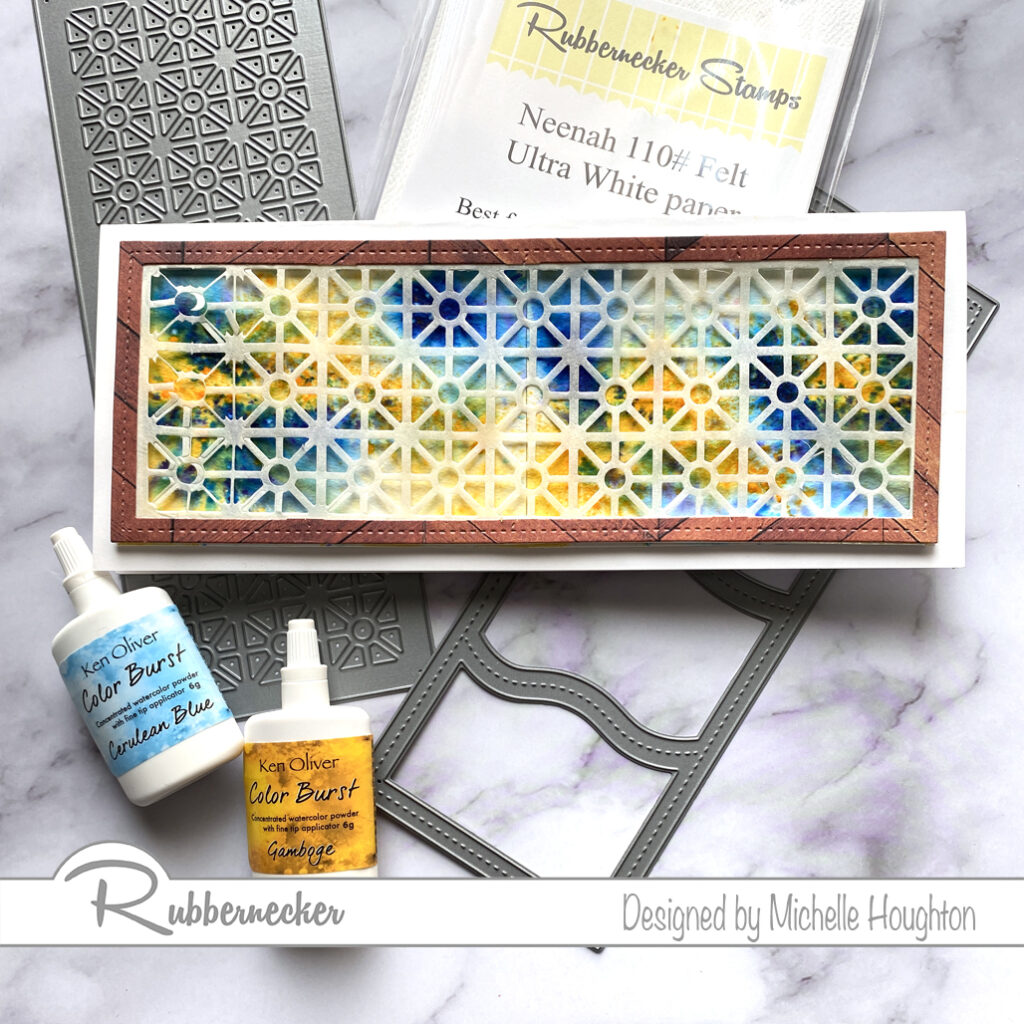
  • Use a second nesting slimline scallop die to cut a larger white base for the layers.
  • Adhere your layers working from the card base up.
  • Pop up the metallic silver layer.
  • Pop up two or three of the trees to a third level.

Thank you so much for stopping in! I am praying that all of my friends and family are healthy and safe moving into the 2021 year. I am praying for a healthier, more open year for all of us!

Have a Happy Colorful New Year!


Posted on 10 Comments

Day 2 of the November Kraftin’ Kimmie Peeks!

Welcome back to Day TWO of our November Krafty Peeks!Are you excited about what you’ve seen so far!? Are you ready for more?
I hope your answer was yes because we’ve got more fabulous fun for you today!The stamp set we are ‘peeking’ for you today is from artistMelissa Baker-Nguyen and it’s called…..HANDMADE SENTIMENTS!!

This adorable set features lots of fabulous designs for the backs of your cards, for stamping on envelopes and tags, for gifts and lots more! SO many options and this one is a must-have in your krafty collection!Check out HANDMADE SENTIMENTS in so many gorgeous creations today as you hop around the Krafty Team’s blogs! You’ll also see the new stencils, hybrid ink and krafty dots along the way! Be sure to leave some love at each stop on the hop because I’ll be giving away some krafty $$ to the shop!You’ll see more of our November goodies tomorrow and then everything will be released after our LIVE Online Release Party on Saturday afternoon at 2pm ET in the Krafty Friends facebook group!For now, check out all the sweet goodness in today’s hop!
See you tomorrow!

I looked to the design team for a little inspiration on this set. My head immediately went to the back of the card and I was not disappointed! I kept my cards pretty simple. I used Color Burst to create bright backgrounds and then used the sentiments for messages on each of the cards. This set is great for creating larger batches of beautiful cards in no time flat!

Keep it simple friends! Cutting, gluing and layering paper just feels good, it does not have to be complicated! Have fun! Check out all the DT inspiration through the link at the bottom of the post. Make sure to scoot by tomorrow for one more day of peeks and the release of all the new Krafty goodness!

Have a Happy Colorful Day!

You are invited to the Inlinkz link party!

Click here to enter
Posted on

Happy Veteran’s Day Poppy

Happy Veteran’s Day. Thank you to those that have served and are serving this amazing country I call home. Thank you for defending my freedom. I am celebrating the day sharing a poppy image created by Ann Corbiere-Scott. This is part of her Lucinda set. I used my Copics on the poppy and Color Burst to create the background. I am loving how the two combined so well.

I kept the image fairly simple and used three color groups but very bright and vibrant! For the background, to keep it really light, I used the leftover Color Burst on my craft matte. It worked perfectly for a subtle soft background behind the bright flower.

I fussy cut the flower and then colored a second flower center and fussy cut it out as well. I mounted the watercolor paper on the card base, after wrapping it with twine. I added a touch of color to one of the included sentiments and then attached it to the lower left corner and popped the lower up in the upper right corner.

A few dots of glossy accents finished the card and adds a little sparkle. If you would like to more of Ann’s beautiful digital art head over to her shop! Thank you as always for stopping in today. I hope you are staying healthy and happy through this fall.

Have a Happy Colorful Day!

Posted on

Slimline cards with Color Burst and new Slimline dies

Good morning! A couple SIMPLE new cards today using Color Burst and a couple new dies from Rubbermoon! I am new to both Color Burst as well as slimline cards so fun fun! I started with a couple backgrounds withColor Burst and watercolor paper, then used some dies to create some simple layers. Check out the steps I used below:

  • Sprinkle Color Burst Cerulean Blue and Gamboge on Neenah Felt Ultra White paper.
  • Spritz the paper with water.
  • Let paper dry.
  • Split the paper in half lengthwise.
  • Attach the watercolor paper onto a slimline card base leaving a quarter inch border.
  • Use the cloud slimline die to cut 2 or 3 cloud layers out of vellum.
  • Trim a sheet of white cardstock to be a silhouette of mountain tops (there is a die for this as well, I just don’t have this one😉).
  • Attach the clouds directly to the Color Burst background .
  • Pop up the mountains on top with foam tape.
  • Same start for this card, use two sheets of the Neenah Felt Ultra White Paper and sprinkle Color Burst Cerulean Blue and Gamboge on both.
  • Mist the paper with water.
  • Let the papers dry.
  • Trim the two sheets so they fill a slimline card base leaving a quarter inch border.
  • Use the new OPC Geo Squares die on a rice paper then used the OPC Wavy die on a patterned paper.
  • Trim the waves out of the Wavy die cut so only the frame is left.
  • Attach the patterned paper frame to the edge of the rice paper.
  • Use foam tape to pop up the rice paper and frame above the Color Burst background.

Hope you enjoyed seeing a little of my creative process! Sometimes it is more about making messes and playing with fun colorful materials. This was one of those creations for certain! Thanks for stopping by, all of the Rubbernecker products I used can be found with the links below!

Have a Happy Colorful Day!


Posted on

Happy Halloween from Rubbernecker

We are celebrating Halloween for 13 days over on the Rubbernecker blog and I am up for day #1! I decided to play with Fall/Halloween colors. I have not had the opportunity to play with Color Burst before and decided this would be a super fun day to do it. I created three cards with Color Burst backgrounds, beautiful silhouette stamps from as well as dies and Neenah Felt Ultra White Paper all from Rubbernecker. Let’s take a look.

I tried three different techniques with the ColorBurst so let’s look at each card.

  • Wet a sheet of Neenah Felt Ultra White paper with water. You can do this with a mister or paint brush.
  • Shake small amounts of Color Burst onto the wet surface.
  • Set the page aside to dry.
  • Once dry, use a background stamp and silhouette stamp in black to create a dramatic image.
  • Use nesting rectangle dies to create a black frame out of cardstock.
  • Layer the card front, frame and a few black sequins or dots on a card front to finish.
  • Shake Color Burst directly onto a sheet of Neenah Felt Ultra White paper.
  • Use a mister to spray water on top of the dry Color Burst.
  • Set the sheet aside to dry.
  • Once the page is dry use a silhouette stamp and black ink for a dramatic effect.
  • Use rectangle nesting dies to trim down the Color Burst page and create a black cardstock frame.
  • Layer a black card base, Color Burst background, black frame and black sequins or dots to finish the card.
  • Sprinkle dry Color Burst onto a sheet of Neenah Felt Ultra White paper.
  • Use a wet paintbrush to lightly run over the Color Burst creating a watercolor background.
  • Set the sheet aside to dry.
  • Once the paper is dry use a stamp with a lower quote or a detailed background through the watercolor.
  • Use a mountain die and cut a thin mountain outline by running it through your die cut machine twice.
  • Use nested rectangle dies to trim the watercolor background and cut a black frame out of cardstock.
  • Layer a black card base, the watercolor background, the slim mountain silhouette and a black frame.

Thank you so much for stopping by today and make sure to keep watching Rubbernecker for the next 12 days to see heaps of Halloween inspiration!

Have a Happy Colorful Day!