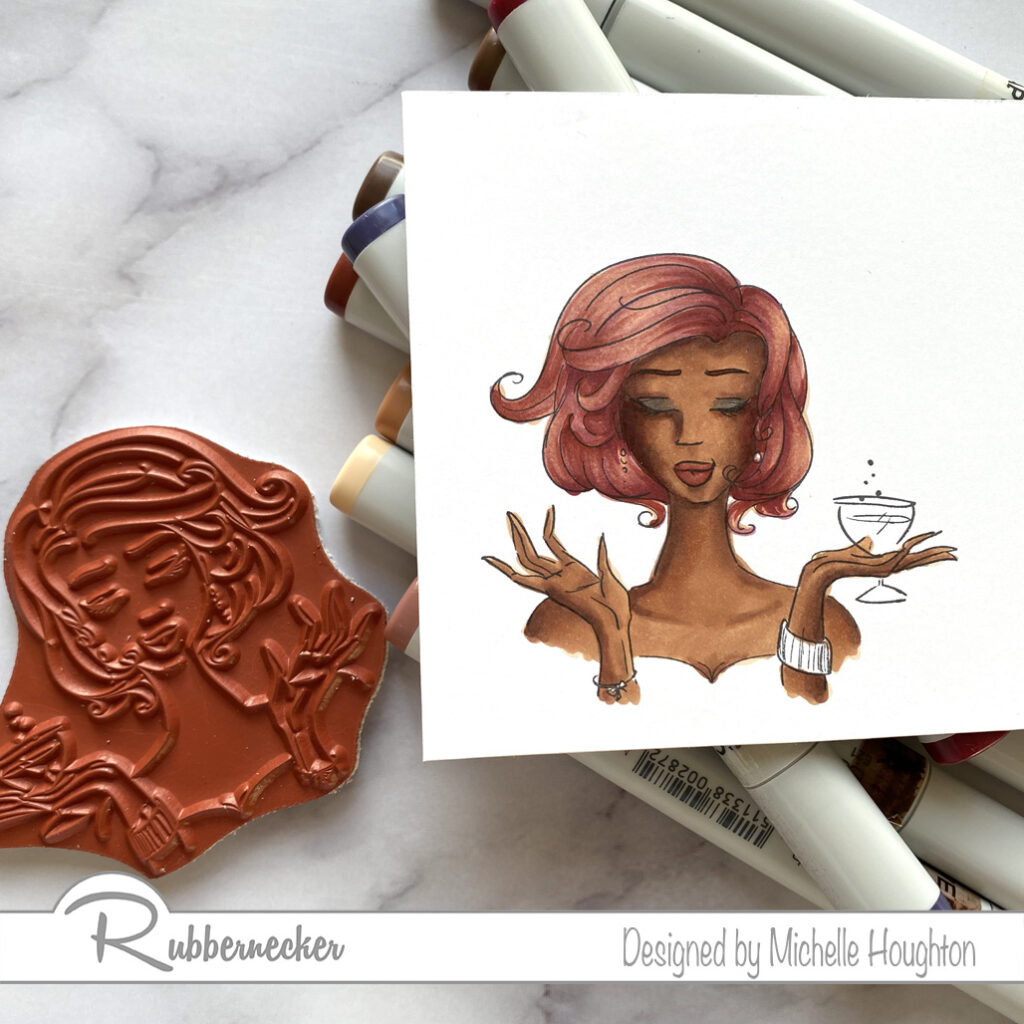
I have a final tutorial with darker skin tones (at least for now). Using one of the beautiful images from Rubbernecker Stamps. You will find the steps and colors I used below and then next Wednesday there will be a video tutorial posted on both the Copic In The Craft Room YouTube channel as well as the Rubbernecked YouTube channel.
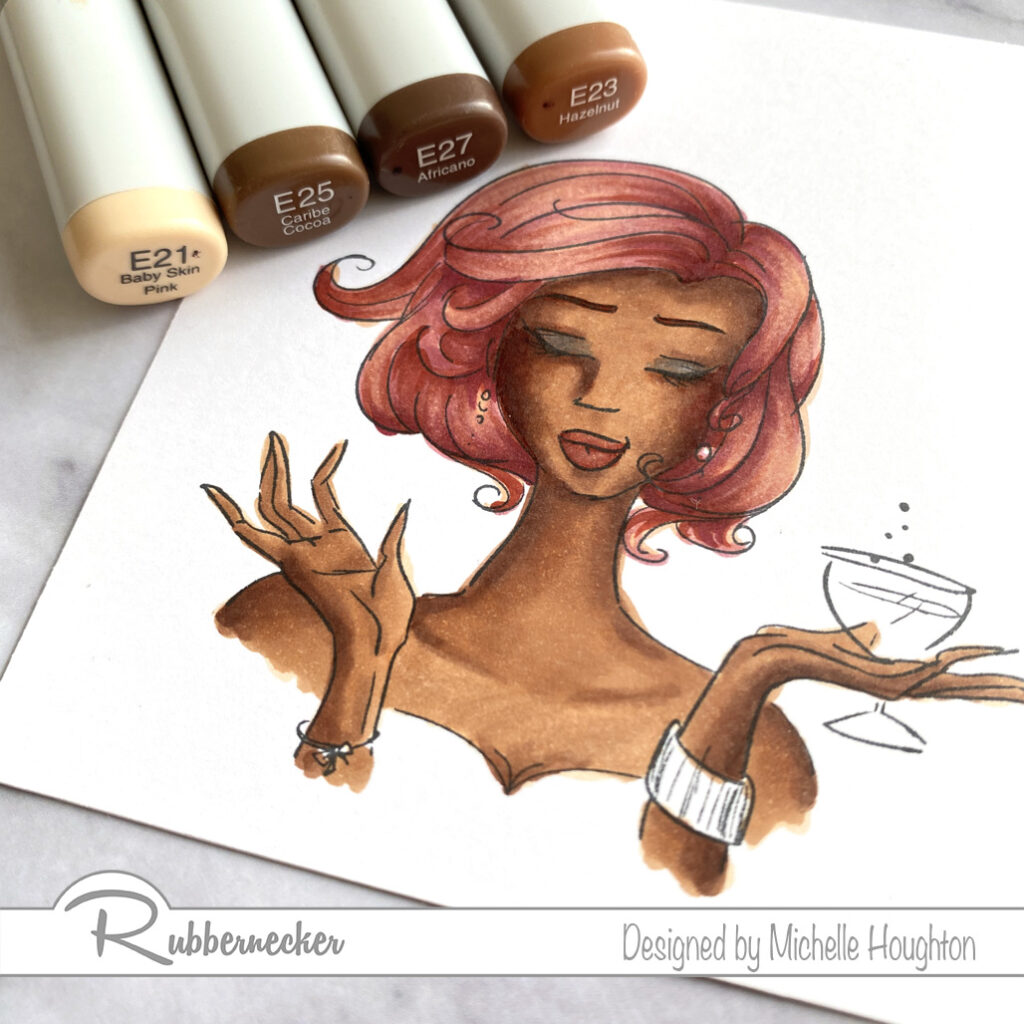
- Starting with the skin base all of the skin areas with E21.
- Use a darker mid-tone to map out the shading on the skin areas, E25.
- Use a darker tone in smaller amounts to deepen the shadow areas, E27.
- Blend the skin smooth working back through the darker mid-tone and then covering the light base color with a light mid-tone, E25, E23.
- Add a deep red earth tone to add color to her cheeks and blend it in with the skin tones, E09.
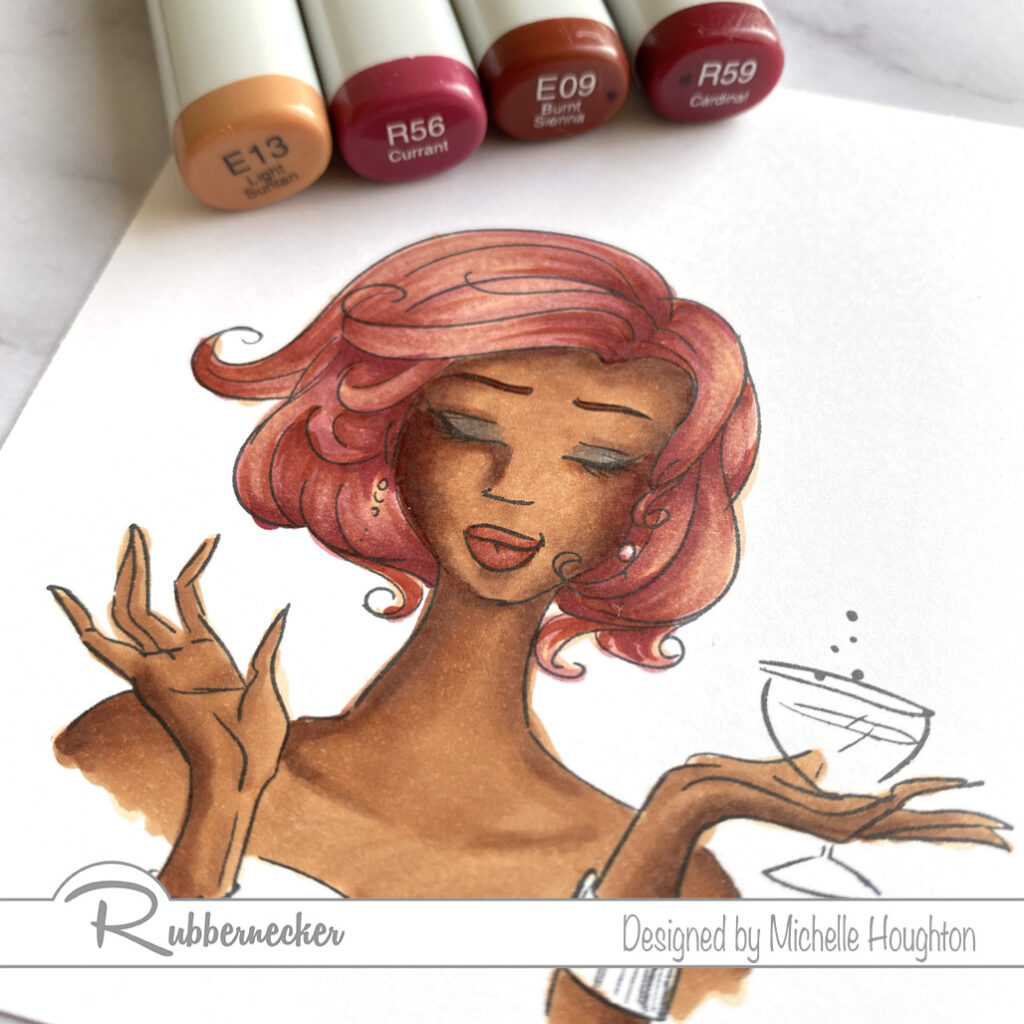
- Base all of the hair with a light earth tone, E13.
- Use a series of red and earth tones to create texture and volume to the hair with small thin flicks, R56, E09, R59.
- Work with the 4 hair colors to smooth and enhance texture to your personal desired effect, E13, R56, E09, R59.
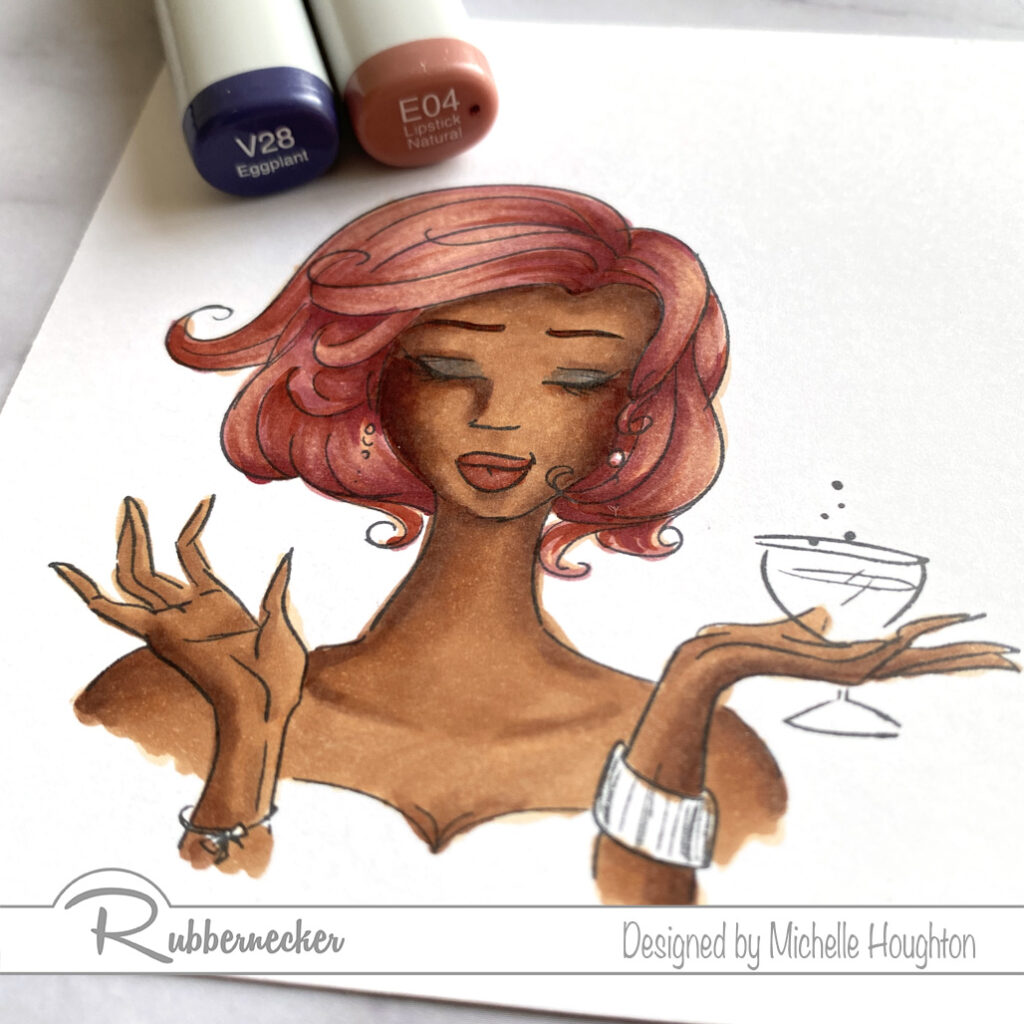
- For lips use two earth tones to create shape and color, E09, E04.
- Use a rich color to add a touch of color to the lids, V28.
Thank you so much for stopping by and checking in on my art. If you have not done so take a second and subscribe to my newsletter up to the right on my blog. I only send a few notes out a year and there will be news about Copic College and live events coming out in the next week!
Have a Happy Colorful Day!