Posted on 1 Comment

MFT Sketch Challenge 212 – Closing in on Seattle Copic Workshops

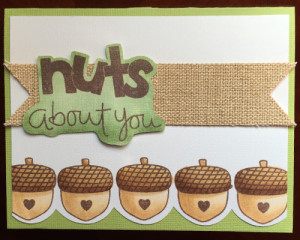
Well I figured I would keep coloring while I was n a roll so here is another card I completed for the on-going challenges over at My Favorite Things.  This is my interpretation of this week’s sketch challenge:

Sketch 212 MFT


I kept it pretty simple today, to me the fun part was using the acorns to form my scallop at the bottom edge. 🙂 Supplies:  cardstock; Bazzill Basics and American Crafts, ink; Memento (Rich Cocoa)  and Copic (YG61, YG63, E50, E53, E55, E57, E59), burlap banner; Little Yellow Bicycle.

We are coming down to wire for my Copic Workshops in Seattle.  If you or anyone you know live in the area and would like to join me for a half day, full day or even two full days of coloring fun make sure to get signed up NOW before it is too late.

Happy Coloring!

Posted on 1 Comment

MFT Color Challenge #13

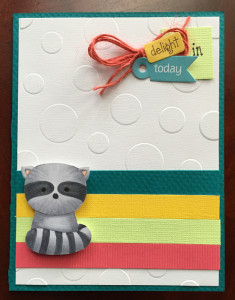
Yep I am still having fun here with coloring.  These are such easy fun challenges at My Favorite Things, I can see myself coming back for more of these 🙂  Besides it get’s me building up my card stash which is always a good thing to have on hand.  The color challenge gives us 4 colors we need to incorporate on a card.  The image I colored and added to my card is really just for fun.  the little raccoon really has nothing to do sentiment, but he is too cute!

MFT Color #13

Supplies include: cardstock; Bazzill Basics and American Crafts, twine; American Crafts, stickers; Bo Bunny, embossing folder; Cuttlebug, raccoon image; My Favorite Things, ink; Copic, C1, C3, C5, C7, C9, E93

Happy coloring!

Posted on 1 Comment

MFT Challenge 211

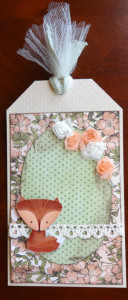
I was invited to check out the My Favorite Things Challenge blog this past week.  They run regular sketch and color challenges for card and stamping fans.  You could most likely translate the challenges into other crafty pursuits as well.  I figured I am in a coloring, crafty mood why not?  Besides a very dear friend of mine is having a baby shower and I would love to make a special card for her as I know she will be appreciative.  Here is the tag I made using the current sketch at MFT.

MFT Sketch Challenge

I do not have any shape die cuts so I just eyeballed the oval and the tag but I don’t think my wobbly lines show too bad :-).  Supplies for the tag include; cardstock; Bazzil Swiss Dots, patterned paper; Graphic 45, flowers and trim; American Crafts, stamp; My Favorite Things, ink; Memento and Copic.

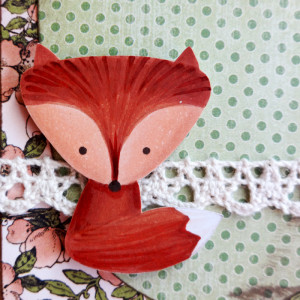
The flowers are hand colored to match the patterned paper I used Copic markers in R20 and E93.  Here is a close up of the fox and a list of the colors I used:

MFT Sketch Challenge close up

E11, E13, E15, E17, E19, E49.  I used Memento ink in Rich Cocoa to stamp the image and even double stamped to keep the lines light and hopefully invisible after I colored.  The E49 I used was to go back over the little nose and eyes.  I know this is a unique image to use for a baby shower gift but the new arrivals last name is “Fox” and the beautiful mama LOVES her foxes so the image could not be any more perfect!

Thank you MFT for the inspiration.

Happy coloring!

Posted on 2 Comments

RubberMoon, Copic and Vellum

Happy Wednesday one and all and welcome RubberMoon fans!  I have another Copic and RubberMoon tutorial for you!  I am passionate about RubberMoon stamps, not only do I think the quality and artistry is top notch, the team and Quality of the people running RubberMoon just can not be beat!  I am also CRAZY passionate about Copic markers and the amazing versatility that these markers and inks have so when given a chance to share their abilities I try to give you the full view of what these products can do.

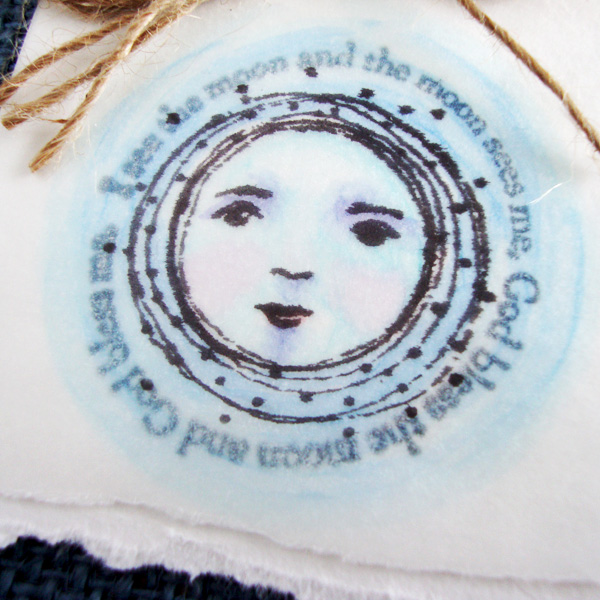
This week I have two beautiful stamps created by Kae Pea, See The Moon and New Moon. These two stamps are truly a favorite of mine not only because they are beautiful but because my family used to sing this song EVERY time we saw the moon when I was growing up.  Yes…EVERY time.  Come to think of it if any combination of us are together in one location and happen to see the moon together we often STILL will be heard singing this song.  So you can imagine there is a large portion of personal history and memory tied to an image like this.

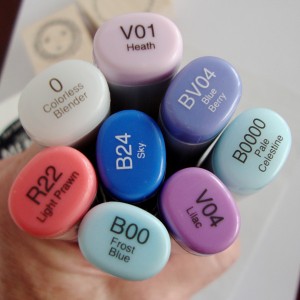
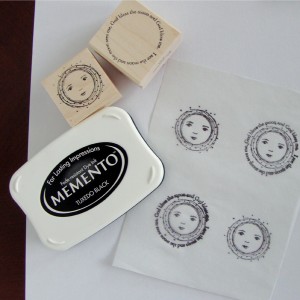
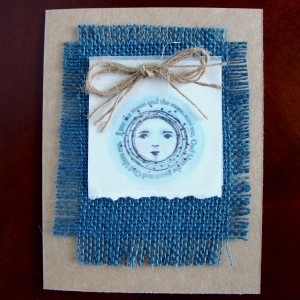
For coloring today I am sticking with my Copics but I wanted a much softer look, one that is more suited to the dreaminess of the image.  I could paint with the Copic inks, and I will show you that technique another day I promise, but for today I chose working on vellum or in this particular case on tracing paper.  You would get a very similar effect working on either, I just happened to have tracing paper within arms reach.  I am also using Memento ink in Tuxedo Black, and Copic markers B0000, B00, V01, BV04, B24 and R22.  (In the photo you also see V04 and my colorless blender that I did not end up using.)  For the card I used a small bit of watercolor paper, natural twine, blue burlap fabric and kraft cardstock.
RM moon 2

Step #1 – On your tracing paper or vellum stamp your moon image and on a few also stamp the words to the song.  I did not add them to all of mine since I was not sure exactly where I was going to end up with my project.
 

RM moon 1


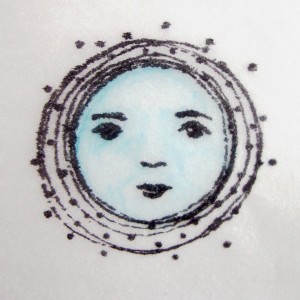
Step #2 – On the BACK SIDE of the tracing paper color in the entire moon face with B0000.  I am working on the back to soften the look of the Copics.  If you let the ink dry completely you will not have any issue with smearing even on the vellum or tracing paper if you choose to work on the stamped side of your work.  You will barely be able to see this layer but it is putting a wash over the entire face to help the next layers go on smoothly.

Step #3 – Using B00 go into the areas where you would like to add a little shading like under the brows, the nose the cheeks, chin and along side the nose.  This should blend fairly well as you go if you work quickly on top of the B0000.  You can always come back to soften the edges just slightly if you need to.
RM moon 3


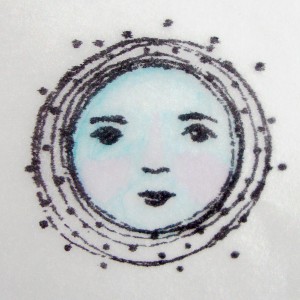
Step #4 – Add V01 into the cheeks and down the length of the nose.
RM moon 4

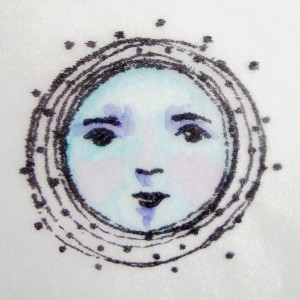
Step #5 – Use your BV04 to add your deepest shadows under the brow and small touches under the nose and bottom lip.
RM moon 5

Step #6 – Go back in with your B0000 to soften some of these edges.  They will not have perfectly smooth blends on the tracing paper or vellum but more of a painterly quality to them.  Also add R22 to the bottom lip.
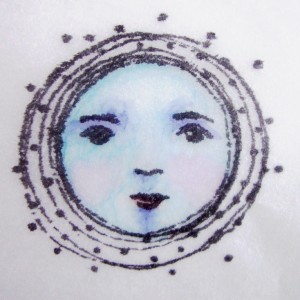
RM moon 6

Step #7 – Using your B0000 go around the outer edge of the moon about 3/4 – 1″ again laying a base for the colors to come.
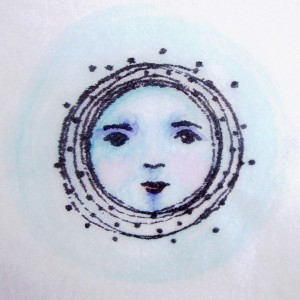
RM moon 7

Step #8 – Use both B24 and B00 to add streaking around the moon.
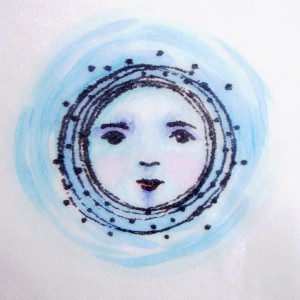
RM moon 8


Step #9 – Use your B000 to soften the streaking around the outer edge.
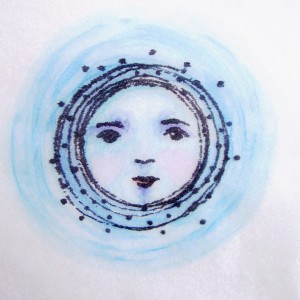
RM moon 9

Hopefully you will be able to see a difference here, in real life there is a striking difference when I turn my image right side up again so I have the stamped image facing me.  The black becomes much more striking and the colors all soften one more step to a very watercolor look.

RM moon 10


To finish I decided to stamp the words to the song onto a small piece of water color paper and then layer my colored image over the words so they show through.  I added a simple bow of tine and layered it on top of blue burlap and a kraft cardstock base.
RM moon 11

Thank you so much for stopping by my blog today!  I hope you will come back by again!  Next Wednesday I have a HUGE announcement that includes a prize giveaway, so you rely need to make it back!

Happy coloring!

Posted on

CHA – Make and Takes

I wanted to continue sharing some of the fun at CHA!  I am getting to it slowly as I have a few projects all going on at once.  It is exciting and fun but I will admit the house is getting a little neglected.  I am probably going to have to spend a day out of my craft space to do a once over!

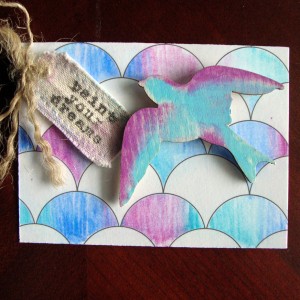
In the mean time here are two of the make and takes that I did at CHA that I really loved.  With only one day Tami and I had to pick and choose a little so we could get through the majority of the show.  We really needed two days to do it justice.  Below is a card that we made at the Faber Castell booth.  LOVED the variety of things they let us try!  We used some Faber Castell water color pencils on the resist paper and then added water to create our beautiful background.  Then we got to try out their wonderful gillatos on wood birds.  We used water to do a little blending again and visited about the new sets that they have put together with their gillatos.  If you have not tried these yet it is worth a try, they are a lot of fun!

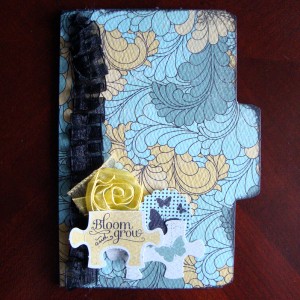
Next is a simple card from Authentique.  We got to use new small file folders to create or card base and then small die cut puzzle pieces and embellishments that match to adorn our card.  i realized after putting mine all together that I have my folder facing backwards.  The front is even cuter since the file folders have a complimentary pattern on the inside and you can see that if I had it faced it the right way!

So there are two fun ones, I will attempt to add a couple more this week!  But no promises.

Hope everyone is enjoying their day and if you love football and/or food are enjoying the day with a pile of friends and family!

Hugs!