Posted on 2 Comments

Merry Christmas 2018

Hello Friends! I am getting to share a brand new Stamp AnnieThing image with you today! I asked Ann a month or so ago if she would be willing to create a Nativity scene for all of us. I color one each year for Copic In The Craft Room and post it on Christmas and Ann said YES! ?

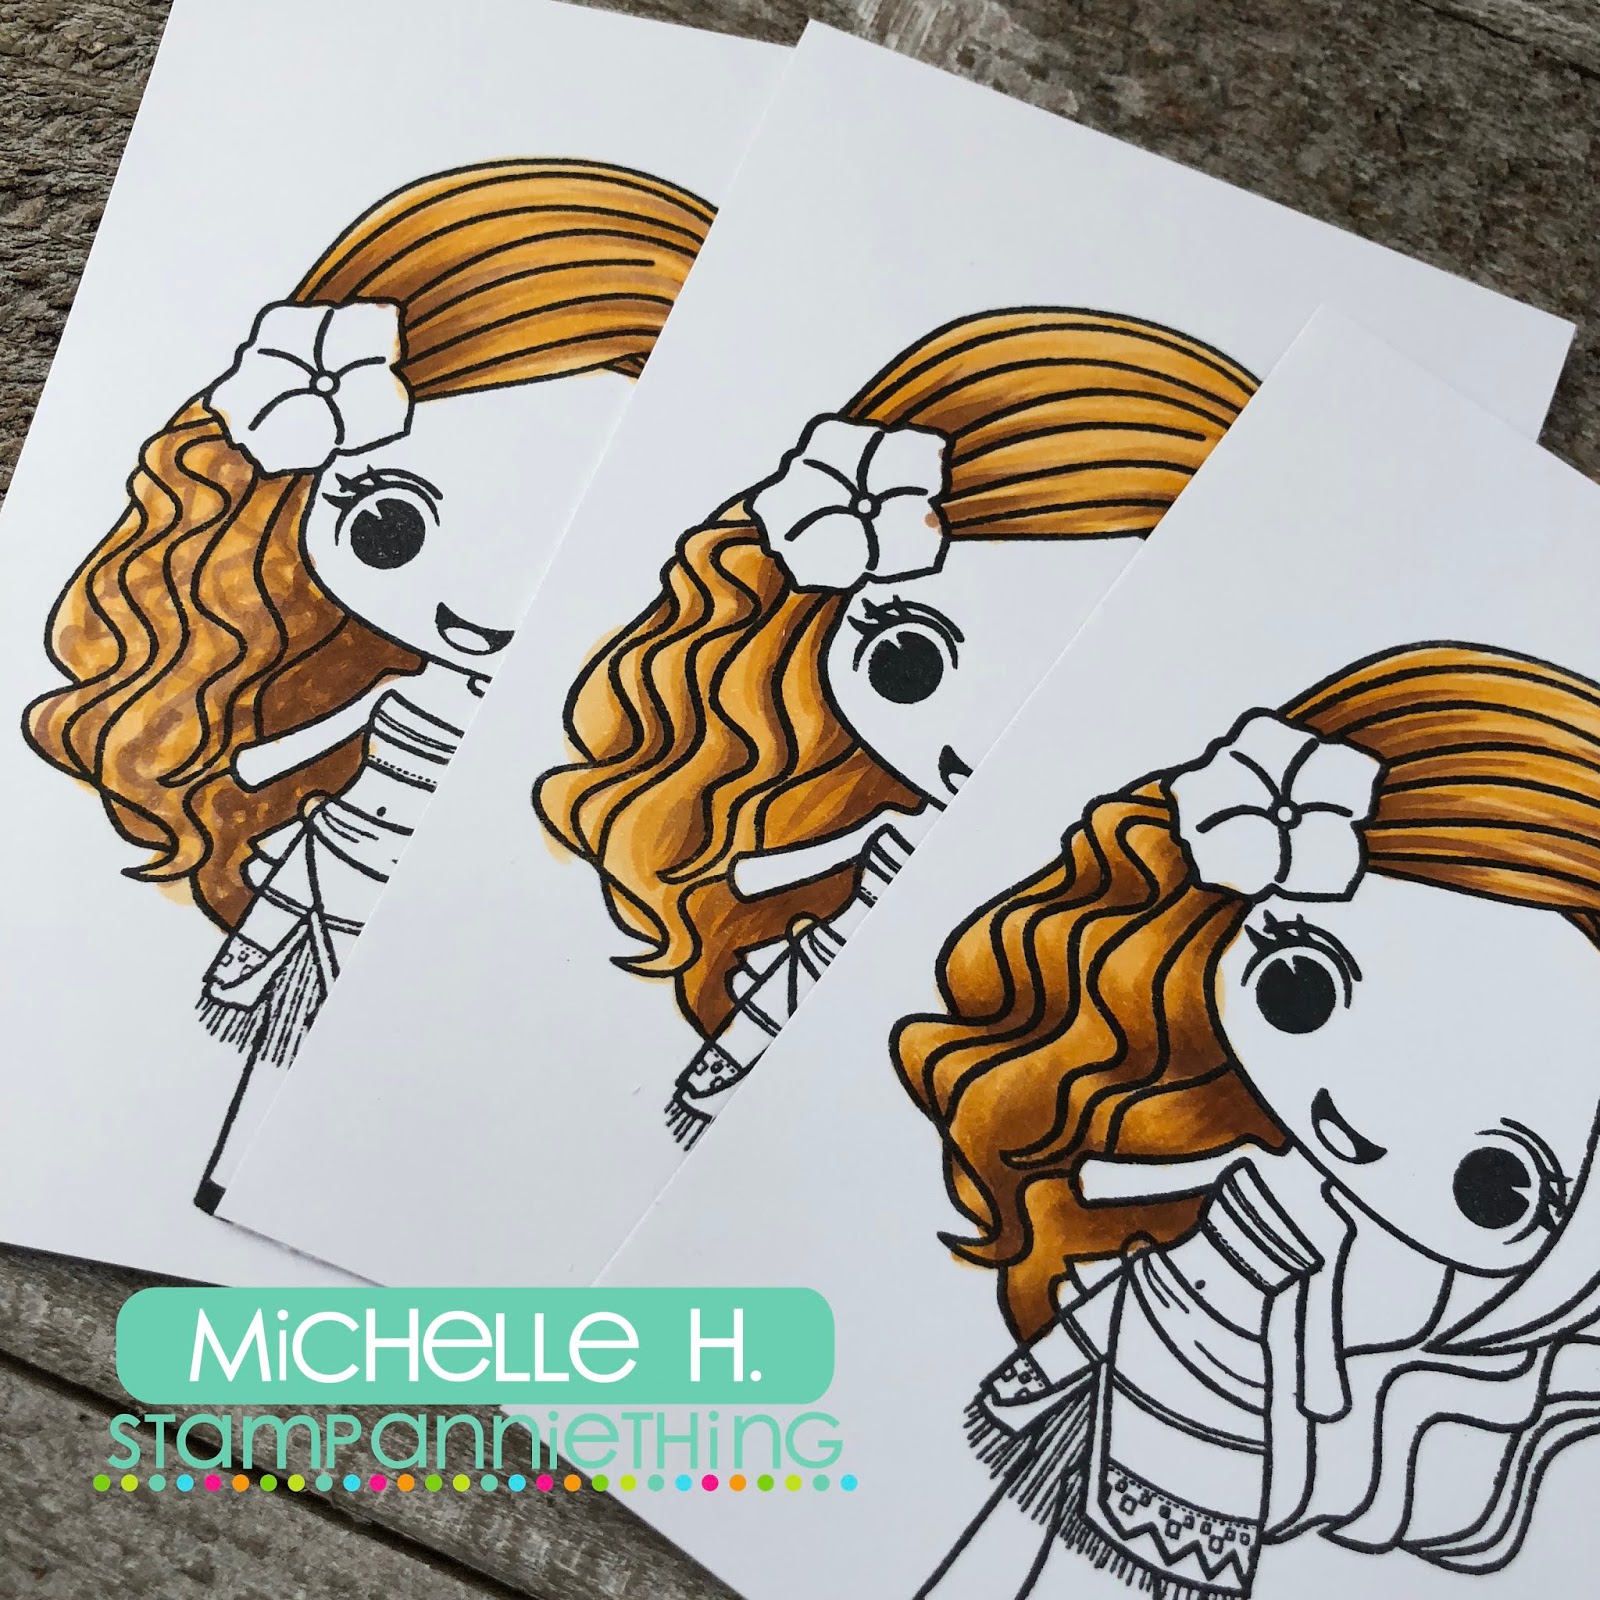
So today I am sharing a brand new digital image with you and I have a full video of Copic coloring to go along with it!

If you have not explored the new Stamp AnnieThing site yet you need to take a full tour, each time I come back I discover new things appearing and new categories to explore. (You know things I might NEED!) One of the new sections in the store is the digital stamp section. Now you are not re-directed to Etsy you get to stay right here for your digital images as well! You will recognize many of the images as the Facebook “Color With Me” images that we have been sharing each month. We have more of these in store for you for 2019! Today you will have access to this new digital and instead of live coloring I am including a link to my video.

Here is a look at my finished card:

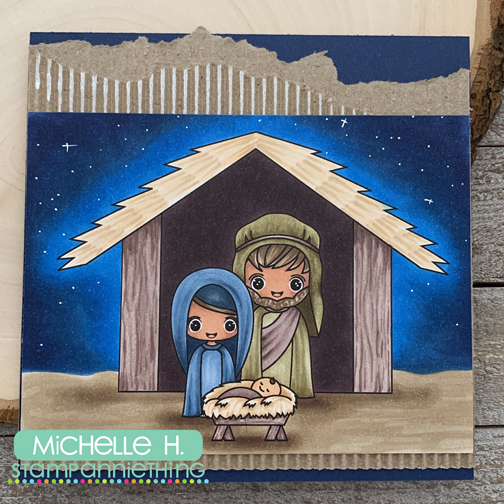
And a close up so you can see Ann’s beautiful image:

And here is the link to the video:

https://studio.youtube.com/video/zfnYjAgLgHQ/edit

Thank you so much for stopping by today! To find this beautiful stamp check out the Digital Stamp section at Stamp AnnieThing.

Have a Merry Colorful Day!

Posted on

Gingerbread! Copic Coloring Tutorial

Hello  friends! Yesterday over on the Stamp AnnieThing Facebook fan page I did a live coloring tutorial of a new SAT digital image, Gingerbread!

You say you missed the live tutorial?! How can that be? I know you all have 7:30pm Eastern wide open on your planners, ha ha. Actually I know all of us are crazy busy and this time of year often gets even more frantic than normal. Luckily for ALL of us when we teach a live tutorial on Facebook it get’s recorded and now it is on the Facebook page for those small moments here and there that you manage to catch for yourself. I enjoy watching tutorials when I am doing other things like folding laundry or prepping dinner. I can’t color along, but I get lots of info just listening and watching when I can. Hope you will have the chance to take a peek later if you did not get to join me yesterday.

Here is a peek at the finished card.

One of the things that is unique about this particular SAT digital image is the size. Now with digital images you have control over the size so you can change this if you want, but if you use the Gingerbread! stamp as is it is a full card front. Yep, fills your 4.25 x 5.5 card front. Now because I use Copics I still place this on a card base, remember that Copics will bleed through your cardstock. You could also fussy cut her out and put her on a different colored base or patterned paper, but I like letting the coloring shine and this image just fits the card front so well it doesn’t need anything else.

Here is a close up of our gingerbread master. If you notice a little or a lot of shine I added Stickles on the gumdrops and Glossy Accents on the peppermint and lollipops. 

Thanks for stopping by today! If you did not have time last night to check out the live FaceBook tutorial head over there when you have a chance to check out the coloring. And make sure to take a peek at all the fun digital images Ann has in the store!

Have a Happy Colorful Day!

Posted on

New Copic Background Video

I have a fun, crazy short video up today at Copic In The Craft Room on YouTube. It is a very quick look at how to create a wood floor and rock wall! The stamps in the scene are from the brand new Grab and Go box at Stamp AnnieThing.

Here is the link. If you would like to see the full scene colored up please do 3 things.

1 – Like the YouTube Channel

2 – Like the video

3 – If you have time leave a comment even if it is only to say hi!

Have a Happy Colorful Day!

Posted on

Stamp AnnieThing Inspiration and Copic Wavy Hair

Hello Stamp AnnieThing fans and friends! Michelle Houghton here sharing a little SAT inspiration and another Copic coloring tutorial with the fabulous SAT stamps!

I recently got a request for a Copic tutorial on coloring wavy hair. Low and behold there are several SAT stamps that have beautiful long wavy hair so perfect! I chose a recent release Chloe – Pehea “Oer to share some tips and tricks.

I have a video in a link at the bottom of the post with a full tutorial if you would like to see the coloring in action, but here is a peak at what I do with wavy hair.

I color wavy hair in one of three ways so here is the same image colored with the same 4 colors 3 different ways:

1 – Loose – This quick and easy style shows the curl, but does not follow the artist’s lines so is simple and easy.

2 – From inside to outside – On this image each section is colored darker in toward the figure and lighter as you move out away from Chloe.

3 – Each wave – On the third image I worked into each individual wave. Where hair section dips inward it gets darker and as it curves away it gets lighter. This technique takes the longest, but also has some of the most striking results.

 Here is a look at all three techniques side by side:

I decided to finish one up and get her on a card and here are the results and a closer look at the hair and skin:

Here is a direct link to see all the hair coloring!

https://www.youtube.com/watch?v=Y215bTdyWaI

Have a Happy Colorful Day!

Bear in mind that some of the links in this post are affiliate links and if you go through them to make a purchase I will earn a commission. Keep in mind that I link these companies and their products because of their quality and not because of the commission I receive from your purchases. The decision is yours, and whether or not you decide to buy something is completely up to you.

Shop with me

Posted on

Copic Coloring Skin with Stamp AnnieThing!

Hi Stamp AnnieThing friends and followers! I am sharing some Stamp AnnieThing inspiration and a little Copic know how with you today! 

Ann , of Stamp AnnieThing, has asked that once or twice a month I give a few techniques with Copics on her amazing stamps and so that is the plan!

Today I have the second part of coloring this adorable Diana-Let’s Do Lunch image. If you missed it, last month I was coloring her hair, today I am coloring her skin. Lot’s of people ask if there is a “right way” to color with Copics and my honest answer is there are some ways to color that make you more successful and some tricks to avoid messes. But most people over time adapt how they are coloring to what works best for them. Watch a lot of tutorials, try a lot of techniques and make it work for you. On Diana I show you how to color her skin 2 ways working from light to dark with is very traditional from Copic manufacturers. It tends to be how we start beginners, you tend to have an easier time blending and see the magic of Copics quicker. The second portion of the video shows coloring working from dark to light. Several people shift to this Copic coloring technique after they have been coloring for a while and some start right off the bat with this, as much as anything because the blending happens as you add each color and they like starting with the darkest shadow areas and mapping those in first. 

I promise I will not always be this verbose in my posts. You can watch the video and figure it out and always make sure to ask questions, happy to answer! In the mean time here is how Diana ended up on her card!


And here is a close up on Diana so you can see her a little better as well:

Here is a link to the video showcasing the Copic skin coloring:

One of the details I love about this little stamp is her hair, for fun I changed the area above her headband to look like a hat, but you can also color that as her her with a headband always fun to make a stamp work more then one way!

Lastly here is a link to the adorable Diana – Let’s Do Lunch!

Thanks for stopping by today! Make sure to come back for more Stamp AnnieThing inspiration!

Have a Happy Colorful Day!