Posted on

Copic Coloring – Ethel Cooking

Happy Thursday my crafty friends (and family too.) I am coloring up another Rubbernecker image today. As I settle back into another new routine back in Iowa I will have time to do a lot more coloring and will have all sorts of new images in the line up!

For those of you wondering about Copic College please stay tuned, I am working on how to finish off the year and the possibility of a BIG announcement in the next month! So stay tuned!

On to the coloring! This is “Ethel Cooking” she looks a little feisty to me what do you think?
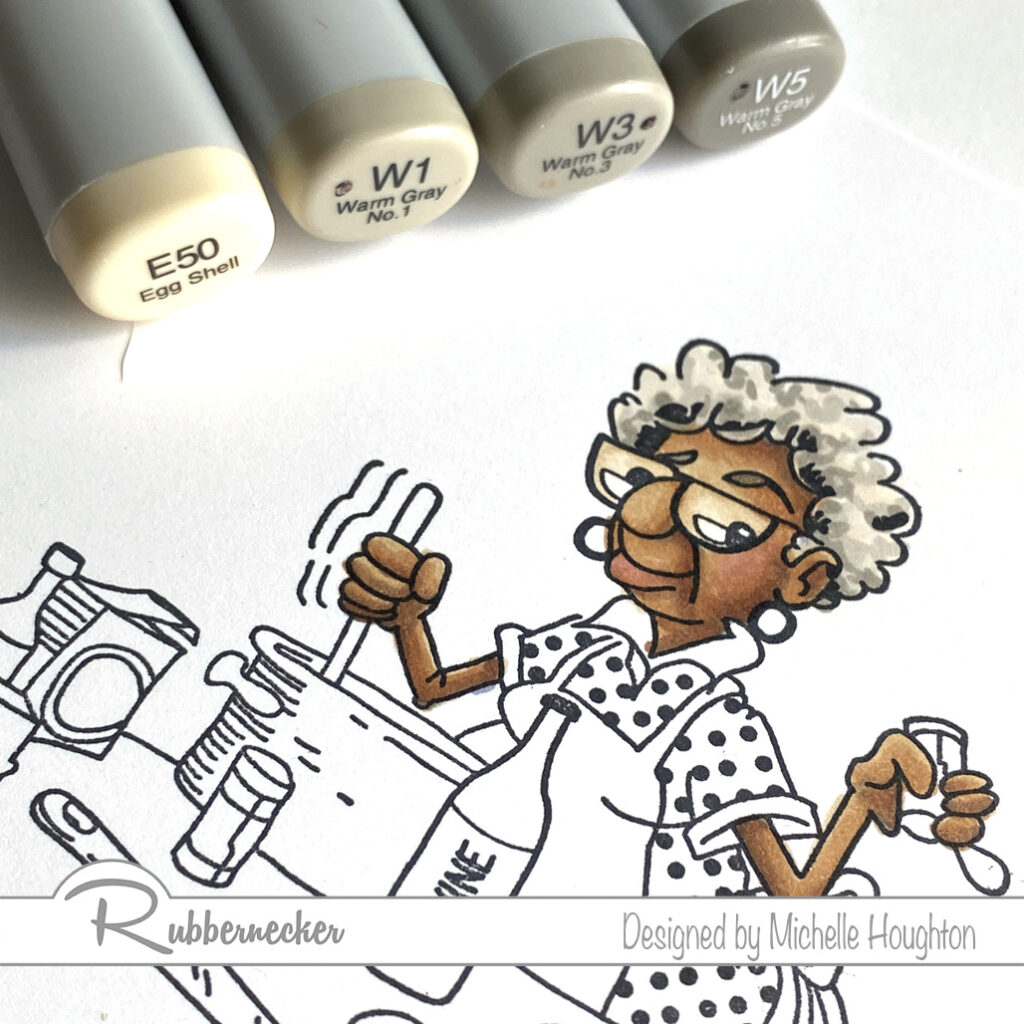
  • Squiggle a light earth tone into the hair (E50)
  • Use two or three warm grays to dot and squiggle texture and shape into the hair, as you get darker using less of each color. (W1, W3, W5)
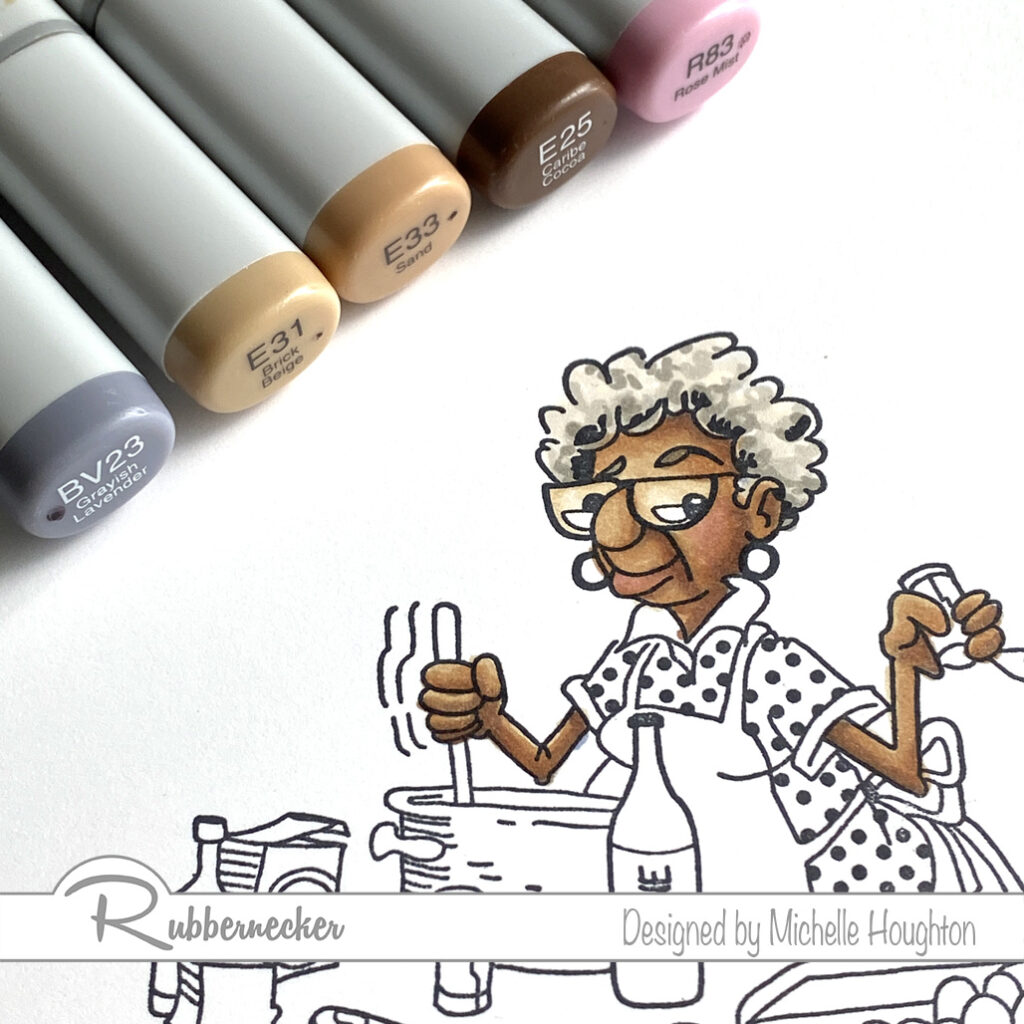
  • Under paint the deepest shadow areas with a blue violet. (BV23)
  • Use a lighter earth tone to base all of the skin. (E21)
  • Use two more earth tones to add shape to the skin areas. (E23, E25)
  • Blend the skin smooth going in reverse through the earth tones. (E23. E21)
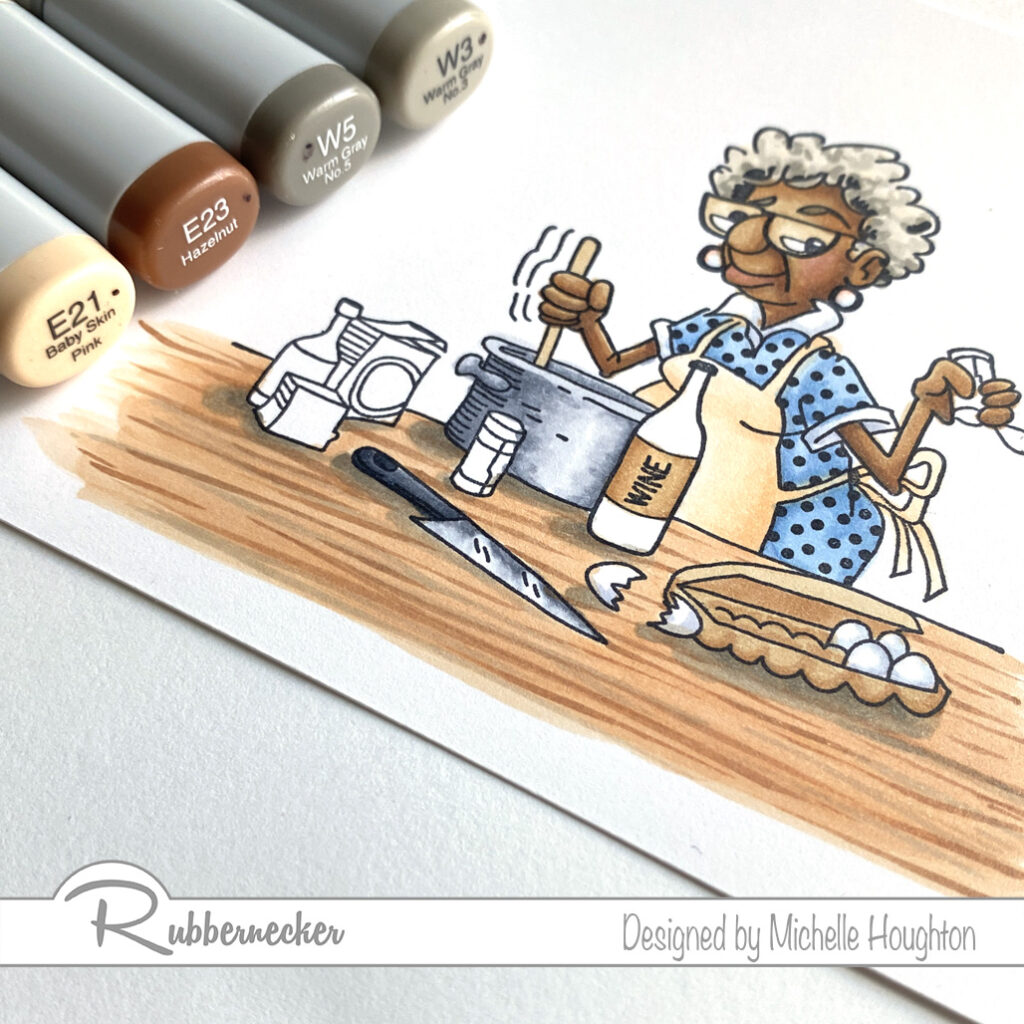
  • Base the counter in a lighter earth tone, my goal was a butcher block look. (E21)
  • Use a darker earth tone and two warm grays to create wood grain and cast shadows under the objects on the counter. (E21, E23, W5, W3)
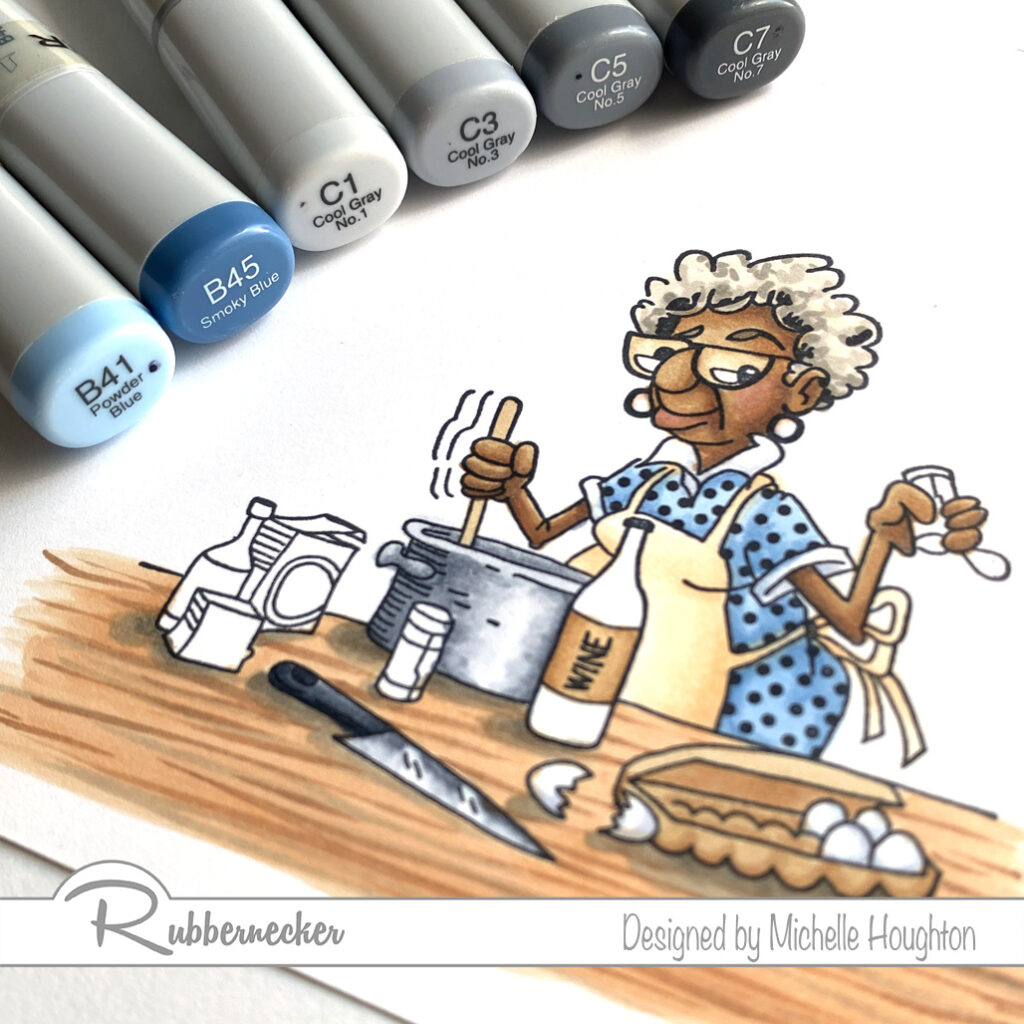
  • Base Ethel’s dress in a light blue. (E41)
  • Use a darker blue to add shape to her body. (E45)
  • Use cool grays to add form to the pot, knife and eggs. (C1, C3, C5, C7)
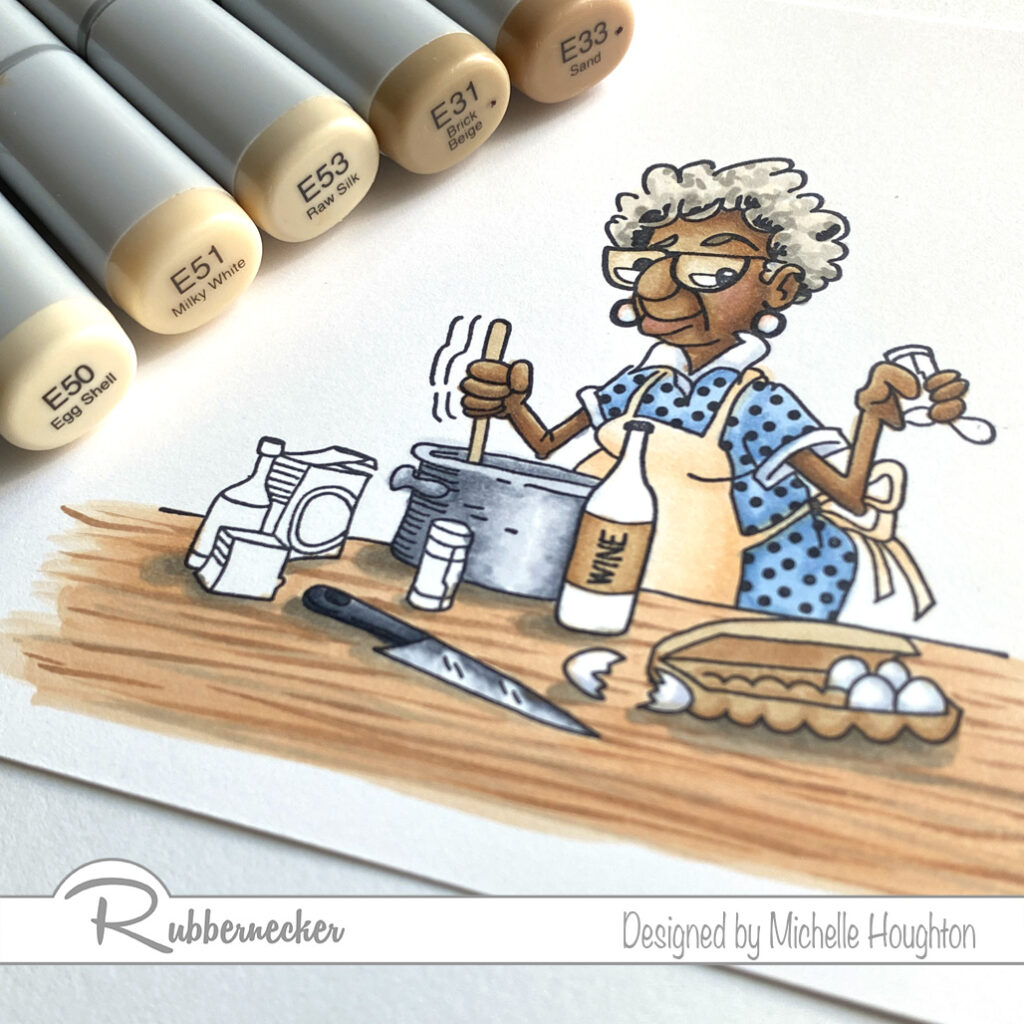
  • Use a light earth tone to base Ethel’s apron. (E50)
  • Use small amounts of two more earth tones to keep Ethel looking plump. (E51, E53)
  • Two different earth tones give the look of cardboard to the egg carton and aged paper to the wine label. (E31, E33)
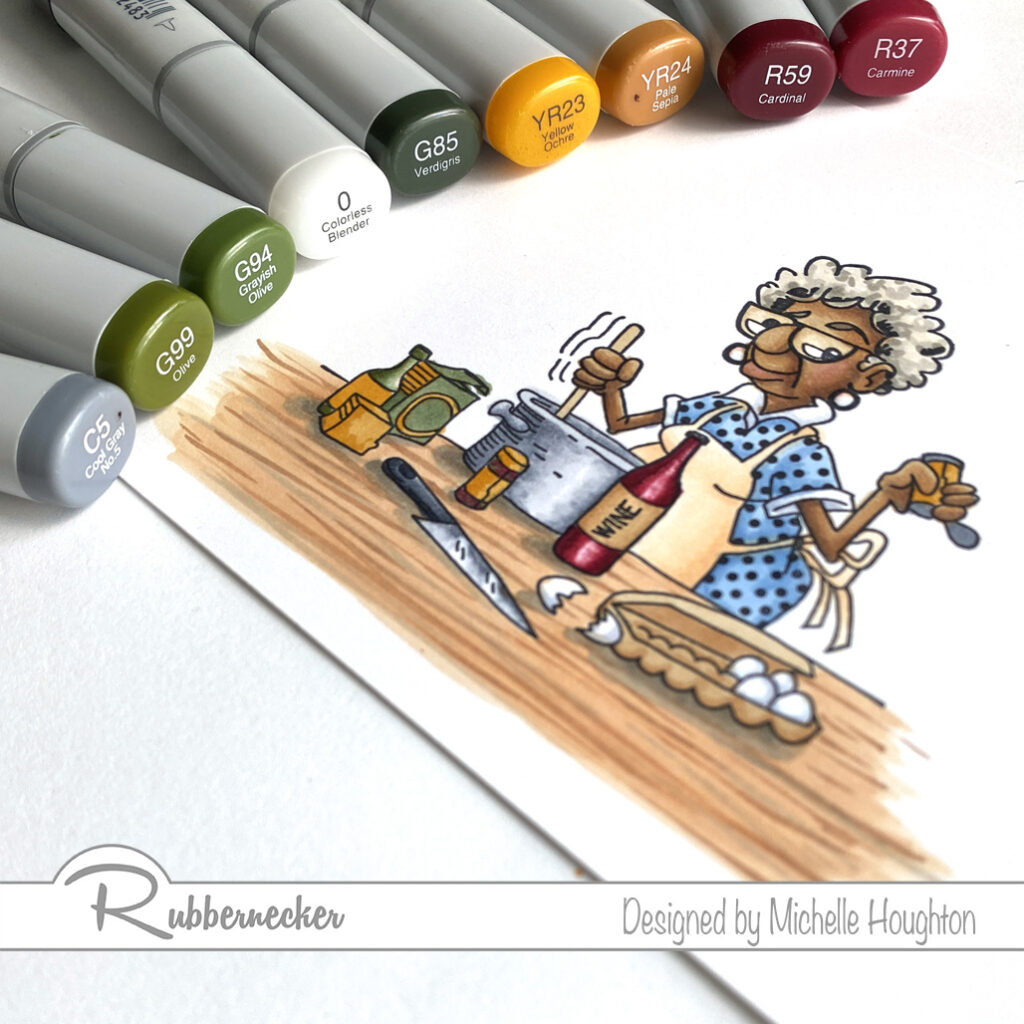
  • Use a group of Yellow reds, reds and greens to finish off the assortment of ingredients at Ethel’s work station. (YR23, YR24, R59, R37, G85, G94, G99, C5 and Colorless Blender)
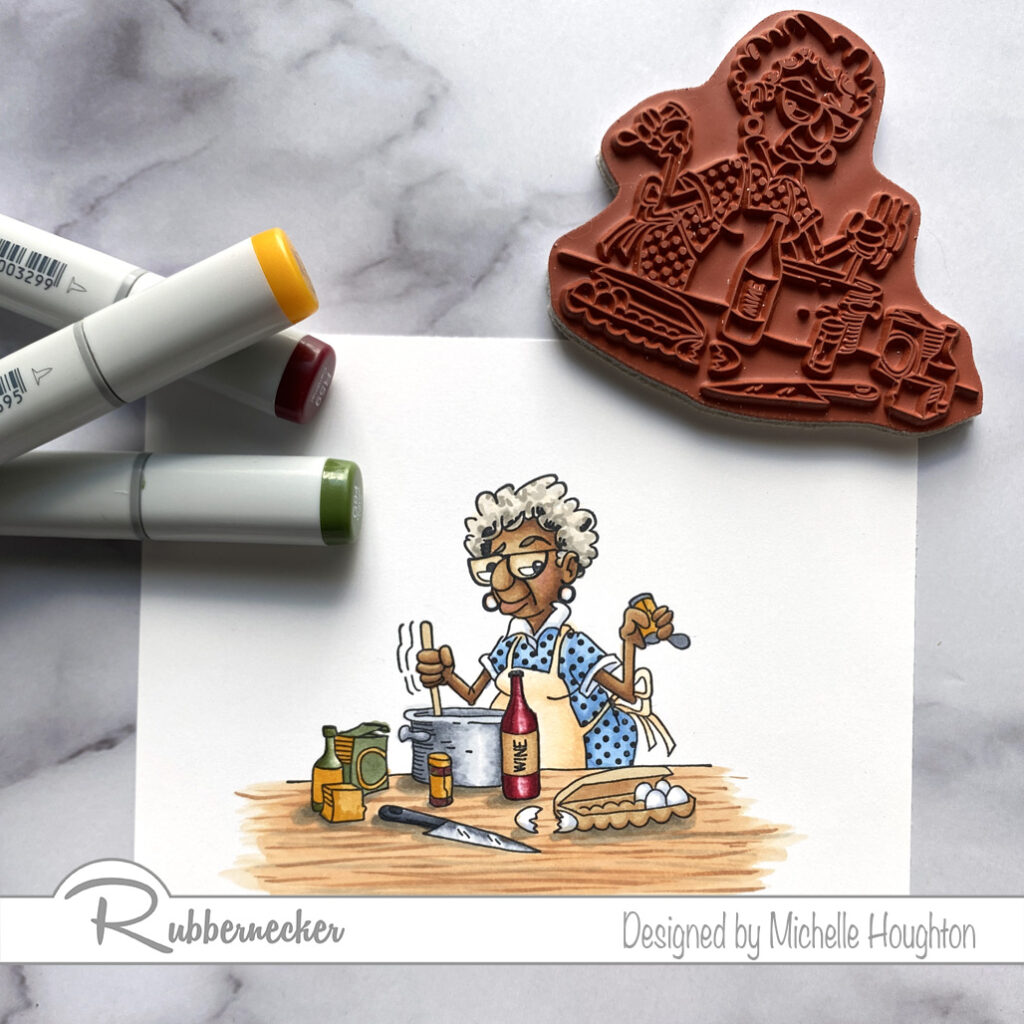
For those of you that need to see more of the process there will be a full video posted next Wednesday. Below you will find a link to the stamp. Thanks as always for checking in!

Have Happy Colorful Day!

Posted on 3 Comments

Hop and Shop August Krafty Release

Woot! Woot!
Today we are celebrating all the wonderful new magical things in our AUGUST Release that are NOW AVAILABLE
in the Kraftin’ Kimmie Stamps Shop!
All THREE of our new stamp sets along with two new stencils, our stunning new hybrid ink colour, Tempting Tangerine and sweet new Halloween krafty dots were released yesterday and we’re
excited to share everything with you in a fabulous blog hop!
So let’s check everything out in action as we hop around the Krafty Design Team’s blogs today! Grab a nice hot (or cold) beverage, sit back and relax while we take you on this krafty tour!
First up we have this fabulous Thanksgiving set by artist Neda Sadreddin and we’re so excited about it!! It’s called…
IT’S TURKEY DAY!
Next up we have not one but TWO fabulous stamp set from artist Sabrina van Vloten called…..
TOO CUTE TO SPOOK….
and OWL-CHEMY!!
Available now is our stunning new Krafty Kolours hybrid ink colour in the large ink pad, the mini cube and ink refill called…
TEMPTING TANGERINE!!
We have two new stencils that coordinate perfectly with our lovely new stamp sets and they are….
GHOULISH GHOSTS and GORGEOUS GAUZE!
And lastly we have the perfect finishing touch for your magical creations with our new Krafty Dots called…
HALLOWEEN DOTS!
Now head on out on today’s celebration blog hop and check out all the new products in action as the Krafty Team shares their incredible creations! Then jump on over to the Kraftin’ Kimmie Stamps SHOP and grab some goodies for yourself!

Happy kraftin’!

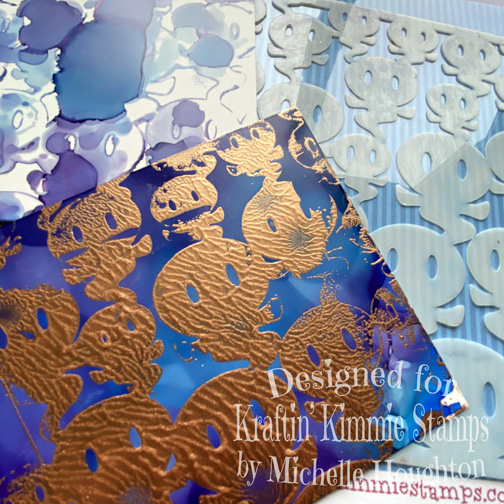
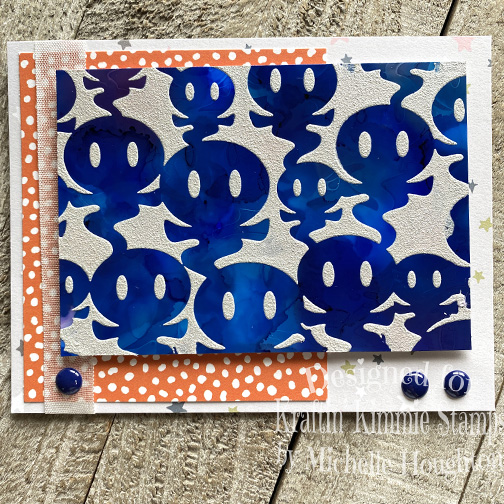
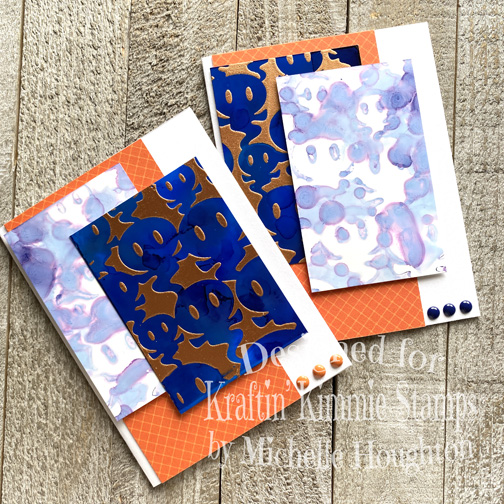
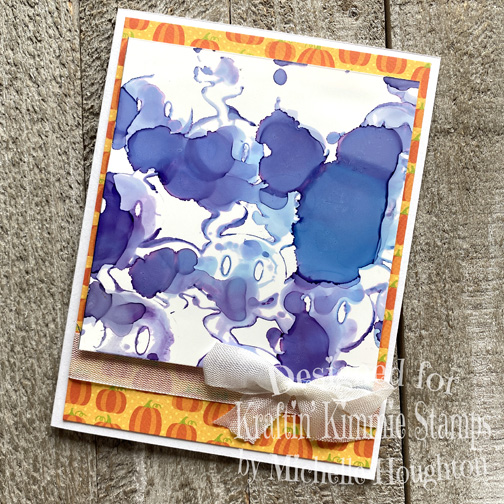
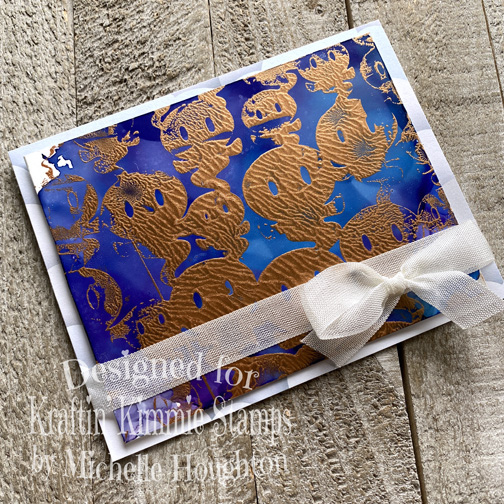
I decided to get a little messy and play with the new ghost stencil and some paints and of course Copic inks!

I created 5 different card fronts and then created cards just layering papers, adding a little ribbon and a few dots. So much fun!

I will be sharing a full real time video this coming Wednesday with exactly how I created all the card fronts. Successes, bloopers and just plain disasters are all in there. I will put a line at the Copic In The Craft Room Facebook page as well as the Kraftin Kimmie Fan page on Wednesday!

Have a Happy Colorful Day!
You are invited to the Inlinkz link party!

Click here to enter
Posted on 11 Comments

August Peeks Kraftin’ Kimmie Day 1

***August Krafty Peeks….Day ONE!! Thursday, Aug 13th, 7am est
Woohoo! Get ready!
It is time for Krafty Peeks again
at Kraftin’ Kimmie Stamps!!
The August Krafty Peeks begin today and you’re not going to believe the fabulous goodies we have in store for you this month! As you may know our August release is always focused on fall and Halloween!!
Today is Day One of our August Krafty Peeks and we are kicking things off with the perfect FALL stamp set!
This set is from artist Neda Sadreddin and it’s called…
IT’S TURKEY DAY!!
Check out these adorable pilgrims and the super fun turkey!! Won’t these just make the cutest Thanksgiving cards! This set also includes 5 awesome sentiments and 2 accessory stamps!
As you hop around the Krafty Team’s blogs today you will see the IT’S TURKEY DAY! stamp set in action in combination with our all of our other awesome new AUGUST Kraftin’ Kimmie products!
You will spot our newest addition to the Krafty Kolours Hybrid Ink rainbow! It’s a vibrant new orange named
TEMPTING TANGERINE!
As always it will be available in full sized ink pads, mini cubes and ink refills!
We’ve got TWO brand new Krafty Stencils for this month’s release to help accessorize your creations!
They are called GHOULISH GHOSTS & GORGEOUS GAUZE!
One perfect for all your spooky cards and the other a fabulous must have pattern for any occasion!
And of course, we are adding the perfect new coordinating Krafty Dots for this release! The package includes mini enamel dots in varying sizes in 6 different colours!
These ones are called
HALLOWEEN DOTS!
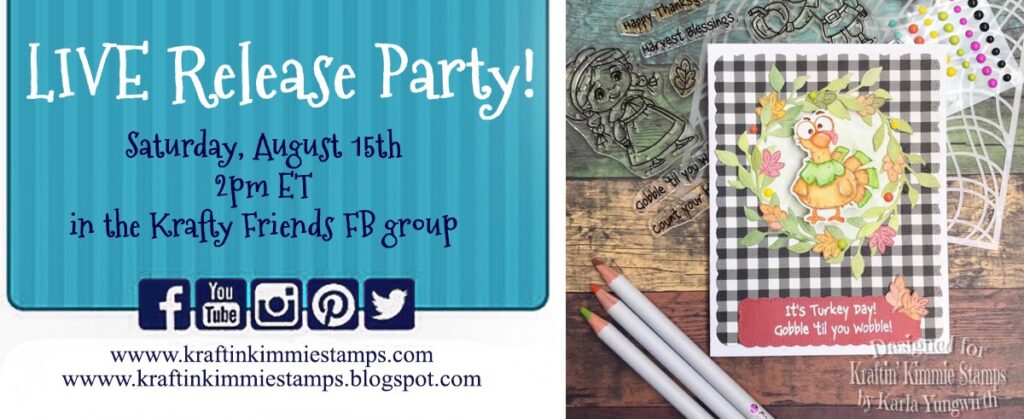
You’ll get to see all of our brand new goodies in action over the next few days of August Krafty Peeks and everything will be released at our LIVE Online Release Party in the Krafty Friends facebook group on Saturday, August 15th at 2 pm EST!
For now, hop around and check out some incredible designs from our Krafty Team!! Be sure to leave some love on EACH stop on the hop because I’m going to be giving away some krafty $$ to the shop!! PLUS our designers are AMAZING and you should tell them so! 😉
Come on back tomorrow for more
HALLOWEEN krafty goodness!
See you then!

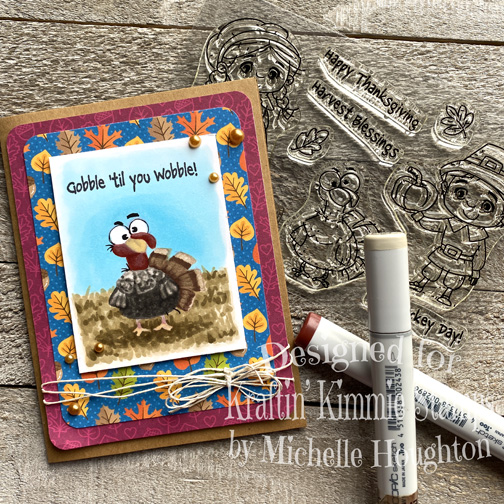
Playing with the It’s Turkey Day Images today! I LOVE this little turkey! How stinking cute is he?! Colored him up with Copics of course. This time with a little no-line coloring. These are ALL earth tones by the way on the bird 😉

Then got him on a card! Sorry this post is short from me today! I am shifting again and the world is more topsy Turvey than normal, but make sure to watch for all the inspiration this week from the fabulous Kraftin’ Kimmie Design Team.

I will be back Saturday with some more crafty goodness from this release AND next Wednesday with a new video!

Have a Happy Colorful Day!
(And Healthy Too!)

Posted on

Copic Coloring With Rubbernecker

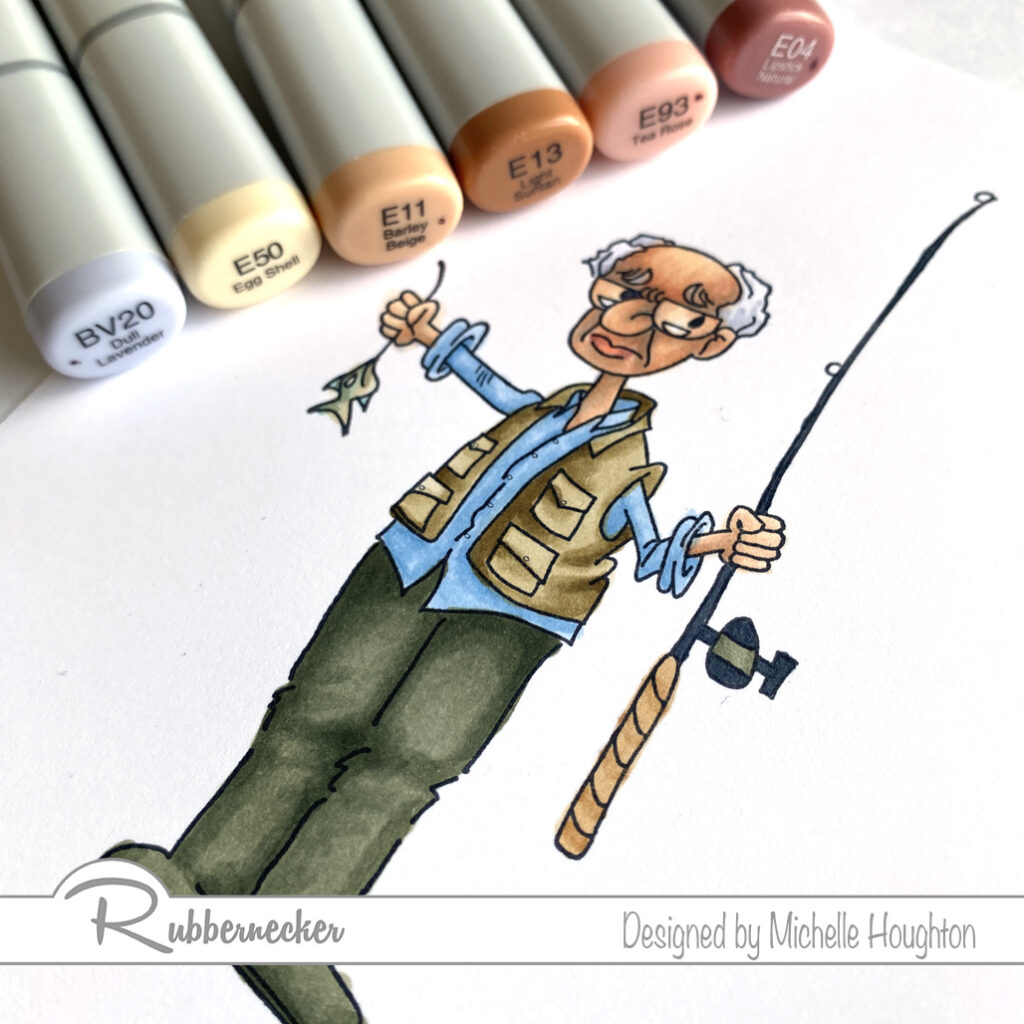
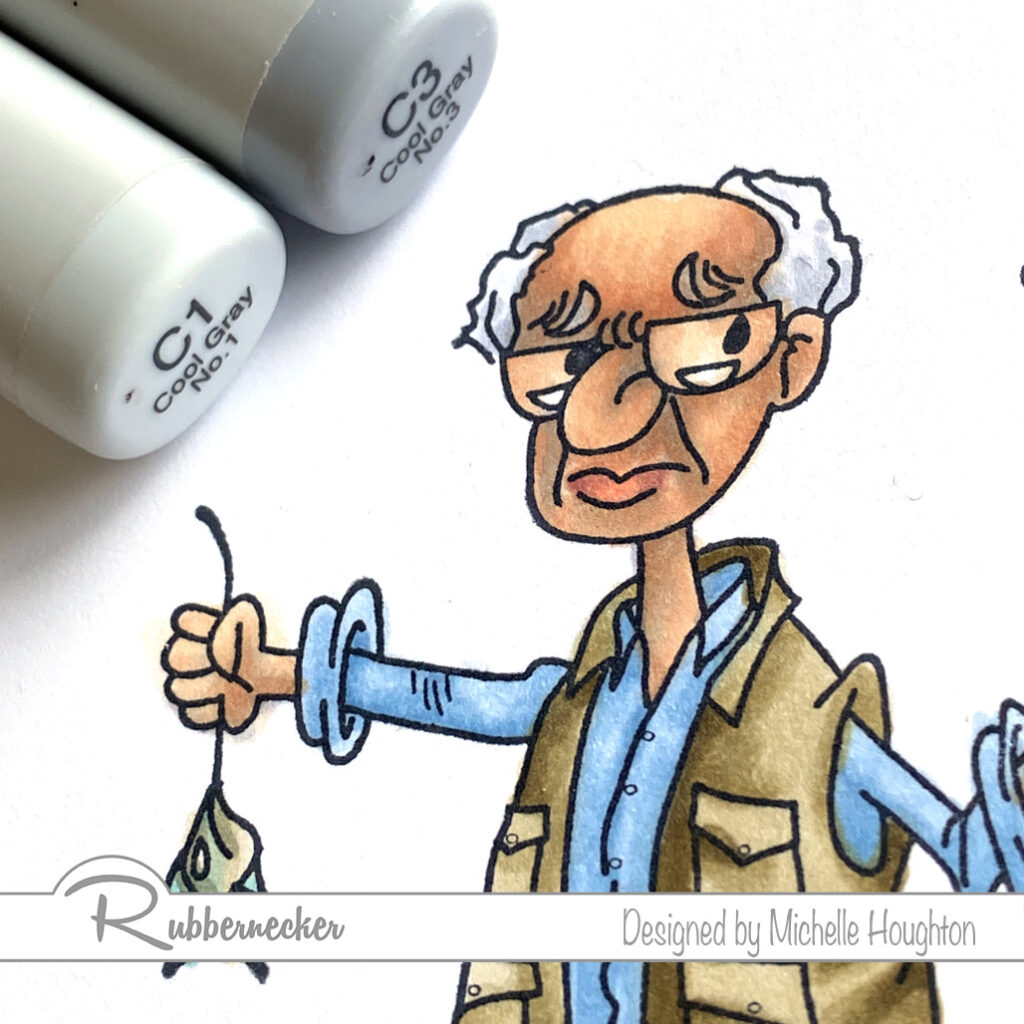
Hello my Copic coloring friends! little coloring today on a fun image from Rubbernecker. Murray with Catch is from the “Old Characters” collection. There is a whole team of these silly characters and wonderful phrases and statements to go along with them!

  • Starting with the skin use a blue violet to under-paint the deeper areas of the skin. This will also gray down the skin tones to age Murray a bit. (BV20)
  • Use a light earth tone over all of the skin. (E50)
  • Use a midtown to add shape to the face and arms. (E11)
  • Use a third earth tone in smaller amounts to deepen the shadow areas. (E13)
  • Blend the skin smooth working in reverse through the colors. (E11, E50)
  • Add a touch of color to the lips with a peachy earth tone and a darker rosy earth tone at the corners. (E93, E04)
  • Behind the glasses use the lightest earth tone and the midtone only. (E50, E11)
  • You can see a closer view in the next photo.
  • Use small dots of two cool grays to add texture to the hair. (C1, C3)
  • Use the darker of the two on the eyebrows. (C3)
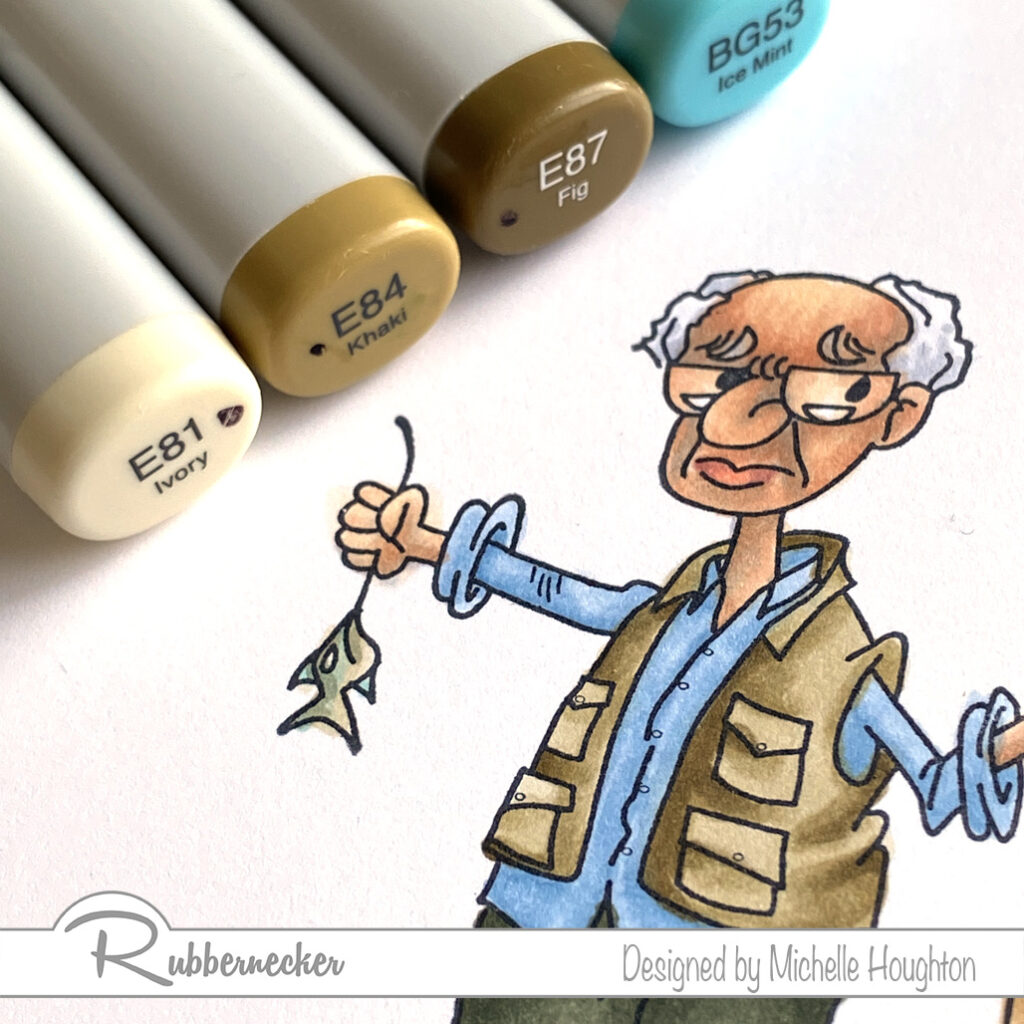
  • Fishing vest and part of the fish is next. Start with basing the vest and fish with a light earth tone. (E81) Note the E 8’s have a very mossy green to them!
  • Use a midtone earth tone to add shape to the vest. (E84)
  • Use a darker earth tone in smaller amounts to deepen the shadow areas. (E87)
  • Add a touch of color to the back of the fish with a brighter blue green. (BG53)
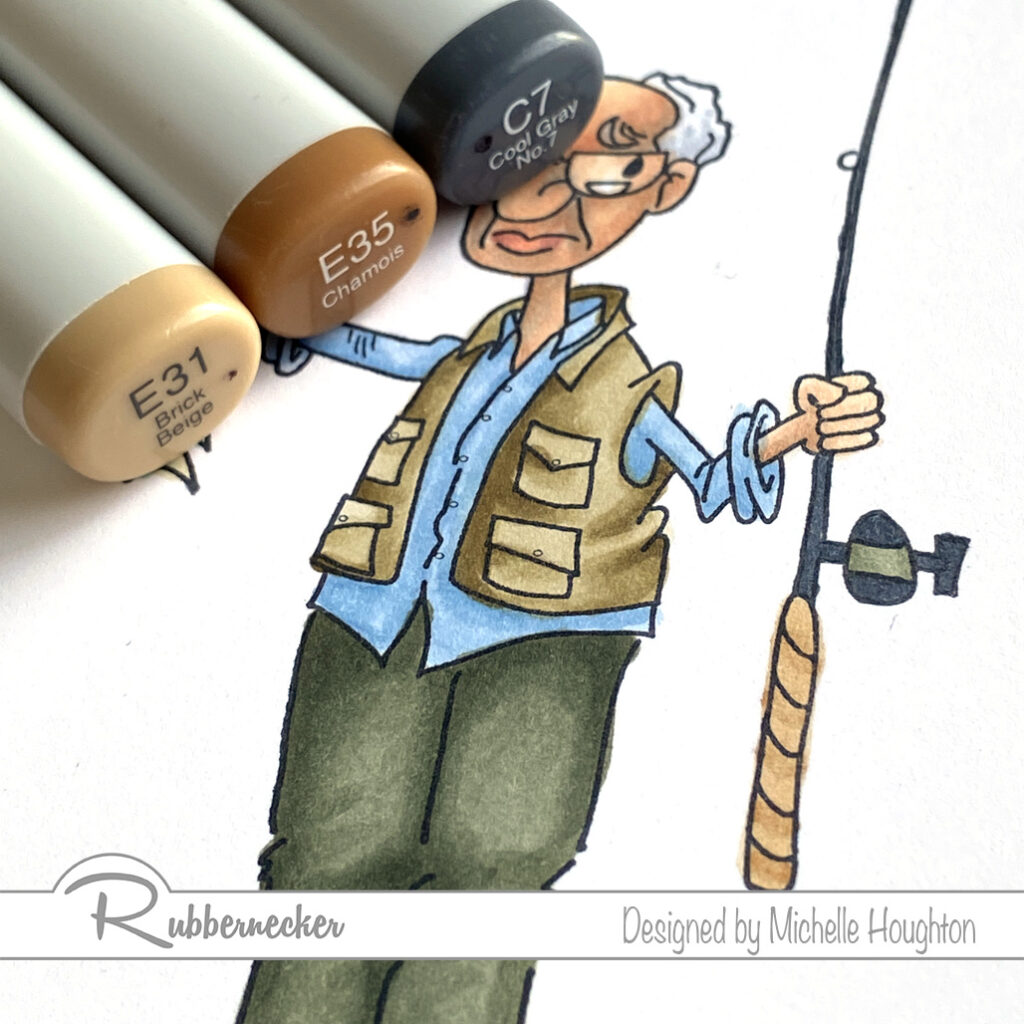
  • Quick coloring on the fishing pole. Fill the rod and parts o the reel with a dark gray. (C7)
  • On the handle use two earth tones. (E31, E35)
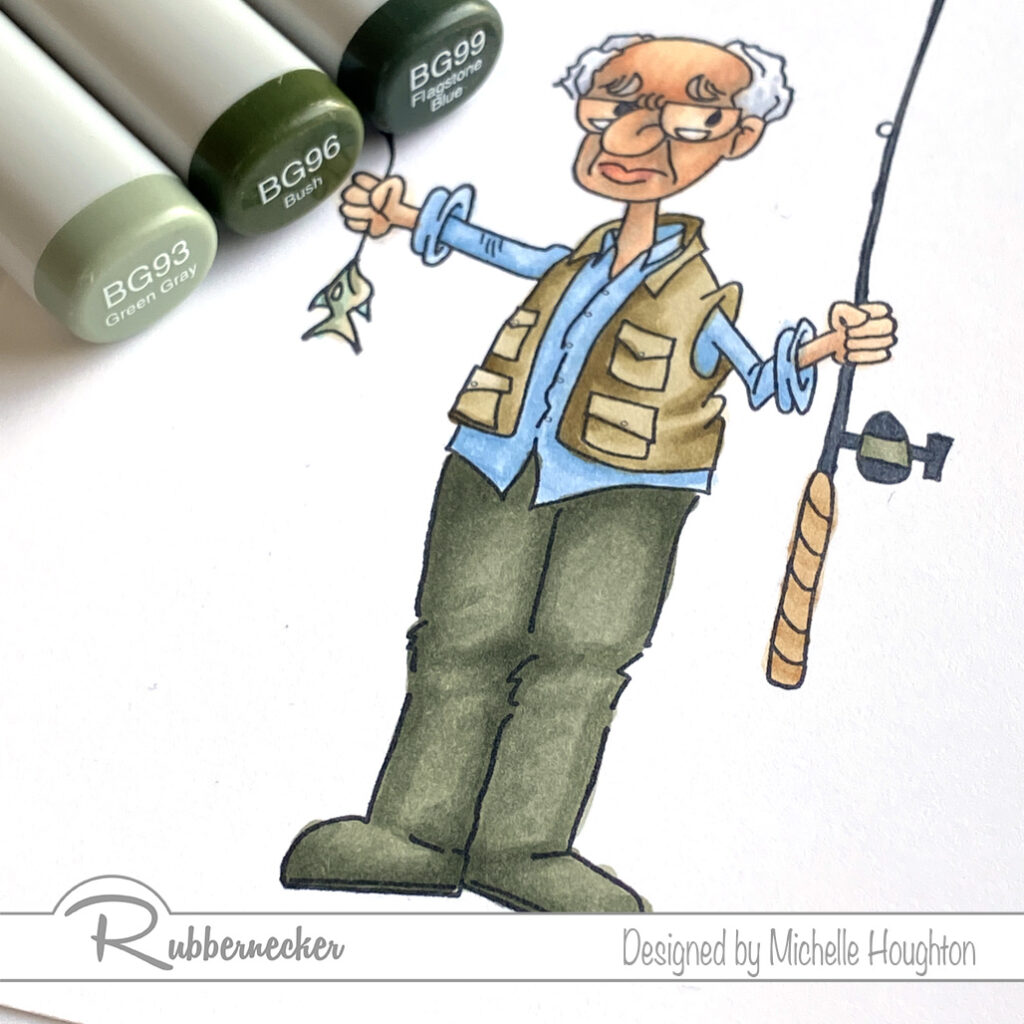
  • Last, but not least his waders and the last section of the rod. Base the waders and the center band on the reel with a lighter blue green. (BG93) I used this same color across the back of the fish to tone down the other blue green.
  • Use a midtone and darker blue green to add shape to the waders and use the midtone on the reel as well. (BG96, BG99)
  • Blend the layers together going in reverse through the colors. (BG96, BG93)

As always thank you for stopping by today! You will find the links to the Rubbernecker products I used below. I will have a video tutorial of this image next Wednesday over at Copic In The Craft Room on YouTube as well as the Rubbernecker YouTube channel. If you have not done so yet, please subscribe to my newsletter over on the right hand side of my blog. Super important right now if you are interested in any of my teaching, live and possibly in the near future, on-line options!

Have a Happy Colorful Day!
Posted on

More Skin and Hair with Rubbernecker

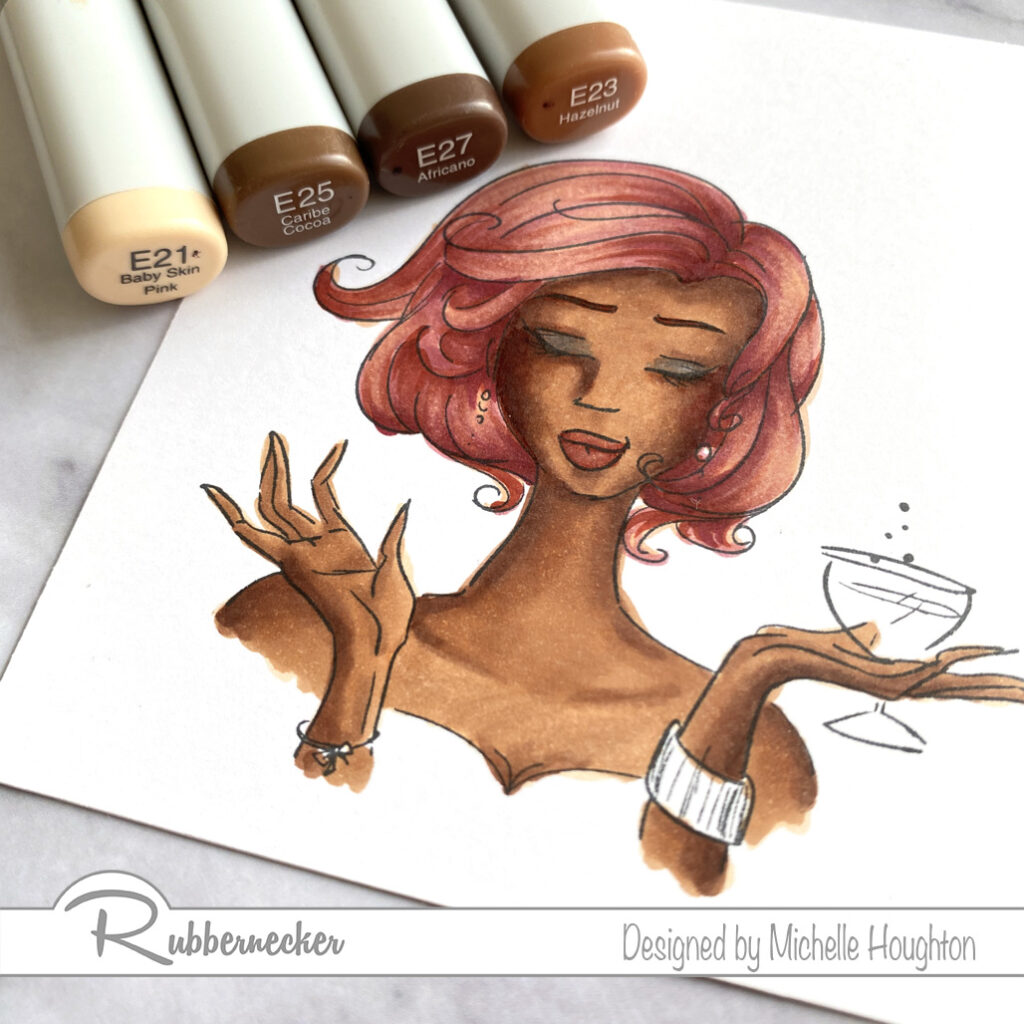
I have a final tutorial with darker skin tones (at least for now). Using one of the beautiful images from Rubbernecker Stamps. You will find the steps and colors I used below and then next Wednesday there will be a video tutorial posted on both the Copic In The Craft Room YouTube channel as well as the Rubbernecked YouTube channel.

  • Starting with the skin base all of the skin areas with E21.
  • Use a darker mid-tone to map out the shading on the skin areas, E25.
  • Use a darker tone in smaller amounts to deepen the shadow areas, E27.
  • Blend the skin smooth working back through the darker mid-tone and then covering the light base color with a light mid-tone, E25, E23.
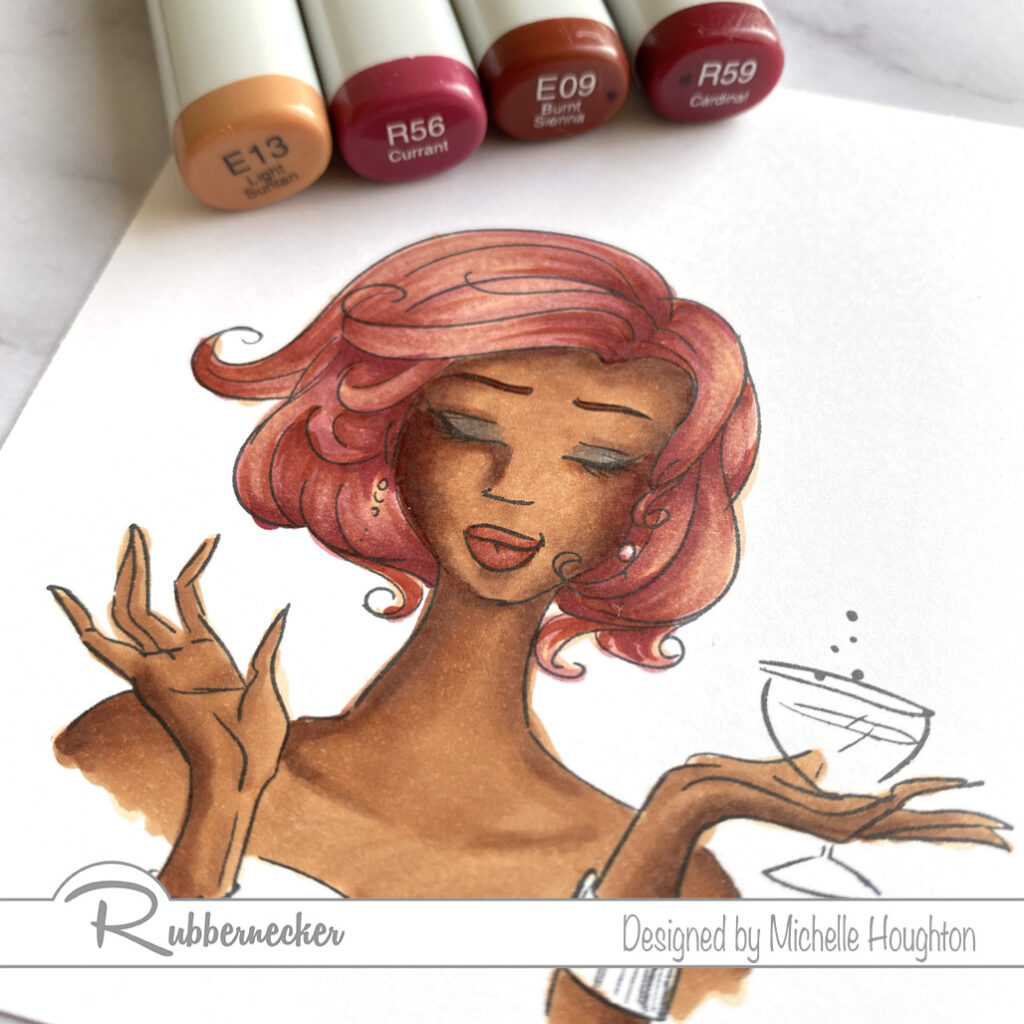
  • Add a deep red earth tone to add color to her cheeks and blend it in with the skin tones, E09.
  • Base all of the hair with a light earth tone, E13.
  • Use a series of red and earth tones to create texture and volume to the hair with small thin flicks, R56, E09, R59.
  • Work with the 4 hair colors to smooth and enhance texture to your personal desired effect, E13, R56, E09, R59.
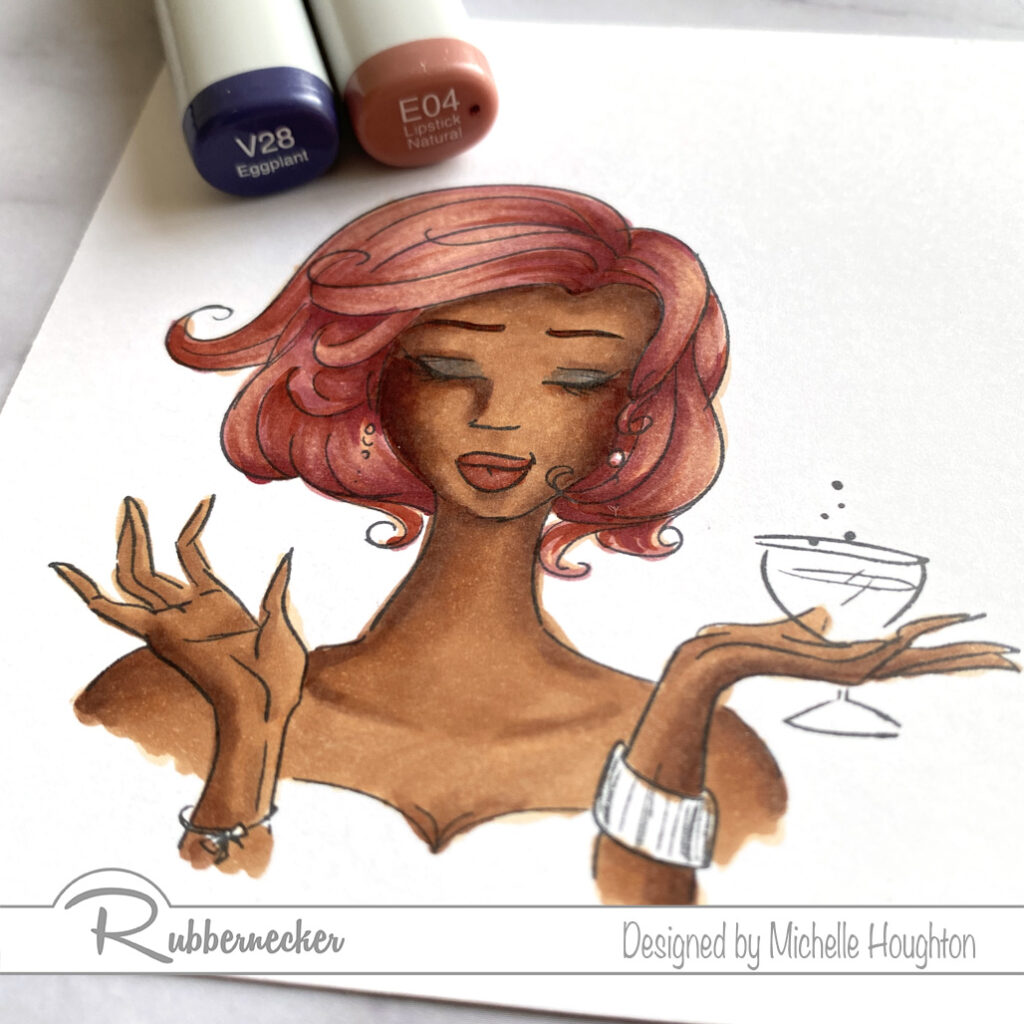
  • For lips use two earth tones to create shape and color, E09, E04.
  • Use a rich color to add a touch of color to the lids, V28.

Thank you so much for stopping by and checking in on my art. If you have not done so take a second and subscribe to my newsletter up to the right on my blog. I only send a few notes out a year and there will be news about Copic College and live events coming out in the next week!

Have a Happy Colorful Day!